Vinyl Stickers For Rv
Vinyl stickers for rv are a simple and effective way to personalize your motorhome, camper, or travel trailer while protecting the surfaces from dirt, UV exposure, and minor damage.
Why Choose Vinyl Stickers for RV Customization
Vinyl stickers for rv are popular because they offer a low-cost, high-impact way to add personality to your vehicle without the commitment of a full paint wrap. You can choose from bold logos, scenic landscapes, witty slogans, or subtle branding that reflects your travel style. Because vinyl is durable and flexible, it conforms well to curved surfaces, handles temperature swings, and resists fading when properly installed and maintained.
Another reason many owners prefer vinyl stickers for rv projects is how quickly they transform the look of the rig. Unlike permanent modifications, stickers can be rearranged over time, allowing you to refresh your design as your tastes evolve. This flexibility makes them ideal for seasonal themes, special trips, or rotating promotional messages for small businesses.
Types of Vinyl Stickers Available for RV Owners
When shopping for vinyl stickers for rv, you will find several product categories designed for different looks and durability needs. Standard vinyl stickers are budget-friendly, come in vibrant colors, and work well for decorative designs that do not face constant abrasion. For high-traffic areas like bumpers, fenders, and lower panels, many owners choose thicker cast vinyl or premium adhesive options that resist lifting, cracking, and peeling.
- Die-cut vinyl stickers with smooth edges for a clean, professional finish.
- Vinyl lettering and decals for adding names, contact info, or brand logos.
- Textured or metallic vinyl for a subtle sheen that stands out in photos.
- Removable and repositionable vinyl for temporary designs and seasonal updates.
Each type brings different performance characteristics, so it is helpful to consider where on your RV the sticker will go, how long you plan to keep it, and how much direct sunlight or road debris the area receives.
Measuring and Planning Your RV Sticker Layout
Before applying vinyl stickers for rv, take time to measure the surfaces where you intend to place them, and create a simple sketch of your layout. Measure height and width, note any curves or panel seams, and mark areas around lights, vents, and handles that may affect sticker placement. This planning stage reduces waste, prevents last-minute resizing, and helps you visualize the final look before committing to adhesive.

Consider the visual balance of your design, mixing larger statement pieces with smaller accents so the overall look feels intentional rather than cluttered. If you are adding multiple vinyl stickers for rv branding or decoration, use registration marks or a light pencil guideline to keep edges aligned. Planning also helps you stagger installation so you can focus on one section at a time without rushing.
Step-by-Step Application and Installation Tips
Applying vinyl stickers for rv correctly starts with a clean, dry surface free of dust, grease, and old decals. Wash the area with mild soap, rinse thoroughly, and dry completely, then use a soft cloth to remove any remaining residue. For best results, work in a shaded area or on a cooler part of the day to prevent the adhesive from setting too quickly before you are ready to position the sticker.
- Peel a small portion of the backing and align the sticker carefully before removing more backing.
- Use a squeegee or credit card to press the sticker down from the center outward, pushing out air bubbles.
- If the sticker is large, consider wetting the surface with mild soapy water to allow repositioning before the adhesive bonds fully.
- Once positioned, smooth the edges firmly and let the vinyl cure for at least twenty four hours before heavy washing or long drives.
Following these steps helps ensure that your vinyl stickers for rv stay flat along curves, maintain strong adhesion, and look sharp for years.
Maintaining and Protecting RV Vinyl Stickers
To keep your vinyl stickers for rv looking vibrant, rinse the vehicle regularly with clean water and use a soft sponge or microfiber cloth to avoid scratching the edges. Avoid harsh detergents or abrasive cleaners, especially on areas with fine details or overlapping layers. When parking outdoors, seek shade when possible to reduce long term UV exposure that can cause fading or slight curling at the edges.
Inspect the stickers periodically for signs of lifting, especially around corners and edges, and gently press them back down if needed. If you notice small bubbles or wrinkles, you can often smooth them by warming the vinyl slightly with a hairdryer on a low setting and pressing it flat. With proper care, high quality vinyl stickers can last several years while maintaining their color and adhesion.
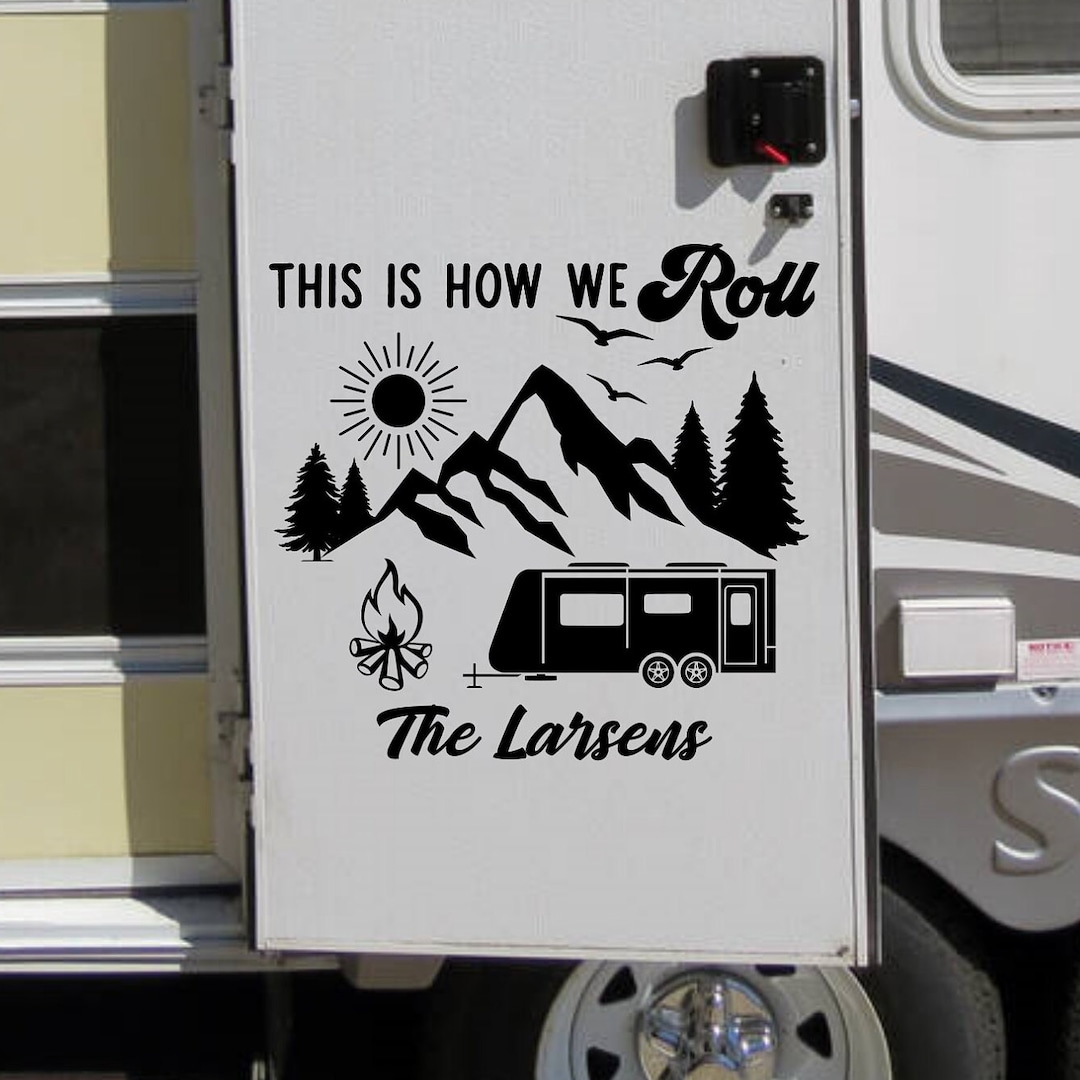
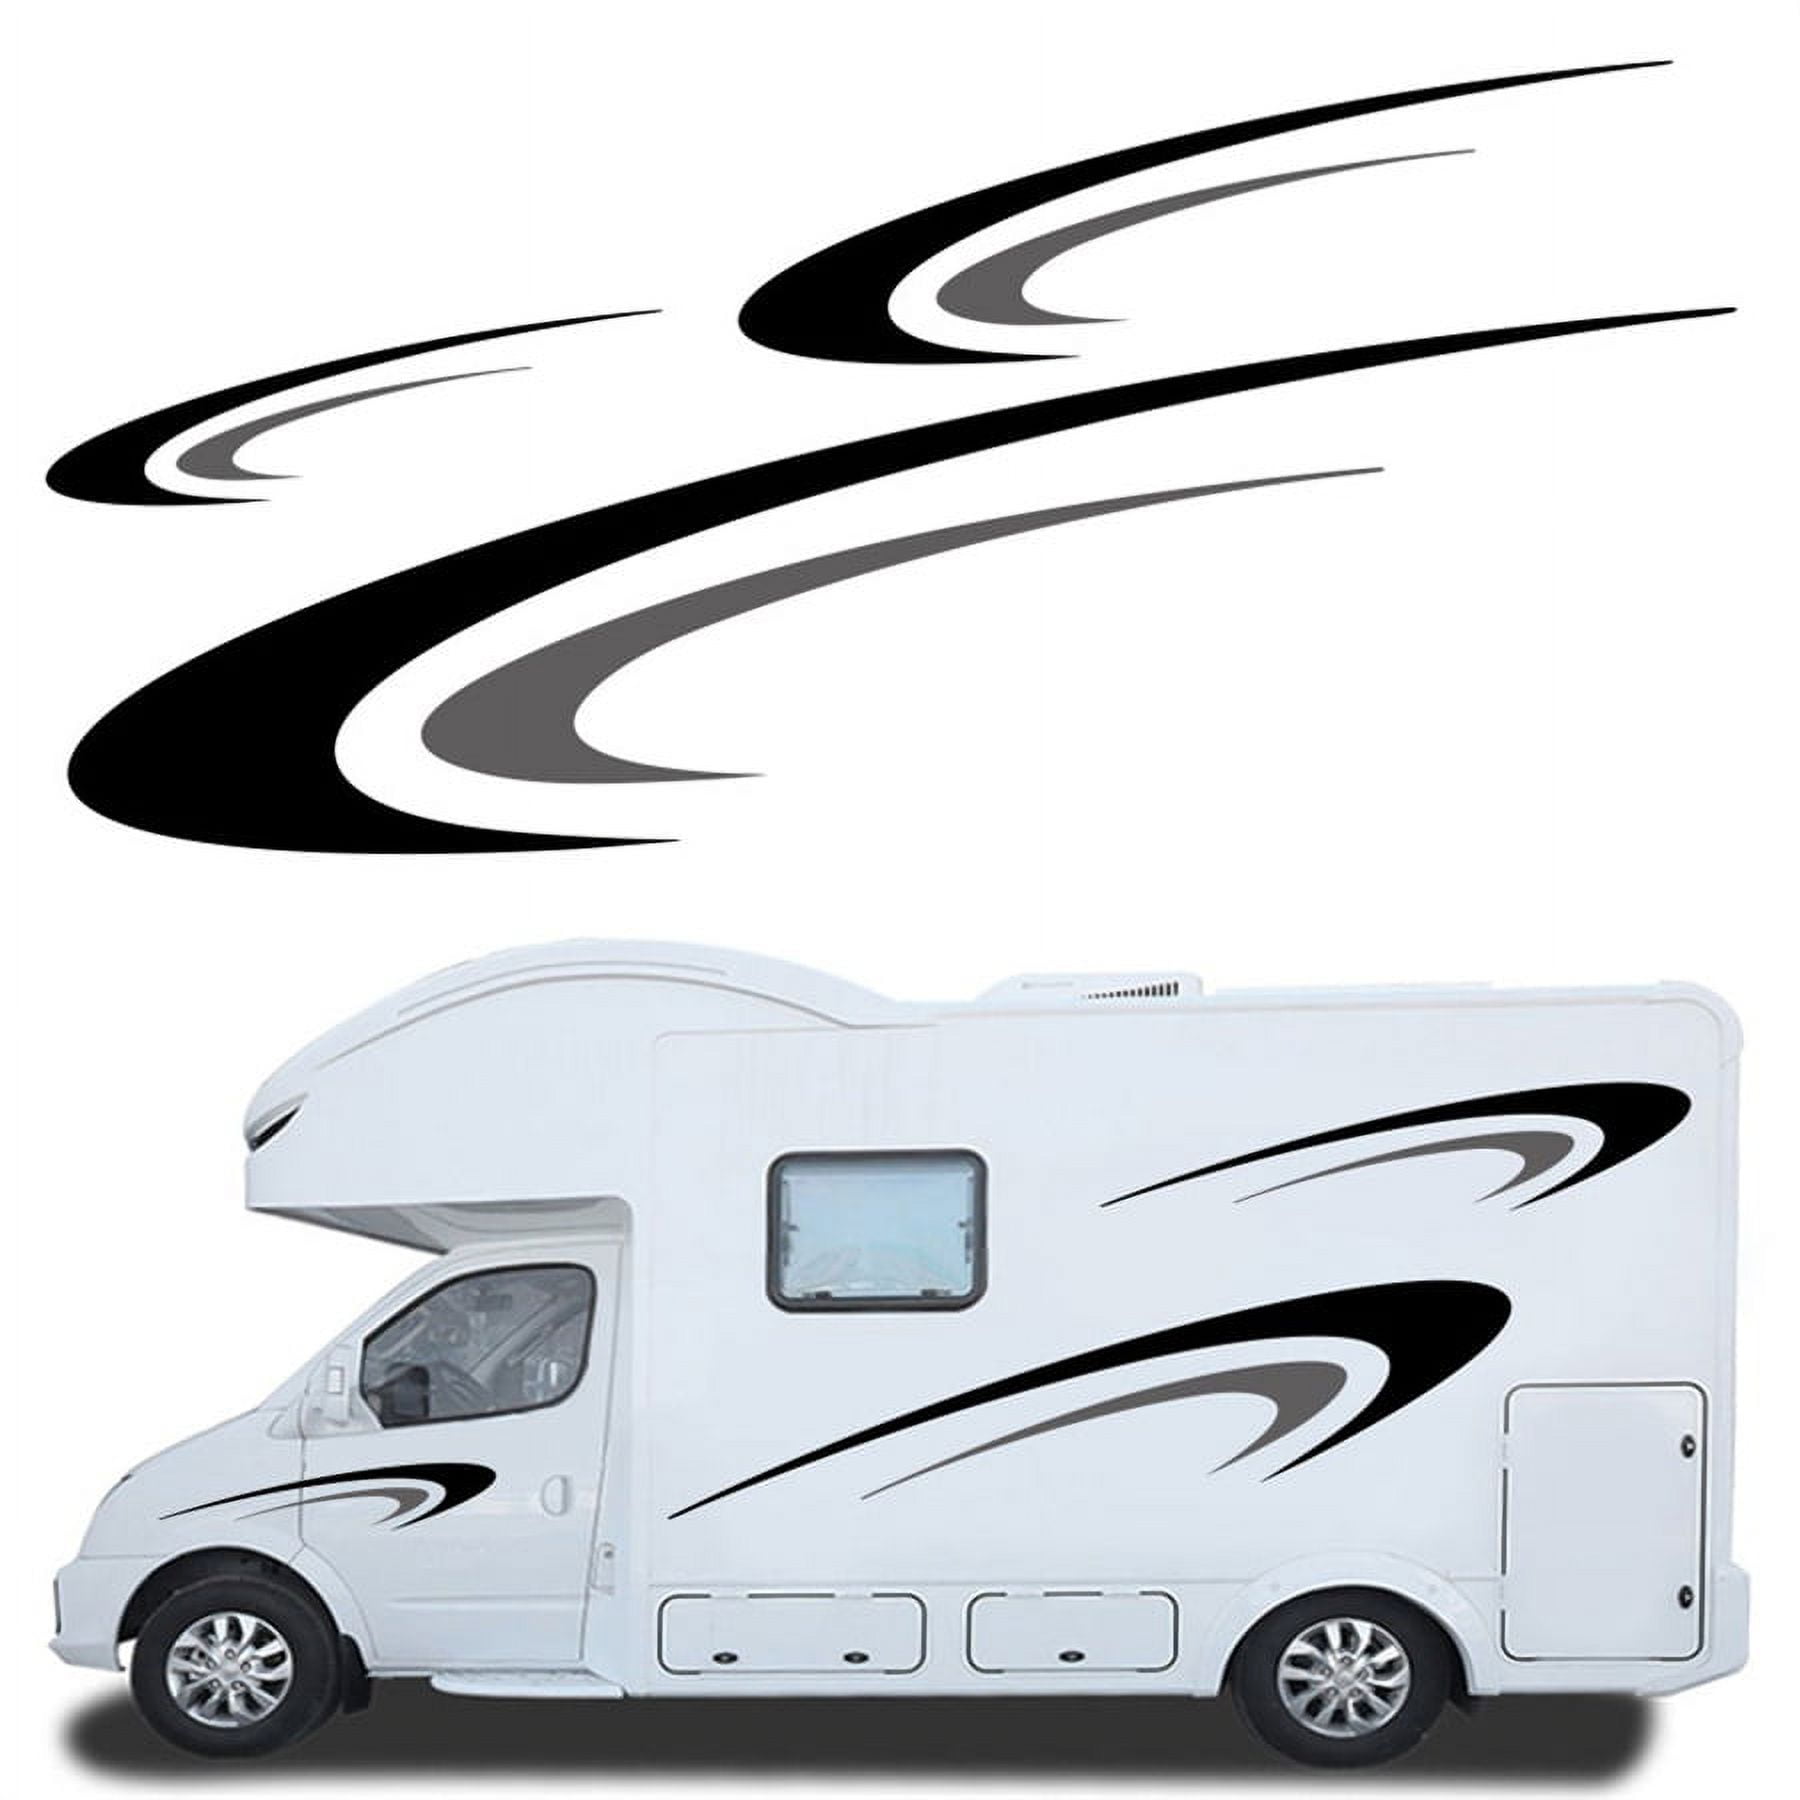
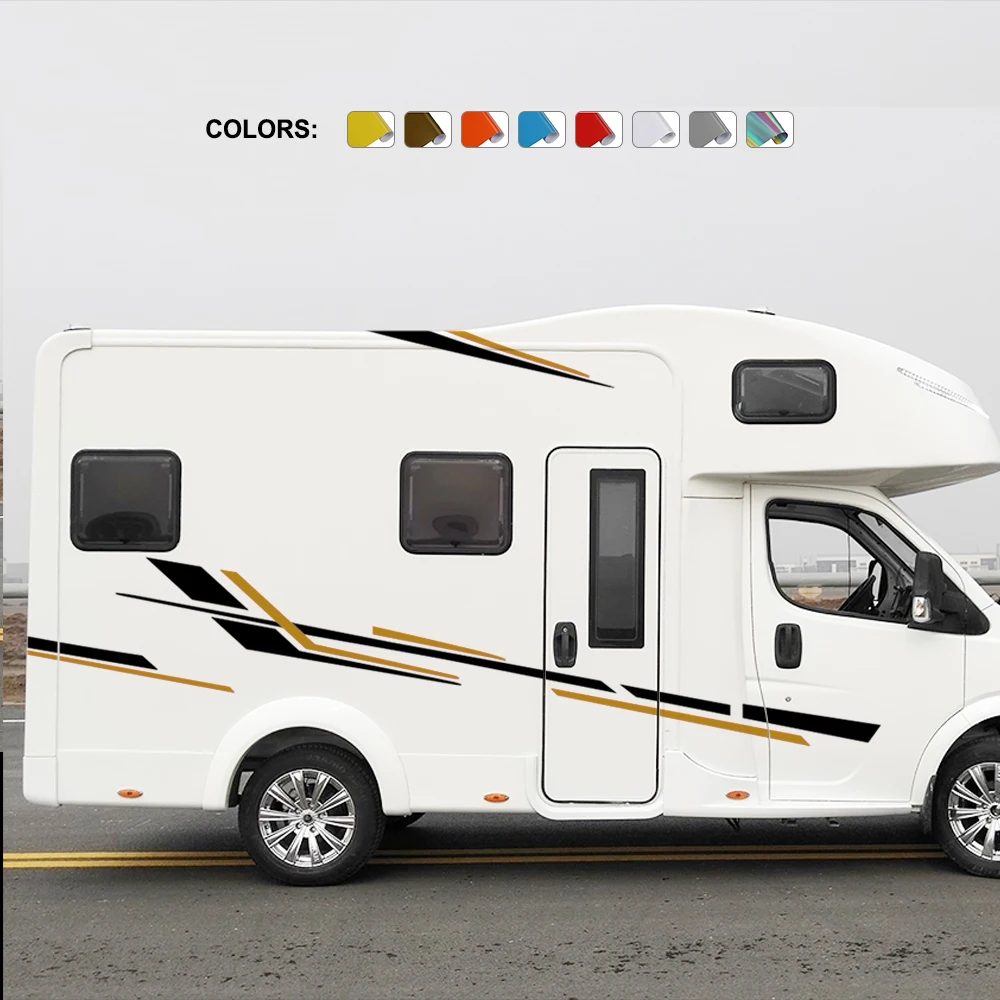
Design Ideas and Creative Ways to Use Vinyl on Your RV
Vinyl stickers for rv offer endless creative possibilities, from minimalist stripes along the lower edge to full accent panels that highlight the wheel wells. You might add a subtle compass motif near the windshield, a travel quote along the rear, or a series of small icons that map the places you have visited. Business owners can use vinyl lettering to display company names, contact numbers, or QR codes that invite interested travelers to learn more.

Coordinate your sticker colors with the existing paint or wrap to create contrast or harmony, and consider using removable options for experimenting with bold patterns during a specific season or trip. Planning a cohesive design theme helps your vinyl stickers for rv feel like an intentional part of the vehicle’s style rather than an afterthought. When in doubt, start small, assess how the look integrates with your rig on the road, and then expand the design over time.
Safety, Regulations, and Responsible Application
While vinyl stickers for rv are generally safe and easy to install, it is important to avoid covering important safety features such as lights, cameras, sensors, or license plates. Check local regulations regarding size, placement, and content of external decals, especially if you plan to use large promotional graphics or reflective materials. Responsible application means ensuring that your stickers enhance visibility and aesthetics without creating distractions or obscuring critical components.
Before long road trips, double check that edges are fully sealed and that stickers do not flap in the wind, which could create noise or interfere with mirrors. By combining thoughtful design with practical considerations, you can enjoy the benefits of vinyl stickers for rv while keeping your motorhome road ready and legally compliant.

In summary, vinyl stickers for rv are a versatile, cost effective solution for personalizing your motorhome, protecting surfaces, and expressing your travel identity. With careful planning, quality materials, and proper installation and maintenance, your stickers can look great mile after mile, making every journey feel uniquely yours.
Vinyl Decals for Car Truck SUV RV Camper Trailer
2PCS Car Side Body Stickers Mountain Tree Forest Graphic Decals DIY Vinyl Sticker Decals for Car Truck SUV RV Camper ...
