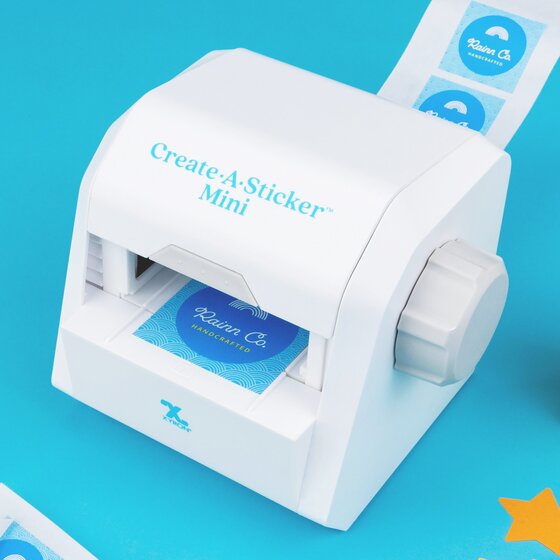
Vinyl Sticker Creator

A vinyl sticker creator is a powerful tool for turning your ideas into durable, high‑impact stickers that can decorate laptops, cars, walls, or storefronts with vibrant graphics. Whether you are a small business owner, a crafter, or a hobbyist designer, learning how a vinyl sticker creator works and how to use it effectively will help you produce professional results without needing a large budget or a full commercial press.
What Is a Vinyl Sticker Creator and How Does It Work
A vinyl sticker creator is essentially a combination of design software, a vinyl cutting machine, and a collection of vinyl materials that work together to transform digital artwork into physical stickers. The process begins with a digital design, which is sent to a cutting machine that precisely slices through the vinyl sheet to create the desired shapes and details. After cutting, the excess vinyl is removed in a process called weeding, the design is transferred to a transfer tape, and finally the sticker is applied to a clean surface, resulting in a weather resistant, long lasting graphic.
Modern vinyl cutter creator models are compact, computer connected devices that can handle intricate text, logos, and illustrations with impressive accuracy. Because the machine follows the paths you define in your design file, you can easily experiment with different sizes, colors, and layouts before committing to a final print run. This level of control makes a vinyl sticker creator ideal for prototyping new branding ideas, producing consistent event signage, or offering customized stickers to customers.

Choosing the Right Vinyl Materials for Your Projects
The type of vinyl you choose has a huge impact on the final look and performance of your stickers. Glossy vinyl provides a shiny, vibrant finish that is perfect for bold logos and product labels, while matte vinyl offers a more subdued, premium appearance that feels sophisticated to the touch. For outdoor applications, you should look for weatherproof, UV resistant vinyl that can withstand sun, rain, and temperature changes without fading or peeling prematurely.
Consider also the adhesive backing, because different surfaces demand different levels of stickiness and removal characteristics. A removable vinyl sticker creator setup allows you to produce temporary decorations that leave no residue, while a permanent vinyl formula creates a strong bond for items like car decals, window graphics, and long lasting product branding. Matching the vinyl type to the intended use ensures your stickers remain vibrant and intact for as long as you need them.
Designing Graphics That Look Professional on Vinyl
Great stickers start with smart design choices that account for the strengths and limits of a vinyl cutter creator. Keep line art clean, avoid excessively fine details that might be difficult to weed, and use solid shapes or clear typography to ensure strong visual impact at any size. It helps to think in terms of positive and negative space, because the machine will cut out everything that is not covered by your chosen sticker color, turning your design into a series of separate pieces that must be carefully arranged.
When you prepare files for a vinyl sticker creator, use vector formats whenever possible, because vectors scale cleanly without losing sharpness. Limit the number of overlapping elements, simplify complex gradients, and test how your design will look on both light and dark backgrounds. Adding a small bleed area around the edges and confirming the final dimensions early in the process will reduce waste and help you achieve a polished, professional result every time.
Setting Up and Operating Your Vinyl Cutting Machine
Getting consistent results from a vinyl sticker creator starts with proper machine setup, which includes installing the correct blade, loading the vinyl roll securely, and calibrating the cutting pressure and speed settings. Different vinyl thicknesses and brands require slightly different settings, so it is wise to run a few test cuts before committing to a full production sheet. A well aligned cutting mat and a clean work surface further reduce the risk of miscuts, wrinkles, or material shifting during the cutting process.
Once the machine is configured, the workflow becomes repeatable and efficient. After cutting, gently lift an edge of the vinyl to confirm that the blade has passed through the backing but not into the cutting mat. Weed out the excess vinyl using precision tools, being careful to leave the parts you want to transfer. Applying a layer of transfer tape, smoothing out air bubbles, and then peeling away the backing paper sets the stage for a flawless application on your chosen surface.

Practical Applications and Business Opportunities
The versatility of a vinyl sticker creator makes it valuable in many different contexts, from small craft booths to established marketing departments. Event organizers use custom stickers to reinforce branding on badges and signage, while retailers add price tags and product identifiers that look polished and cohesive. Artists and musicians design limited edition merchandise, turning stickers into collectible items that promote their work in everyday environments.
For entrepreneurs, offering personalized sticker services can become a steady side business or an online store highlight. You can let customers upload their own artwork, choose from preset sizes, and pick the appropriate vinyl type for indoor or outdoor use. By showcasing sample projects, explaining the production process, and providing clear care instructions, you build trust and encourage larger orders over time.
Maintenance, Troubleshooting, and Best Practices
Keeping your vinyl sticker creator in good condition starts with routine maintenance, such as cleaning the cutting bed, wiping down the machine rails, and replacing blades before they become dull. Proper storage of vinyl rolls in a cool, dry place prevents warping and curling, which can lead to feeding problems during cutting. Regular software updates and periodic test cuts help you catch small issues before they disrupt an important project.

When troubleshooting common problems, check your file settings, blade depth, and material alignment before assuming a hardware fault. If stickers are lifting at the edges, you may need to adjust the weeding process or choose a stronger adhesive formula for the surface you are targeting. By documenting what works for each vinyl type and surface combination, you build a reliable reference that speeds up future projects and reduces wasted materials.
In the end, a well used vinyl sticker creator empowers you to move from concept to physical sticker quickly, with a level of precision and customization that is difficult to achieve through traditional printing methods. By understanding your materials, refining your designs, and maintaining your equipment, you can produce durable, eye catching stickers for personal projects, client work, or a growing business, all while enjoying the creative satisfaction of seeing your graphics come to life in vibrant, tangible form.
Make Real Stickers - Best Way to Make Vinyl / Pro Stickers
This is the right way to make professional level stickers at home. Amazon Thermal Laminator: https://amzn.to/30GNKOw Normal ...
