Vinyl Graphics Installation
Vinyl graphics installation transforms ordinary surfaces into bold, high-impact visuals using precision-cut or printed vinyl applied with proven techniques and specialized tools. Whether you are refreshing a vehicle, branding a storefront, or adding personality to equipment, a methodical approach to surface prep, film selection, and application workflow reduces stress and produces professional results.
Planning Your Vinyl Graphics Project
Before you touch a squeegee, define the scope, environment, and longevity you expect from your vinyl graphics installation. Consider whether the piece will live indoors or outdoors, how long the campaign should last, and whether you need removable or permanent adhesion. Choose between cast vinyl for complex curves and long-term durability, or calendered vinyl for flat, short- to medium-term projects that demand cost efficiency.
Sketch a simple layout, note the dimensions of each panel, and list the tools you will need, such as a measuring tape, level, masking tape, heat gun, and high-quality squeegees. A clear plan reduces rework, minimizes waste, and keeps your vinyl graphics installation on schedule from design to final inspection.

Surface Preparation and Cleaning
The foundation of any successful vinyl graphics installation is a meticulously clean and prepared surface. Dirt, dust, oils, and residues create invisible barriers that can cause lifting, bubbling, or hazing over time. Wash the area with a mild detergent and water, rinse thoroughly, then wipe with a dedicated panel wipe or isopropyl alcohol to eliminate any remaining contaminants and ensure proper adhesion.
For automotive applications, pay special attention to door edges, seams, and drainage channels where grime can hide. If the surface is heavily oxidized or has old adhesive residue, use a dedicated adhesive remover and a soft scraper designed for automotive use. Allow the surface to dry fully, and avoid touching the prepared area with bare fingers to prevent transferring oils that can interfere with the vinyl graphics installation process.
Weeding, Trimming, and Transfer Tape Application
When your design moves from digital file to physical film, weeding becomes a critical step in vinyl graphics installation. Using a weeding tool, carefully remove the excess vinyl around your graphics, leaving only the parts that will adhere to the surface. Work methodically on small sections, and use a hook tool to extract stubborn pieces without disturbing the surrounding areas.
Once the design is weeded, apply low-tack masking tape or a specialized transfer tape across the entire image to hold the pieces in precise alignment. Firmly smooth the transfer tape with a squeegee to eliminate air pockets, then trim the edges to create a clean, manageable panel. This consolidated unit not only simplifies alignment during application but also protects delicate details and sharp edges throughout the vinyl graphics installation.
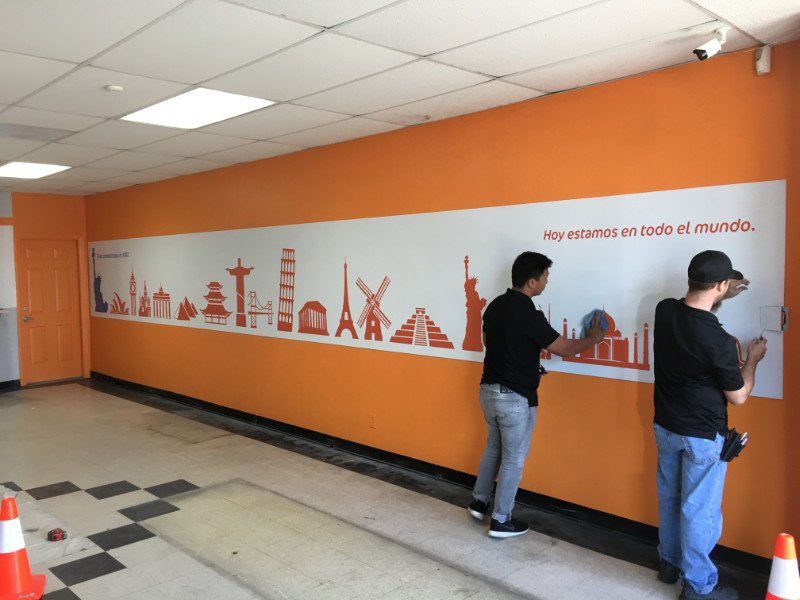
Application Techniques for Smooth, Bubble-Free Results
Position the graphics on the surface without letting the transfer tape touch down, then gently lower one edge while holding the rest away. Slowly peel the backing away at a controlled angle, aligning the exposed edge with the panel and using your free hand to guide placement. Starting from the center, work outward with firm, overlapping strokes of a soft squeegee to press the vinyl down and push air outward.
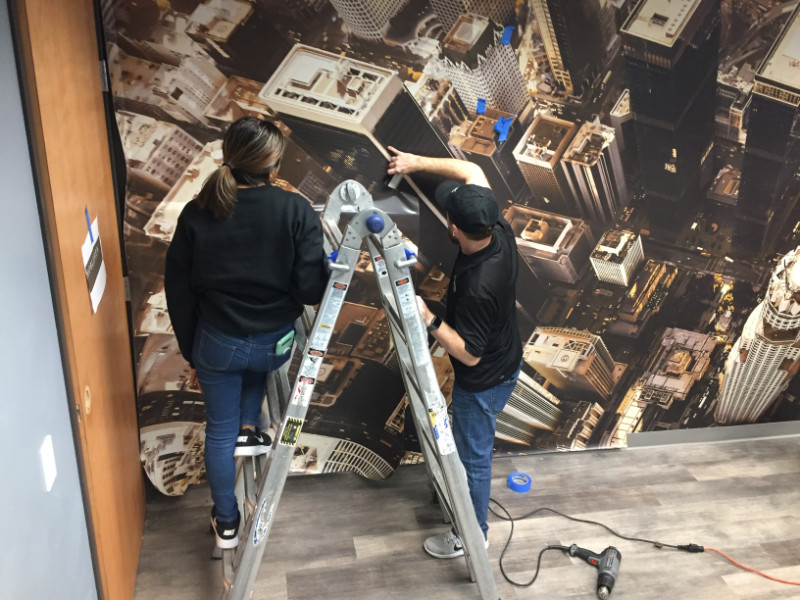
If you encounter stubborn edges or intricate shapes, briefly warming the film with a heat gun can relax the material and improve conformability without compromising adhesive integrity. For larger installations, section the graphics into logical panels, complete each section fully, then seam them carefully to maintain continuity and avoid visible ridges in your vinyl graphics installation.
Post-Installation Care and Long-Term Performance
After completing your vinyl graphics installation, allow fresh applications to cure according to the manufacturer’s recommendations before aggressive cleaning or exposure to harsh conditions. Use a soft cloth, mild soap, and gentle pressure to remove dust and fingerprints, avoiding abrasive tools or aggressive solvents that can dull the finish or lift edges.
Inspect the graphics periodically for signs of lifting, especially around corners and trim, and address small issues early to prevent larger failures. With proper surface preparation, careful application, and routine maintenance, your vinyl graphics installation will remain vibrant and securely bonded, delivering long-term impact and a polished appearance that stands up to everyday wear and weather.
How to Apply Large Vinyl Graphics
Learn how to install a large 2 color graphic on a transit van.
