Vinyl Decal Application Instructions

Following clear vinyl decal application instructions is the fastest way to achieve a clean, professional look on walls, windows, vehicles, or equipment without hiring a specialist.
Preparing the Surface for Perfect Adhesion
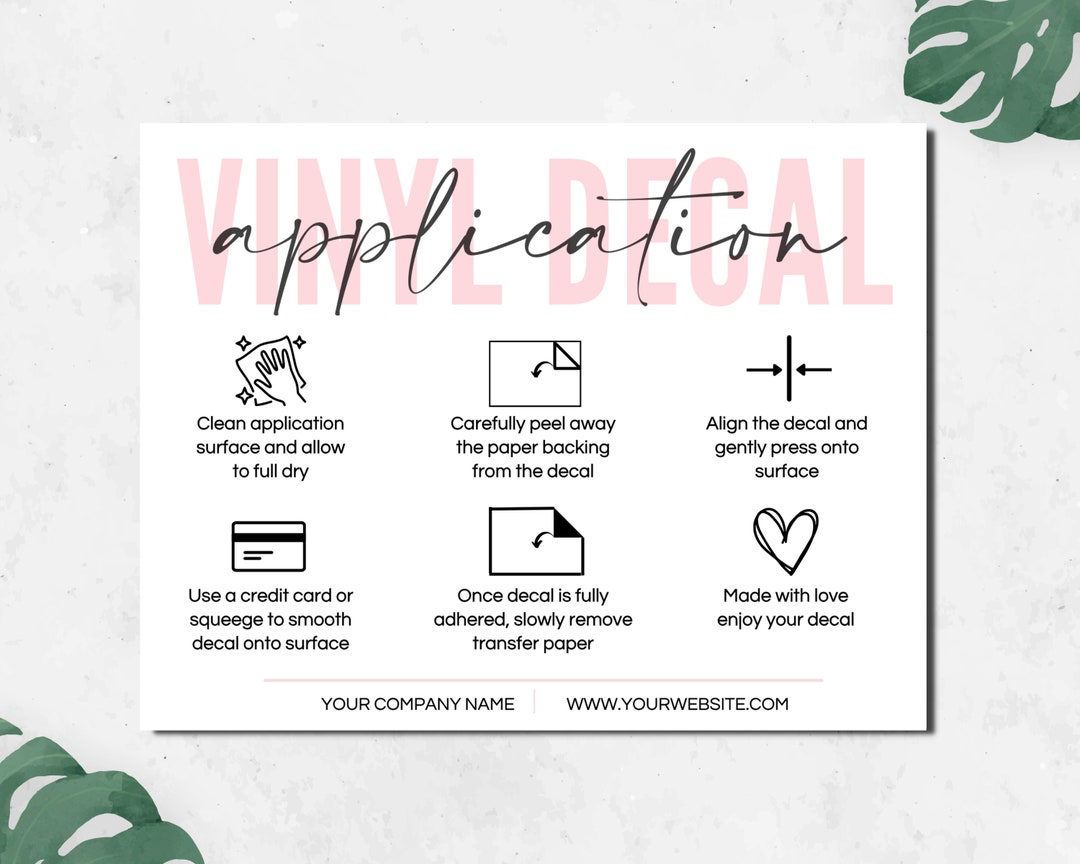
The first step in any reliable vinyl decal application instructions guide is thorough surface preparation, because dust, oil, or residue will prevent the adhesive from bonding evenly. Clean the area with a mild soap solution and dry it completely, then use a soft cloth with isopropyl alcohol to remove any remaining oils that could cause peeling later on. If you are applying the decal to a dusty or painted wall, consider wiping it down one more time and letting it dry fully before moving the vinyl into position.
Temperature and humidity also matter when you follow vinyl decal application instructions, so try to work indoors where the surface is stable and free of condensation. Cold or damp surfaces can cause the adhesive to set unevenly, leading to bubbles or weak spots over time. Allow the surface to acclimate to the room temperature for several hours, and avoid installing the decal right after painting or power washing, since fresh paint or moisture can compromise long term hold.

Measuring and Aligning Before You Peel
Good vinyl decal application instructions always emphasize precise measuring and alignment, because repositioning a decal after the adhesive touches the surface can stretch or damage it. Use a level, measuring tape, and painter's tape to mark the intended placement area, and lightly pencil a center line or guide marks where the edges or key points should sit. This step helps you judge spacing, height, and symmetry before any part of the decal becomes permanent.
Before you peel the backing, double check the design orientation and size by holding the decal against the marked area without removing the liner. Make sure text is readable, logos are upright, and borders align with your guides, adjusting as needed while the decal is still supported by the liner. When you are satisfied with the position, you can move on to the next phase of the vinyl decal application instructions with confidence that the layout is correct.
Peeling, Positioning, and Smoothing Techniques
With the surface ready and the alignment checked, you can begin the transfer by peeling a small corner of the liner back at a sharp angle, exposing just enough adhesive to start positioning the vinyl decal. Use a card or squeegee to press the exposed section firmly onto the surface, working slowly from that anchor point to prevent the material from folding or wrinkling as it meets the wall or window.

Continue peeling the liner while simultaneously smoothing the decal with firm, even pressure, using a squeegee or soft cloth to push out trapped air and encourage strong adhesion. Follow the full set of vinyl decal application instructions by overlapping edges if the design is made of several pieces, and register each piece carefully using registration marks or measuring between fixed points. Pay special attention to corners and detailed areas, gently lifting and repositioning if needed before the adhesive fully sets, which usually happens within the first few minutes of contact.
Removing Bubbles and Final Setting
After the entire decal is applied, go over the surface again with firm, outward strokes from the center toward the edges to flatten the vinyl and force hidden air out through the edges. If you still see small bubbles, lift the edge slightly and re-squeeze the area, or use a needle to create a tiny vent hole before smoothing it closed, following detailed vinyl decal application instructions for tricky spots. Avoid pressing so hard that the material stretches, especially on textured walls or around curves, since overstressed edges may lift later.
Allow the decal to sit undisturbed for the time recommended in the vinyl decal application instructions, which can range from a few hours to overnight depending on the size and surface. During this period, keep the area away from direct water, heavy dust, or temperature shocks that could weaken the bond. Once the adhesive has fully cured, the decal should feel smooth to the touch, with strong edges and no visible lifting, giving you a durable finish that lasts through normal indoor or outdoor conditions.

Maintenance and Long Term Care
To keep your vinyl decal looking sharp, follow gentle cleaning methods that align with standard vinyl decal application instructions for ongoing care, such as wiping with a damp cloth and avoiding harsh abrasives or bleach based cleaners. On outdoor surfaces, occasional rinsing with fresh water can remove dust and pollutants that might otherwise gradually weaken the adhesion, especially in areas with high wind or temperature swings. Inspect the edges from time to time, and if you notice any lifting, press them back down firmly to prevent moisture from seeping underneath.
When the time comes to remove the decal, use a hairdryer on a low setting or a gentle adhesive remover to soften the backing without damaging the underlying surface, pulling slowly from one edge to reduce residue. By treating the installation and removal process with care, you protect both the decal and the surface beneath, ensuring that your next project using these vinyl decal application instructions will be just as successful as the last one.
Summary and Next Steps
By following these vinyl decal application instructions step by step, you can transform any smooth surface into a polished display that looks custom made and professionally installed. The combination of careful preparation, precise alignment, patient smoothing, and consistent maintenance gives you reliable results whether you are decorating a single room or branding a fleet of vehicles. With practice, each new decal becomes faster to install, and you will gain the confidence to experiment with larger designs, intricate cuts, and creative placements.
Take your time, refer back to these vinyl decal application instructions whenever you need a reminder, and enjoy the satisfaction of seeing a clean, vibrant design stay firmly in place for months or years to come. Every smooth finish and bubble free surface is a reminder that thoughtful preparation and gentle handling make all the difference in professional looking results.
Vinyl Decals & Stickers Application Guide / Adhesive Graphics Installation - Vinyl ink
This video will demonstrate the step by step application of cut vinyl graphics with a transfer tape, also known as a carrier sheet.
