Vehicle Decal Installation
Professional vehicle decal installation turns a simple sticker into a durable, eye catching graphic that protects paint and expresses your style.
Prepare the Surface for a Clean Vehicle Decal Installation
The foundation of every successful vehicle decal installation is a meticulously clean surface. Dirt, dust, oils, and old wax create invisible barriers that prevent adhesive from bonding evenly, leading to bubbles, lifting edges, and early failure. Before you begin, wash the area with a dedicated automotive shampoo, rinse thoroughly, and dry completely with a soft microfiber towel to eliminate water spots.
After washing, you must remove any remaining residues. Isopropyl alcohol or a dedicated panel wipe works best to strip wax, silicone, and light oils without damaging the clear coat. Spray the prepared section, wipe with a clean lint free cloth, and avoid touching the surface with bare fingers, since natural oils from skin can interfere with adhesion. A well prepared surface is the single most important step in vehicle decal installation because it ensures the graphic lays flat and stays secure for years.
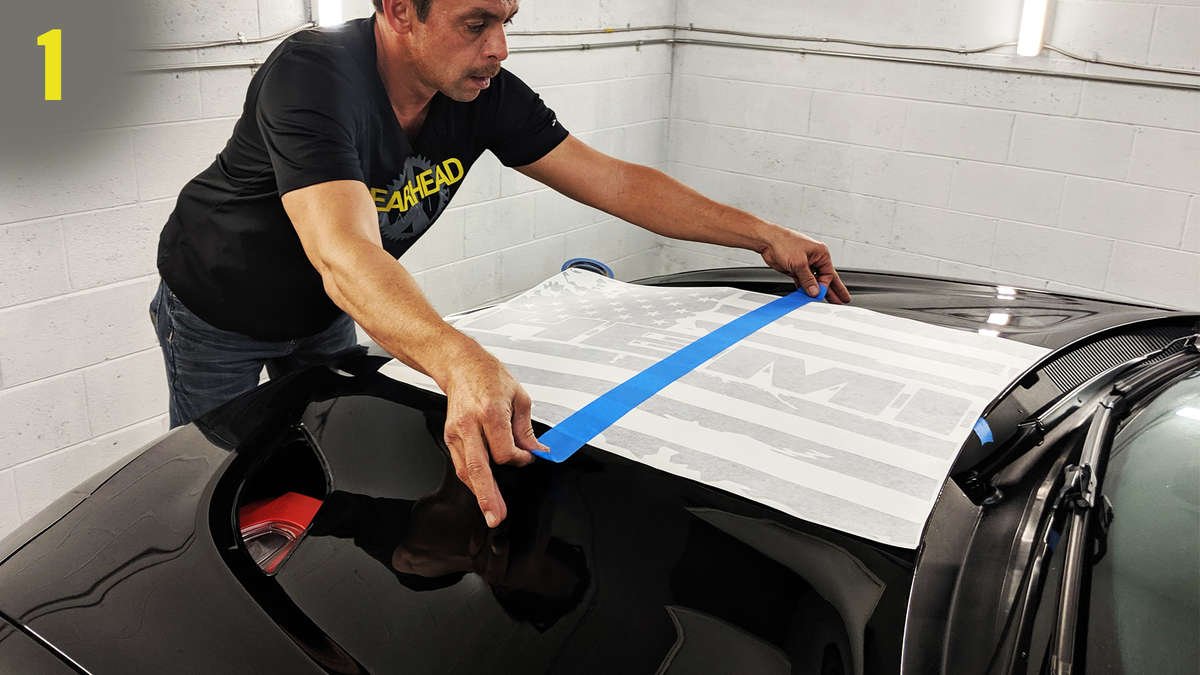
Measure, Align, and Position Before Applying the Vehicle Decal
Precision in the early stages makes the actual vehicle decal installation much smoother and reduces the need for rework. Use a measuring tape or ruler to find the center of the area and mark reference points with removable tape or a soft pencil. If the decal has mounting holes or alignment marks, transfer those points onto the vehicle lightly so you can verify symmetry before committing.
Before removing the backing, dry fit the decal by holding it in place against the surface and checking sight lines, proportions, and distance to edges. Have a friend assist or use temporary guides so the graphic does not drift. Once you are satisfied with the placement, you can proceed to the wet installation method, which is often the most forgiving approach for complex curves and large panels in vehicle decal installation.
Use the Wet Application Technique for Smooth Results
Wet application involves spraying a solution of water and a few drops of dish soap onto the panel, then laying the decal on top while you adjust its position. This method dramatically extends the working time, allowing you to slide, lift, and nudge the graphic until it is perfectly aligned during vehicle decal installation. The liquid cushion also helps the decal conform to curves, reducing stress on the adhesive and minimizing wrinkles.

Spray the surface, peel a small section of the backing, and carefully attach that edge first, pressing from the center outward to push out air and excess liquid. Continue removing the backing slowly while smoothing the decal with a soft squeegee or soft microfiber towel, maintaining a wet surface underneath. The goal is to achieve intimate contact between the adhesive and the painted surface, which is essential for long term durability in vehicle decal installation.
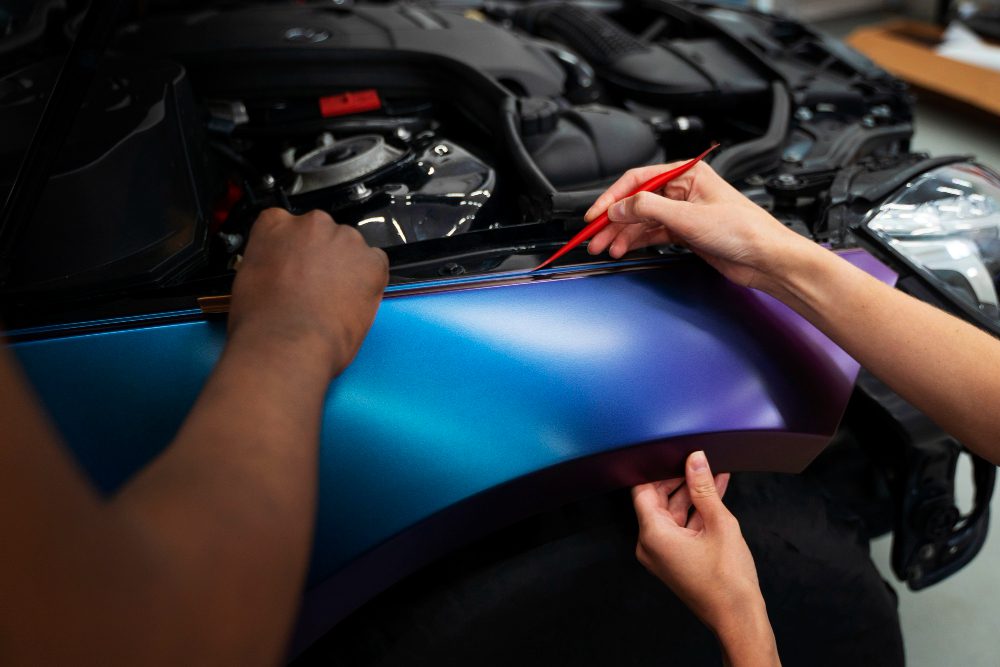
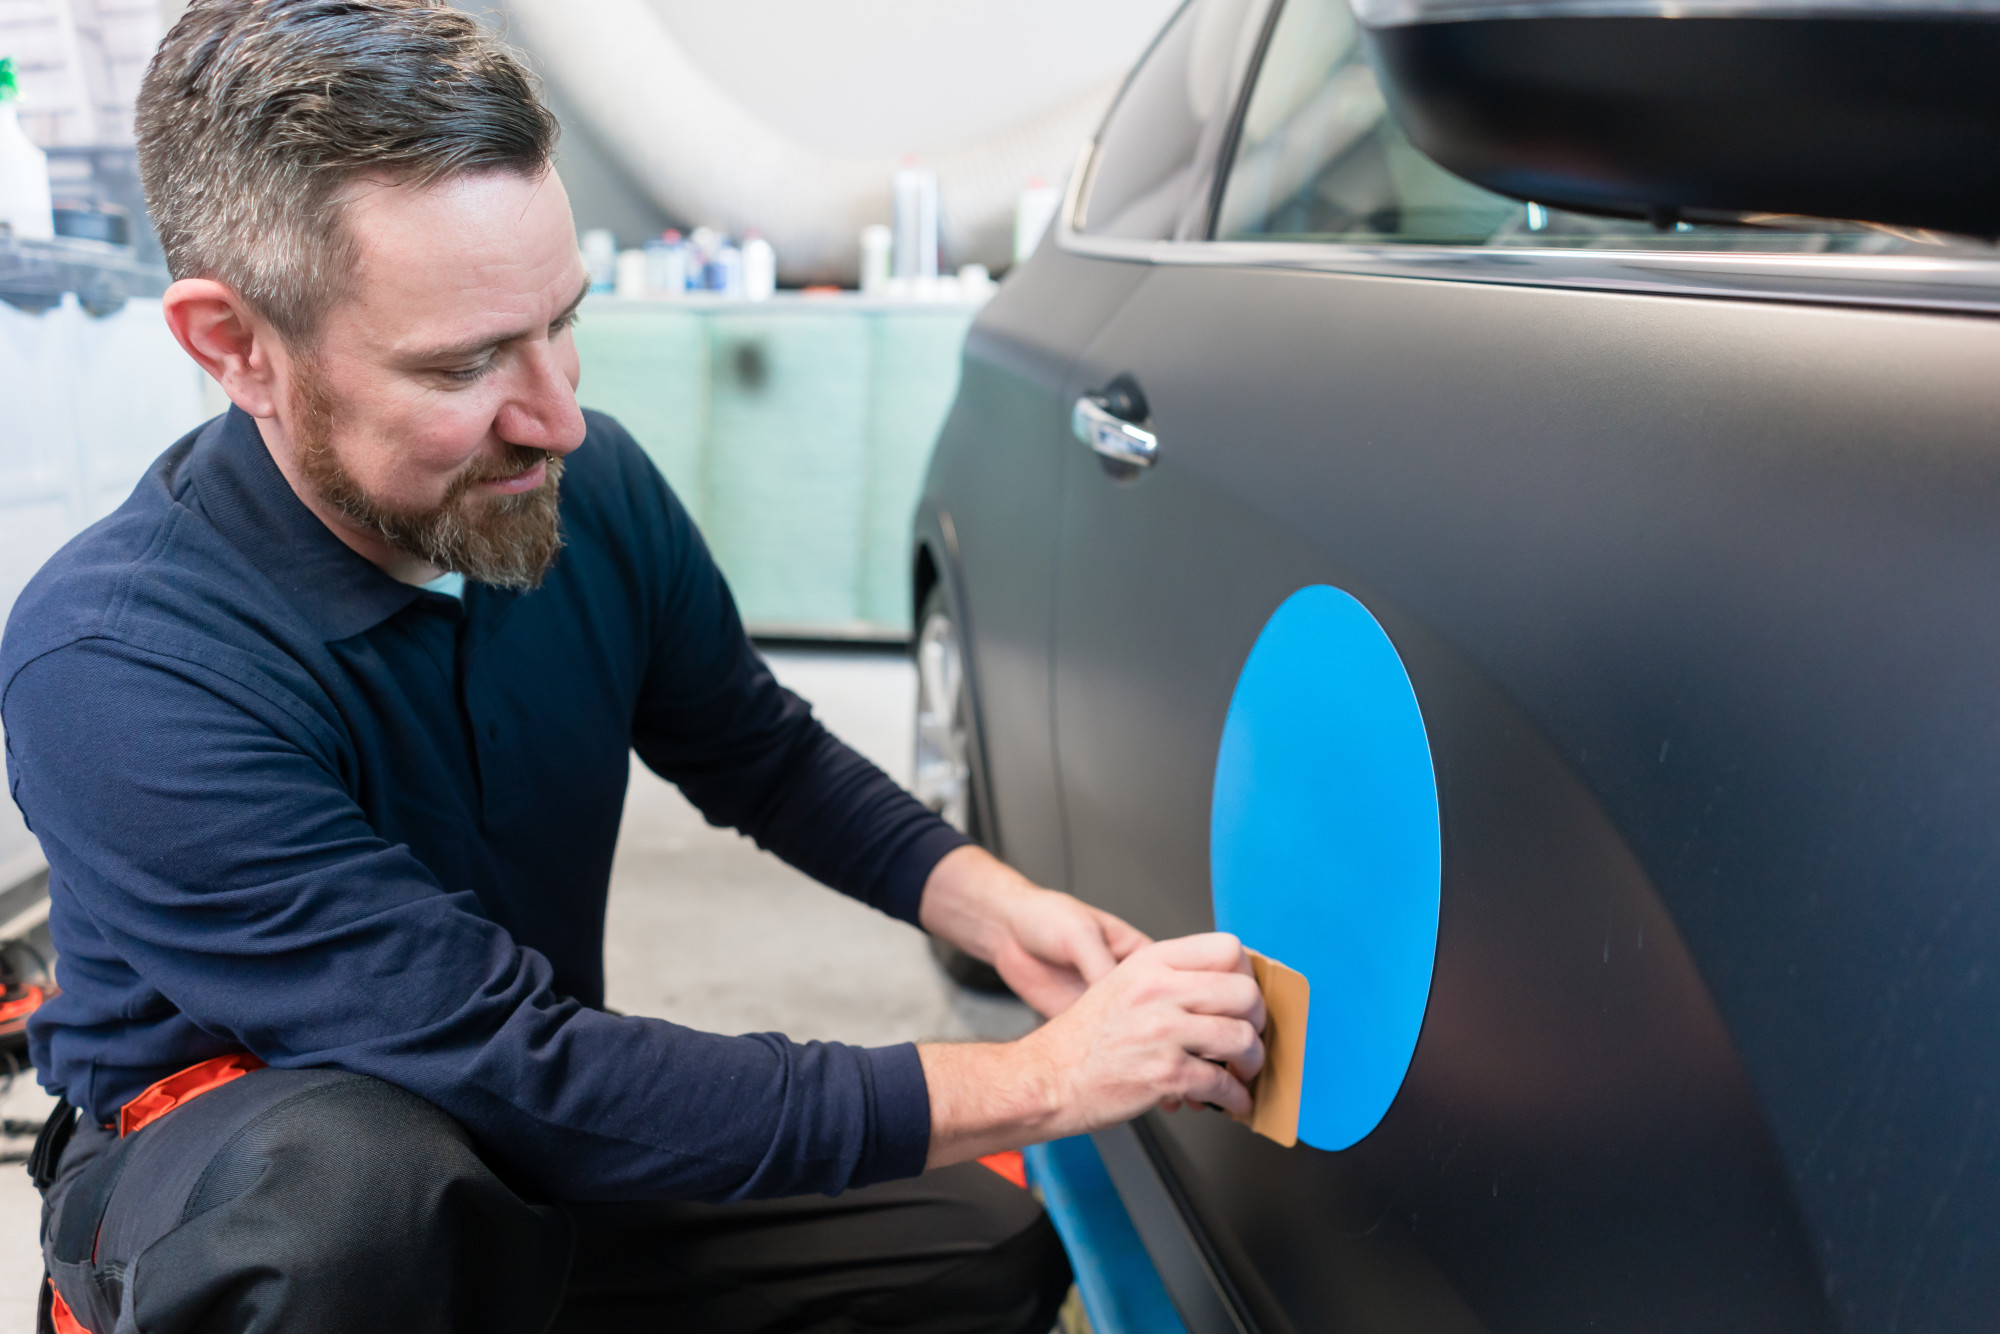
Squeegee Out Bubbles and Excess Fluid Correctly
After the decal is in position, controlled squeegeeing is the key to a professional finish in vehicle decal installation. Start from the center and move outward toward the edges, using firm but controlled pressure to push water and air out from under the graphic. Overlap each pass slightly to ensure you do not miss any trapped fluid, especially near detailed areas and seams.
Work methodically from one side to the other, checking visually and by touch for any remaining bubbles. Small bubbles can often be pushed to the edge and eliminated, but large persistent bubbles may require carefully lifting the decal and repeating the wet application step. Avoid using sharp tools that can scratch the clear coat; instead rely on a high quality soft squeegee and gentle, consistent strokes to create a flawless surface during vehicle decal installation.
Dry, Cure, and Seal for Long Term Protection
Once the decal appears smooth and bubble free, allow it to dry thoroughly before considering the vehicle decal installation complete. On a warm, shaded surface, this may take several hours, while cooler or humid conditions can extend the cure time significantly. Resist the urge to touch, fold, or expose the edges to strong stress during this period, since the adhesive is still developing its bond.
After the recommended cure time, often 24 to 48 hours, consider applying a dedicated decal sealant or a light coating of paint protectant to enhance durability against UV exposure, road salt, and washing. These products help lock the edges, prevent fading, and make future cleaning safer for both the decal and the underlying paint, extending the life of your vehicle decal installation.
Maintain Your Decal with Gentle Cleaning Habits
Proper maintenance is crucial to preserving the appearance of a professionally installed vehicle decal. Use a soft sponge or microfiber mitt, pH neutral soap, and gentle, straight line washing motions to avoid lifting edges or scratching the material. Rinse thoroughly and dry carefully, especially around the borders, to prevent water from seeping behind the graphic during regular vehicle decal installation care.
Avoid aggressive cleaners, high pressure washers aimed directly at the edges, and abrasive tools that can wear down the adhesive and cause peeling. Inspect the decal periodically for signs of lifting or damage, and address small issues promptly to prevent larger failures. With consistent, gentle care, your vehicle decal installation will remain vibrant, intact, and protective for many seasons of driving.
Conclusion
Mastering vehicle decal installation is about patience, preparation, and attention to detail at every stage.
How to install decals like a PRO!
via YouTube Capture.
