Transfer Cut Vs Die Cut
When people compare transfer cut vs die cut, they are really looking at two different ways to turn a design into a clean, ready-to-apply sticker or label. Both methods can deliver crisp graphics and durable results, but they follow opposite logic in how the material is handled before it reaches your project.
What Is a Transfer Cut and How Does It Work
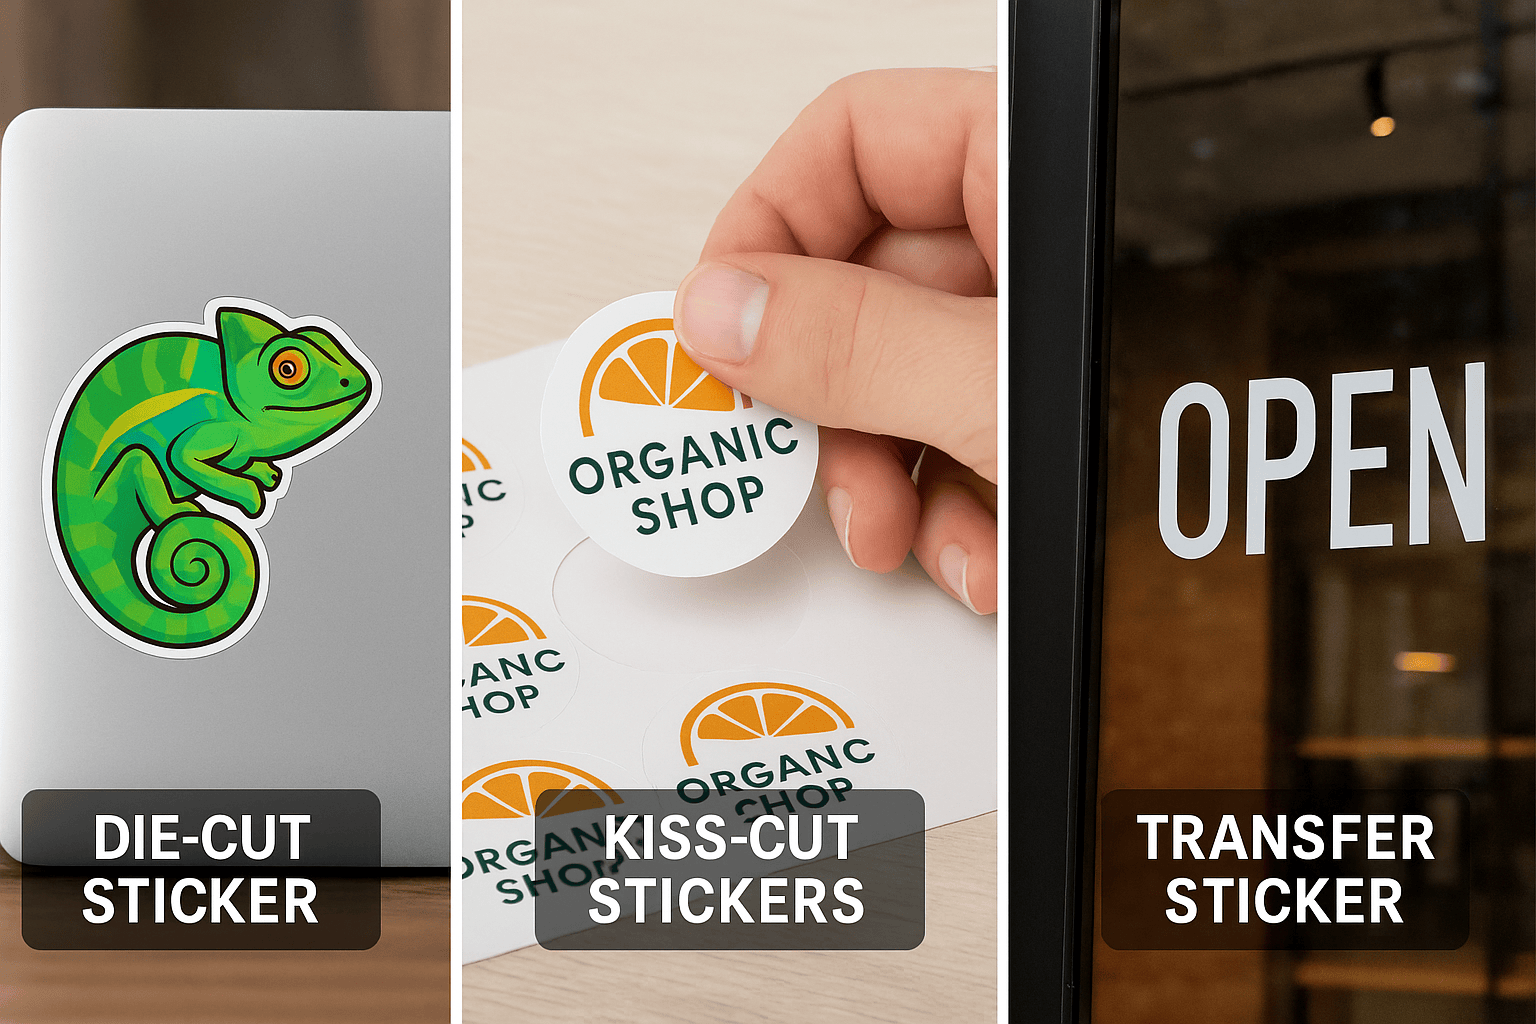
A transfer cut starts with a design that is cut through the top layer and adhesive, while the excess material remains attached to its backing. The operator then uses a transfer tape to lift the cut piece, reposition it precisely, and press it onto the target surface in one smooth motion. This approach is especially useful for intricate lettering, multi-color blocks, or detailed graphics that would be difficult to handle piece by piece.
Because the excess is left on the carrier sheet, the fragile elements stay connected and protected until they are in place. In transfer cut vs die cut discussions, this advantage often shows up when people talk about weeding complexity and alignment time. The process can reduce errors on jobs with tight registration requirements, such as vehicle decals or window signage that must look professional from the first attempt.
What Is a Die Cut and Where It Shines
A die cut cuts the material all the way through and removes the waste around the shape, leaving only the desired form ready for immediate application. Unlike the transfer method, each piece is separated from the sheet during production, which can simplify the workflow for single, simple graphics. This makes die cut a popular choice for straightforward labels, packaging inserts, or promotional giveaways that do not need complex layering.
Because the final item is already detached, there is no need for transfer tape, and installers can position the piece by hand or with light squeegee assistance. In transfer cut vs die cut comparisons, people often highlight speed and cost for basic shapes when the design has minimal detail. For short runs or one-off projects, skipping the transfer step can save time and reduce the number of supplies required.
Material Choices and Compatibility
Both methods can work with a wide range of films, from basic vinyl to premium cast materials, but the choice of substrate can influence which process feels more natural. Thin, flexible, or low-tack films often perform well with transfer cut, since the tape supports the whole design during placement and prevents stretching. On the other hand, thicker stocks or rigid shapes may be easier to handle with die cut, especially when the final surface is uneven or textured.
When evaluating transfer cut vs die cut, it is also worth considering environmental conditions and exposure to moisture or chemicals. Transfer-applied graphics can sometimes seal the edges better on certain surfaces, while die-cut pieces may rely more on strong adhesive to stay in place over time. Testing a small batch on the actual substrate helps confirm which workflow gives the cleanest edges and the best long-term durability.
Production Speed and Turnaround Time
Speed in production depends heavily on the complexity of the artwork, and this is where transfer cut vs die cut differences become obvious. A detailed design with many small islands of material usually runs faster through a transfer workflow, because operators can register everything once and apply it as a single unit. By contrast, a die-cut process may require careful placement of each element, which can extend labor time on intricate jobs.
For straightforward shapes, however, the die cut route can be very efficient, especially when automated equipment handles cutting and stacking. In high-volume scenarios where each label is almost identical, the simplicity of die-cut application can reduce setup changes and minimize downtime. Understanding the balance between design detail and production pace helps choose the right cutting method for each project.
Cost Considerations and Practical Budgeting
Cost in transfer cut vs die cut comparisons is not just about the price per cut; it also includes labor, material waste, and the time needed for setup and weeding. Transfer cutting often involves an extra step and additional supplies, such as transfer tape and positioning tools, which can raise the price for very simple designs. Meanwhile, die cutting may generate more offcuts that need disposal, especially with detailed logos or letters like O, A, or R that have enclosed spaces.
To get the most value, many shops run a quick internal estimate that factors in machine time, material cost, and operator wages. If the artwork is highly detailed or requires precise alignment, the higher cost of a transfer workflow can be justified by fewer errors and faster installation on site. For large batches of basic shapes, a straightforward die-cut solution often delivers the best return on investment.
Choosing the Right Method for Your Project
Selecting between transfer cut and die cut ultimately comes down to the specific demands of the job at hand. If your design includes intricate shapes, fine text, or multi-color layers that must line up exactly, a transfer approach can make installation smoother and more reliable. On the other hand, if you need quick, low-cost labels with clean edges and simple geometry, a die-cut solution may be the more practical path.
By weighing factors like artwork complexity, production volume, substrate type, and budget, you can match the right cutting method to the expectations of the client and the capabilities of your equipment. The ongoing conversation around transfer cut vs die cut is really about flexibility, because mastering both techniques gives you the tools to handle a wider range of projects with confidence and consistent quality.
In the end, understanding how each process shapes the final look and feel of a graphic allows you to make informed decisions that save time, reduce waste, and keep your customers satisfied with a professional result.
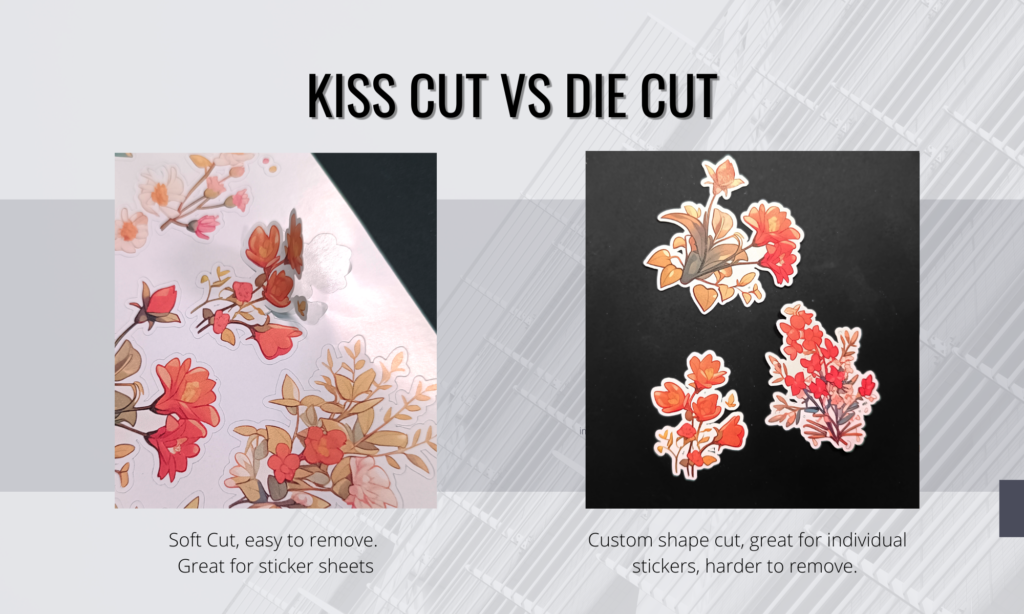
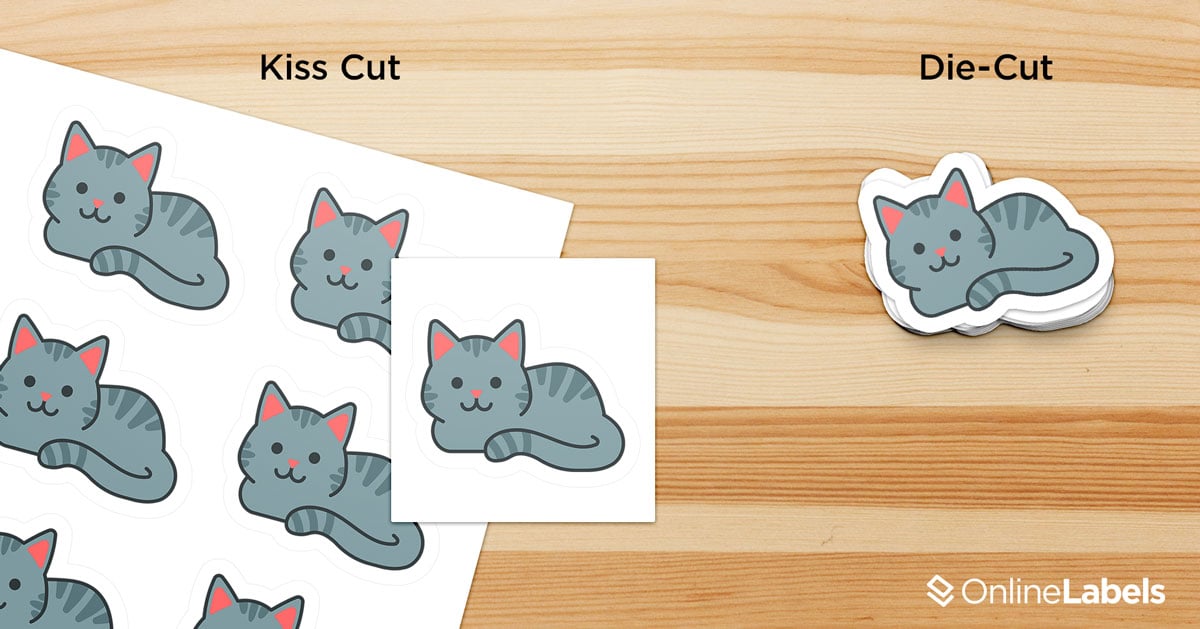
Die-cut vs. Kiss-cut Stickers - What's the Difference?
Every decal has a purpose. Making sure your decal is cut the best way for your project will ensure you get the best results.
