Making Your Own Decals
Making your own decals is a rewarding way to personalize your gear, your space, and your projects without paying premium prices.
Planning Your Decal Design
Before you cut or print anything, start with a clear idea of what you want your decal to say and where it will live. Think about the size, the colors, and the level of detail, because these choices will affect which tools and materials work best. Sketch your concept on paper or in a simple digital program so you can refine shapes and text before committing.
Consider the surface where the decal will go, since smooth, clean, and dry surfaces give the best long term results. If you are making a logo, a slogan, or a decorative graphic, keep the design simple enough to cut cleanly or print sharply. Save your final artwork as a vector when possible, because vectors scale without losing crisp edges, which is especially helpful when making your own decals of different sizes.

Gathering Tools and Materials
For basic projects, you may only need printable vinyl, a cutting machine or a sharp craft knife, and some transfer tape. If you prefer a no‑cut option, printable decal paper for inkjet or laser printers is a fast way to turn a digital design into a sticky sticker. Gather a ruler, a scraper or credit card, a pair of scissors, and cleaning supplies so your surface is dust free before application.
More advanced makers might add a vinyl cutter, a weeding tool, a heat gun for shaping, and several grades of transfer tape. You can start small and upgrade as you learn, but having a clean workspace and reliable tape will improve every approach to making your own decals. Choose materials that match where the decal will live, such as weather resistant vinyl for outdoor use or removable adhesive for delicate surfaces.
Creating the Decal by Cutting
Cutting by hand or with a machine is great for detailed shapes and precise lettering. Import your design into the cutting software, set the correct material and blade depth, and let the machine cut through the vinyl while leaving the backing intact. Weeding, the process of removing the excess vinyl around your design, requires patience but gives you full control over every line and curve.
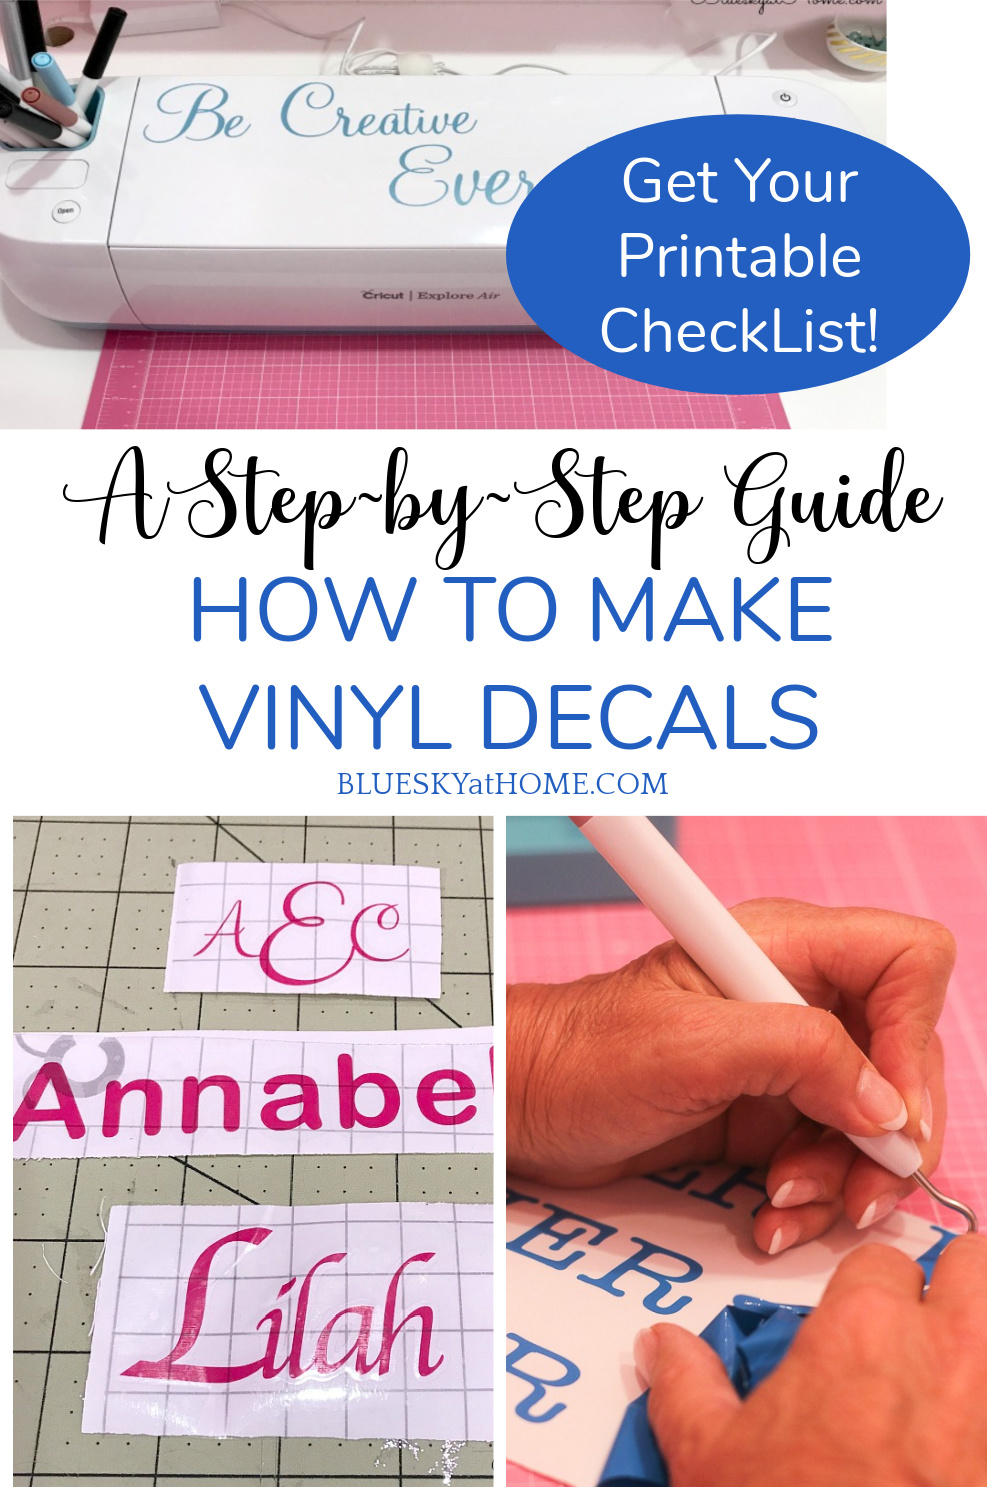
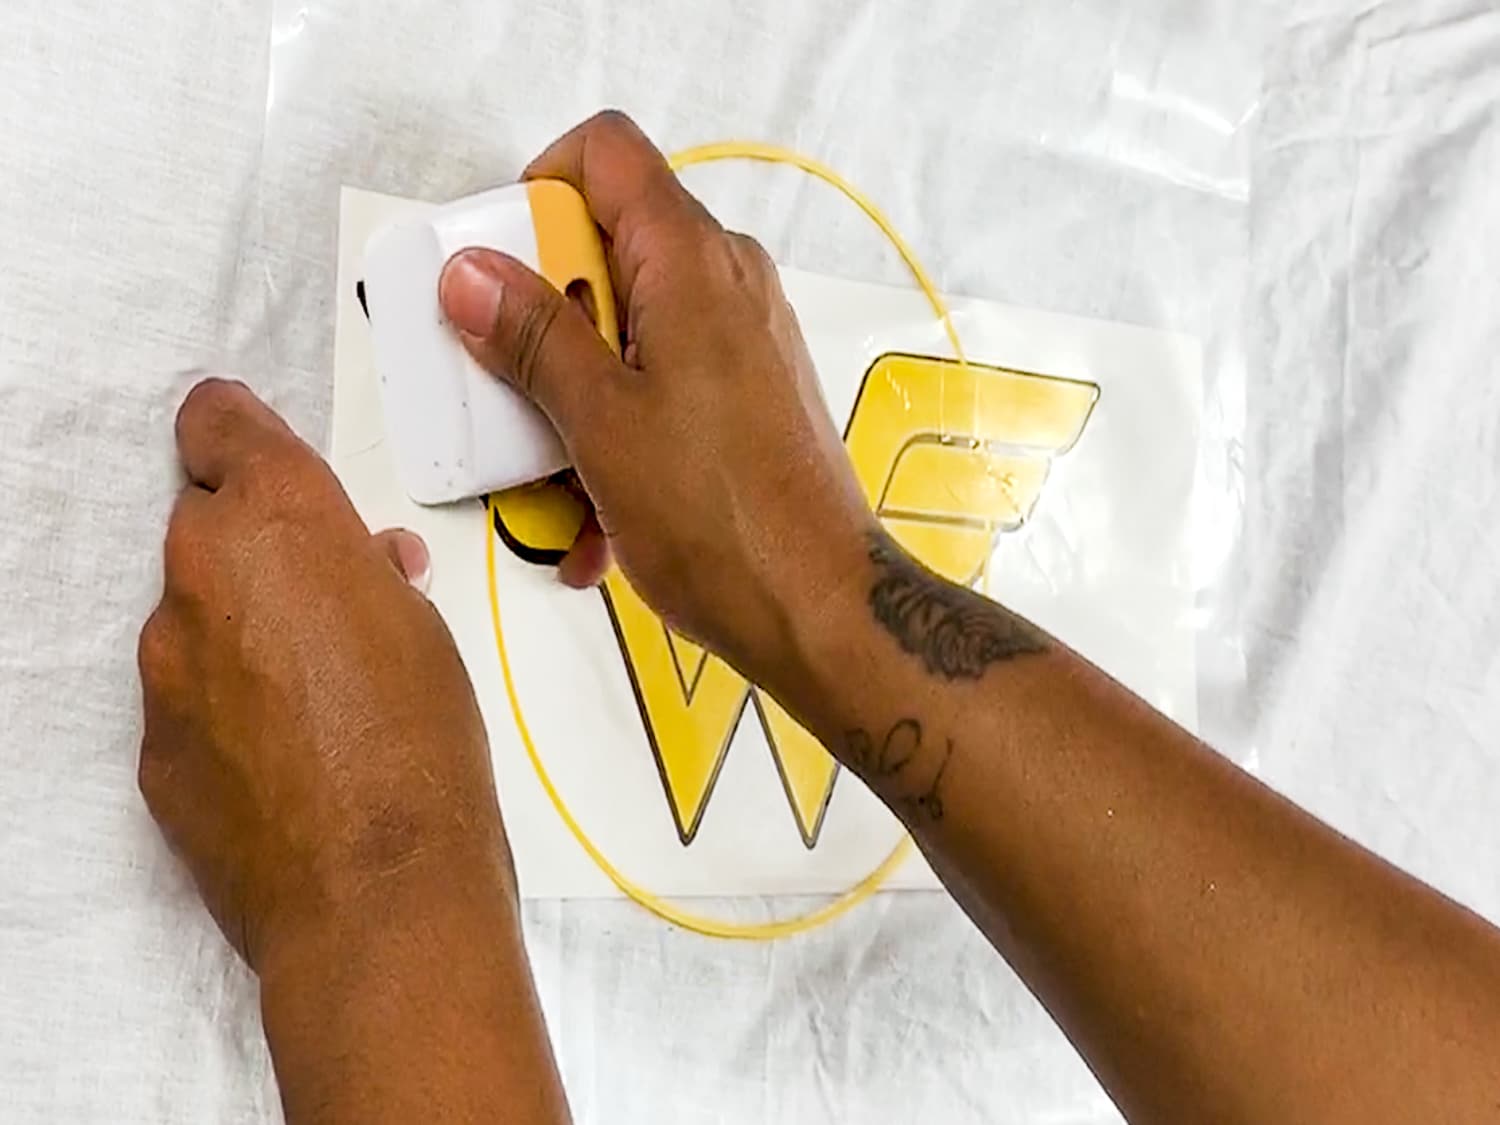
Once the excess vinyl is removed, apply transfer tape over the design and rub it down firmly to ensure good adhesion. Carefully peel away the vinyl backing, leaving the artwork on the transfer tape, then position the decal on your surface. Use a scraper to press out air bubbles and improve adhesion, especially on uneven textures, which is a key step in learning how to make your own decals that look professional.
Tips for Clean Cuts and Long Life
- Test cut a small piece first to check blade sharpness and adhesive strength.
- Use a light touch when weeding to avoid pulling up parts of your design.
- Press the decal down slowly from the center outward to reduce trapped air.
Printing Decals on Special Paper
If you do not have a cutter, printable decal paper offers a straightforward way to make your own decals with an inkjet or laser printer. Print your design onto the paper, let the ink dry completely, and then cut around the shape with scissors or a knife. The printed area becomes the decal, and the remaining paper backing provides stability during application.
Seal your print with a clear, compatible coat if you need extra durability, especially for outdoor or high wear situations. This method is ideal for colorful graphics or when you want to experiment with gradients and detailed artwork. Keep in mind that adhesion may be less strong than vinyl, so test a small area first to confirm the surface compatibility.

Preparing the Surface for Application
A smooth, clean surface dramatically improves how well your decal sticks and how long it lasts. Wipe down the area with a mild cleaner and dry it fully, removing dust, oil, and residue that can interfere with adhesion. For textured walls or fabric, consider whether the decal will lie flat enough for your goal, or choose a more flexible method such as sewn fabric patches.
If the surface is slightly rough or porous, a thin primer or top coat designed for the material can create a better bond. When you learn how to make your own decals, remember that installation is just as important as design, so take your time aligning and leveling the decal before pressing it into place.
Applying and Finishing Your Decal
Position the decal carefully, using a registration mark or a light pencil guideline if needed. Peel a small section of the backing and align it, then slowly lay the rest of the decal while smoothing with a soft cloth or scraper. Working from the center outward helps push out water and air, which reduces peeling and lifting over time.
After the decal is fully pressed down, gently remove the transfer tape at a sharp angle, pulling back rather than lifting straight up to avoid tearing small pieces. If you see any bubbles, carefully lift the edge and re press from the center outward. Finish by protecting the edges with a clear sealant if the decal will face heavy wear, completing one of the most customizable ways to decorate or brand your items.
Conclusion
Making your own decals combines creativity with practical skill, giving you control over design, size, and material choices.
How to print waterslide decals - BOAB Models Tips & Tricks
decal #howto #scalemodels Hello and welcome to BOAB Models guide to printing waterslide decals. This guide looks at using an ...
