Make Stickers
Making stickers is a fun and creative way to turn your ideas into small, sticky art that you can place anywhere.
Choose Your Sticker Style and Purpose
Before you start to make stickers, decide what kind of sticker you want and where it will live. A cute logo sticker for your laptop feels different from a bold warning sticker for a warehouse or a playful set of emoji stickers for your journal. Think about the size, shape, and message, because these choices will guide your tools and materials later. You might even start with a simple doodle on paper to clarify the look before you move to digital design.
Consider who will see or use the sticker, whether it is for branding, gifts, or personal decoration. If you are making stickers to promote a small business, focus on a clear name and contact information, or a memorable symbol that stands out at a glance. For personal projects, you can experiment with colors, patterns, and inside jokes that match your personality. Write down a short brief with the main visual, colors, and the feeling you want, so every time you make stickers you follow the same strong identity.

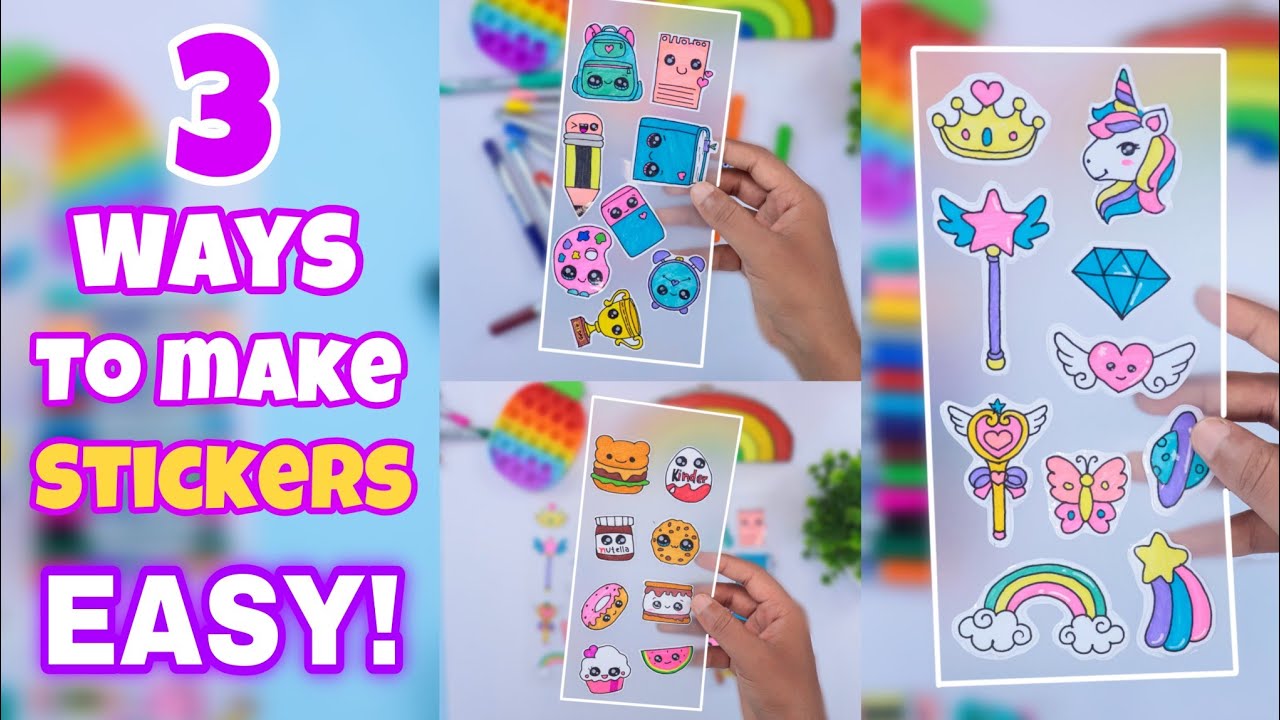
Design Your Sticker on Computer or by Hand
You can design your sticker digitally using simple tools or draw it by hand and scan it in. Programs like free vector editors, illustration apps, or even online sticker makers give you precise control over size, colors, and text. Work in the final output size so you do not lose detail when you make stickers, and remember to add a small bleed area if the design goes to the edge of the cut line. Keep text large and readable, and avoid very thin lines that might break during cutting or peeling.
If you prefer a handmade look, sketch, ink, and color your design, then scan or photograph it at high resolution. You can clean up the image in a basic editor, adjust contrast, and make the lines crisp before you use it to make stickers. Whether digital or analog, save a copy in a lossless format and export a clean version with the correct color profile for printing. A well-prepared design makes the whole process smoother when you move to cutting and assembly.
Prepare the File for Cutting and Printing
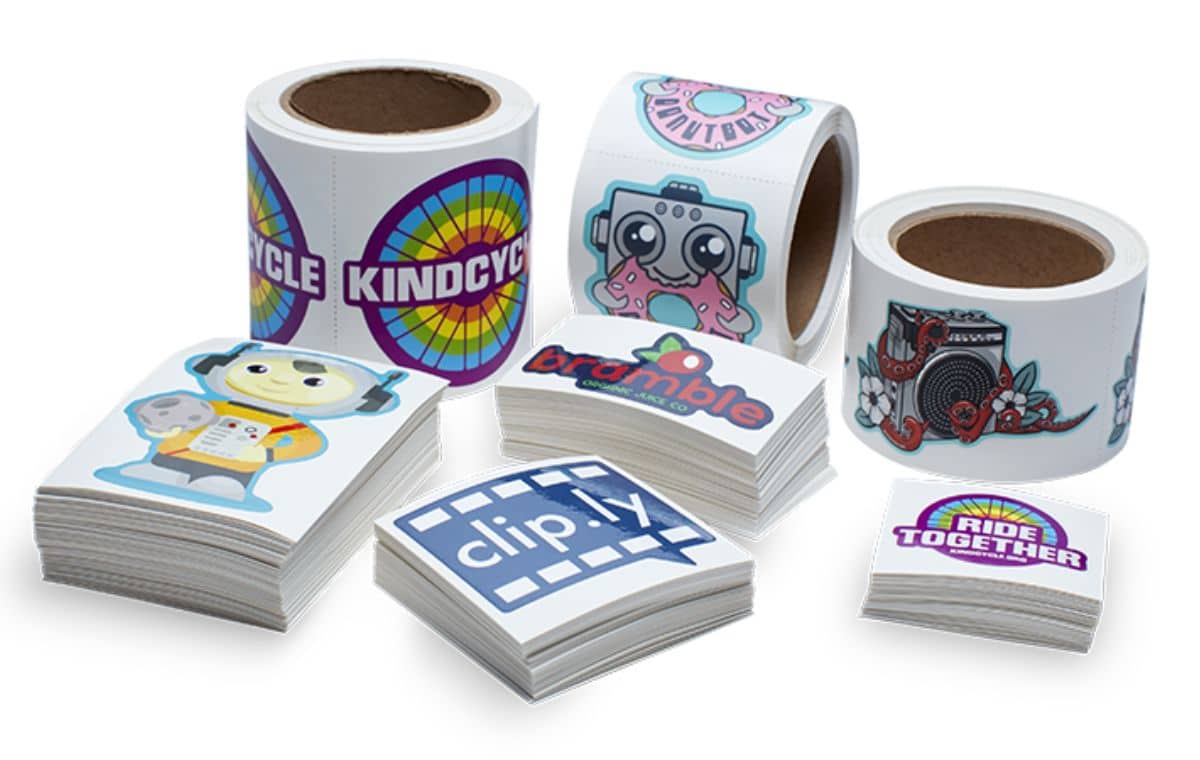
When you are ready to produce stickers at home or with a printer, export the file in the right format and settings. Use vector formats when possible, or high-resolution PNG files with transparent backgrounds for professional results. Check the DPI, usually 300 or higher for print, and confirm the color mode, such as CMYK for printed stickers or RGB for screens. If you plan to cut stickers by hand, mark the cut lines clearly but keep them outside the final sticker area so they do not appear on the finished piece.

For printed stickers, you might order from a print-on-demand service or use a local printer that handles vinyl or paper. Prepare a proof or test print on regular paper to verify sizes, colors, and spacing before you commit to the final materials. When you make stickers in small batches, create a simple system for naming and organizing files so you can quickly find the right version later. Good file preparation reduces surprises and helps your stickers look exactly as you imagined.
Cut and Finish the Sticker Materials
How you cut your stickers depends on the materials you choose and how many you need. For a few stickers, you can cut paper designs with scissors or a craft knife, using a ruler for straight lines and a steady hand for curves. Self-healing mats and small blades help you make clean cuts without damaging the surface beneath. If you want more durable stickers, consider a home cutting machine that can slice vinyl sheets with precision, or order professionally cut stickers from a manufacturer.
After cutting, remove the excess material and apply any necessary layers, such as a clear topcoat for protection or a separate backing sheet for stickers on a sheet. Press each sticker gently to smooth out air bubbles, and let any glue or coating dry according to the product instructions. For large projects, set up a simple assembly line so you can efficiently make stickers in higher volumes while keeping quality consistent. Finishing touches like rounded corners or rounded corners can make the stickers feel more polished and professional.
Store, Share, and Use Your Stickers
Once your stickers are complete, store them flat in a folder or a box to prevent bending or peeling before you use them. Keep them away from direct sunlight and moisture, especially if they are printed on paper or have sensitive adhesives. If you are giving stickers to friends or clients, a small envelope or cellophane bag adds a professional touch and protects the adhesive surface. When you make stickers for your brand, think about how they will look on laptops, notebooks, or packaging, and choose colors and shapes that complement your other visuals.
Share your stickers on social media, in your shop, or at events to show your work and attract people who like the same aesthetic. You can create series or seasonal designs to keep things fresh and encourage people to collect them. As you gain experience, experiment with new materials, shapes, and finishes so that every time you make stickers, you refine the process and improve the results. With practice, your stickers will become more polished, recognizable, and fun to use in everyday life.
Conclusion
Making stickers is a hands-on craft that blends design, cutting, and finishing into small pieces of art you can share or sell.

Make Stickers in Canva for Free! (Beginner Friendly)
Get my free sticker designs at https://jennifermaker.com/751 ! Learn how to make stickers in Canva and cut them with your Cricut!
