How To Put Vinyl Decal On Car
Applying a vinyl decal on car surfaces is a simple way to personalize your vehicle with sharp graphics and long lasting color.
Preparing the Surface for a Clean Vinyl Decal on Car
The first step to a flawless install is meticulous surface preparation, because dust, wax, or old residue will prevent a vinyl decal on car from adhering evenly. Wash the area with a dedicated automotive shampoo, rinse thoroughly, and dry with a clean microfiber towel to remove water spots. Use an isopropyl alcohol wipe or a dedicated panel wipe to eliminate any remaining oils, waxes, or silicone that could compromise the bond.
Choose a shaded spot or work indoors to avoid direct sunlight and high temperatures, which can make the vinyl too tacky or cause it to stretch during application. If you are applying over existing decals, carefully lift and remove the old material, then use a razor scraper at a low angle to clean away any leftover adhesive before continuing. A well prepared, smooth surface ensures that your vinyl decal on car lines up precisely and stays bubble free for years.

Measuring and Cutting the Decal for Exact Fit
Before you peel the backing, position the vinyl decal on car in a dry run against the panel to check alignment, overhang, and proportions. Use a soft measuring tape or ruler to note distances from edges, such as the door line or wheel arch, and mark reference points with removable tape or chalk. If the decal comes in a larger sheet, carefully cut along the design outline, leaving a small border around the edges for easier handling during installation.
For intricate shapes or multiple pieces, consider laying them out on a flat surface and assembling them temporarily to verify how they connect before committing to the car surface. Keep the protective backing intact until you are ready to apply, and make sure your hands are clean and dry to avoid transferring dirt onto the adhesive side. Thoughtful measuring and cutting reduce waste and help your vinyl decal on car look professionally installed.
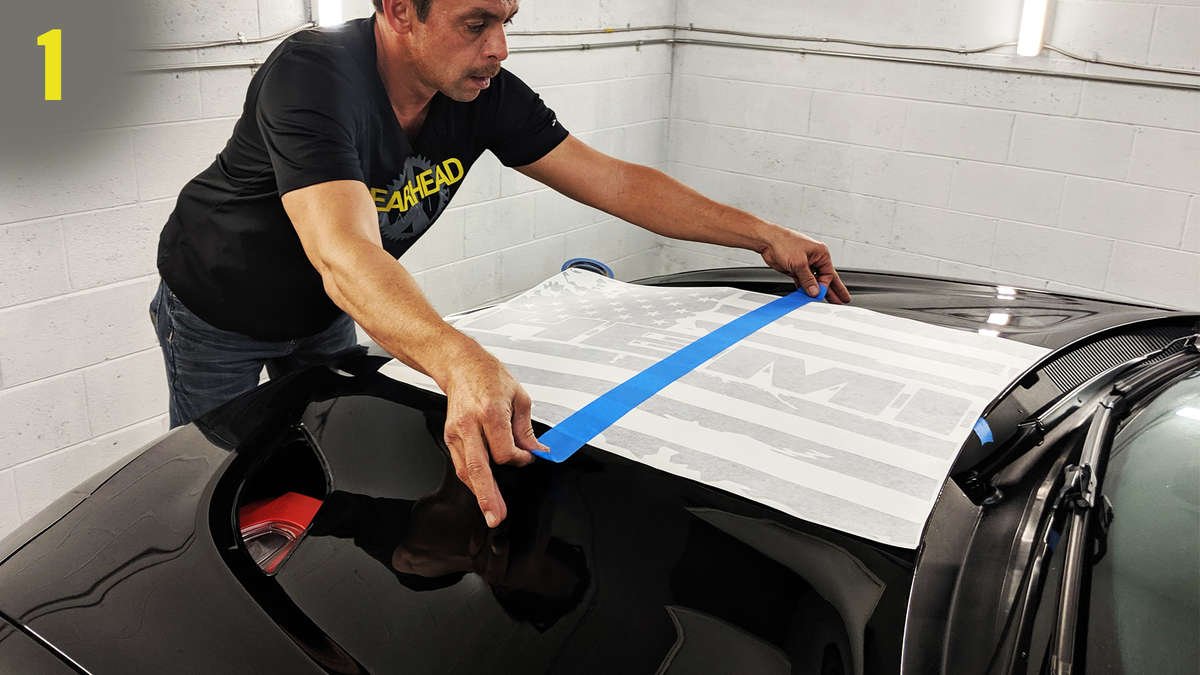
Positioning and Aligning the Decal for Symmetry
Proper positioning is critical when you put vinyl decal on car, especially on larger panels where slight misalignment is immediately noticeable. Use temporary reference lines, such as thin strips of tape placed on the panel where the edges should fall, to create a visual grid. Carefully lower the decal into place, starting from one edge and slowly smoothing it down while aligning with your guides, which helps you adjust before the adhesive sets.
If the design has multiple elements, attach them to each other with transfer tape first so they move as a single unit, making it easier to maintain consistent spacing. Work from the center outward, gently pressing the vinyl onto the surface with a soft squeegee or your palm to push out air and ensure full contact. Taking time to align your vinyl decal on car carefully prevents the need for rework and delivers a balanced, symmetrical look.
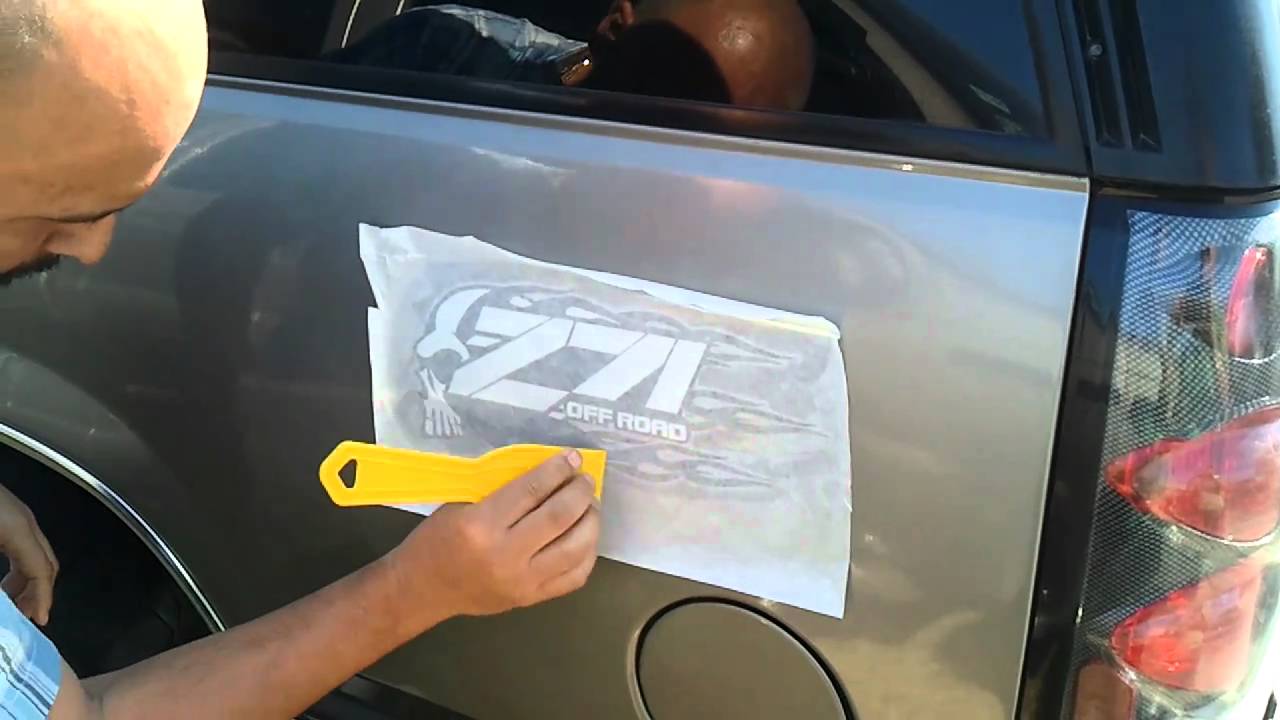
Applying Even Pressure to Eliminate Bubbles
Once the decal is roughly in place, use a firm squeegee to press the vinyl smoothly onto the panel, moving from the center toward the edges to force out trapped air and avoid bubbles under the vinyl decal on car. If you encounter small bubbles, gently lift the edge of the decal, release the air, and smooth the surface back down, rather than stretching the material which can distort the design. For tight corners and curves, use a softer felt squeegee or a wrapped cloth to apply pressure without scratching the vinyl.
Pay extra attention to edges and corners, because incomplete adhesion in these areas can lead to peeling over time. After the main body of the decal is smooth, go over the entire surface with firm, even strokes, checking visually for any remaining bubbles. A well pressed application helps your vinyl decal on car resist weather, washing, and driving vibrations without lifting or warping.

Trimming Excess Material and Final Inspection
After the decal is fully adhered, use a sharp hobby knife or precision cutter to trim any overhanging pieces, holding the blade at a shallow angle to avoid slicing into the car paint. Run the trim strokes away from your body and fingers, and place a protective board behind the area if you are cutting close to the panel edge. Clean away any loose particles with a tack cloth, then inspect the decal from multiple angles to confirm that all edges are sealed and the colors are vibrant.
Check the finish under different lighting conditions and at various distances to verify that your vinyl decal on car looks crisp and properly aligned. If you notice any areas that did not bond correctly, gently lift them and reapply pressure with the squeegee, avoiding aggressive stretching. A final wipe with a safe automotive cleaner, applied after installation has set, will remove any lingering residue and leave a polished, customized appearance.
Long Term Care and Maintenance Tips
To keep your vinyl decal on car looking fresh, wash the vehicle regularly with mild soap, avoiding abrasive brushes or harsh chemicals that can lift the edges. When using an automated car wash, choose a touchless or soft brush system if possible, and consider hand drying to minimize wear on the edges.

Over time, inspect the decal periodically for signs of lifting, especially around corners and edges, and address small issues early to prevent larger peeling. With proper installation and care, a quality vinyl decal on car can maintain its vivid appearance for many years, adding personality and style without permanent changes to your vehicle.
Como aplicar um adesivo de vinil
A especialista em tecnologia Caree Sisson demonstra como aplicar um adesivo de vinil no vidro de um carro. Este adesivo foi ...
