How To Put On Vinyl Decals
Applying vinyl decals the right way starts with a clean surface and a calm, patient mindset.
Prepare Your Surface and Tools
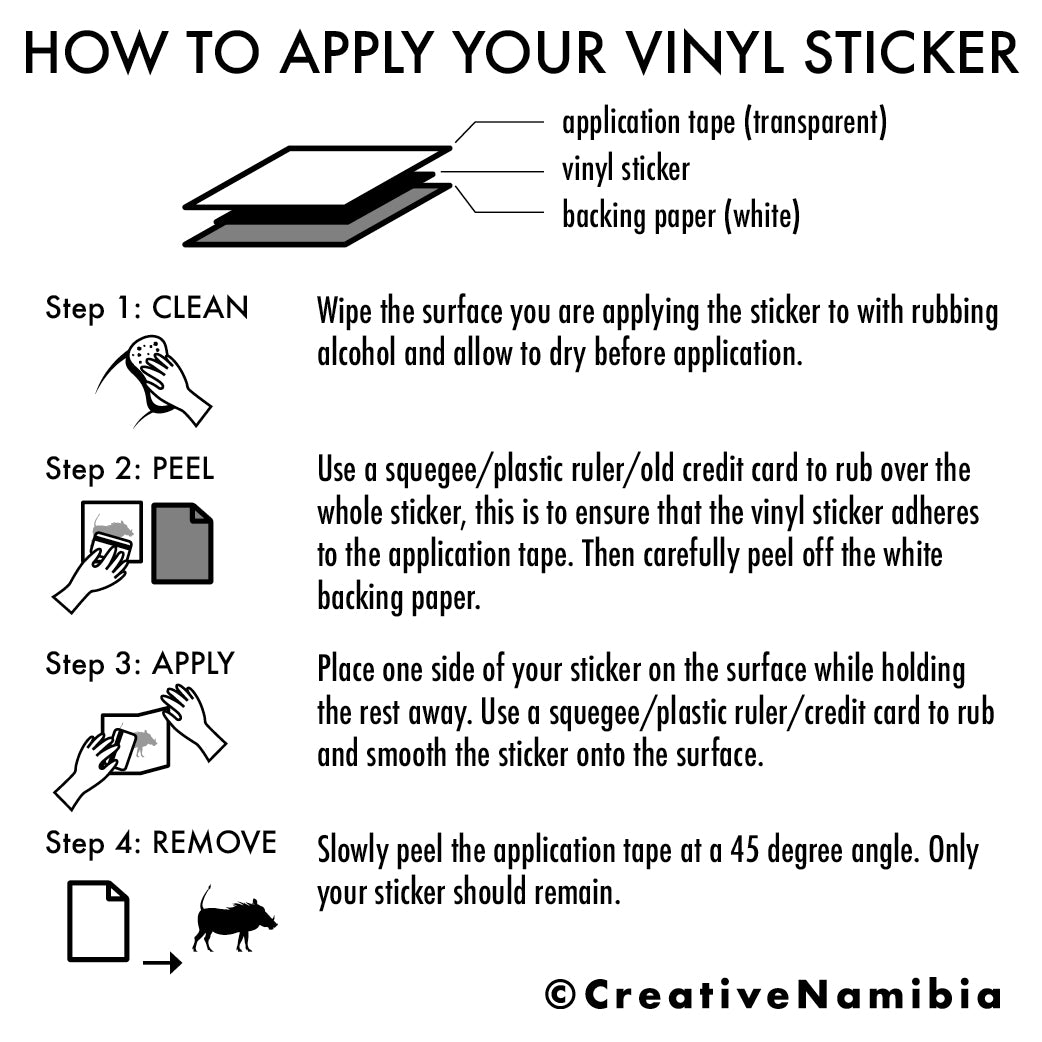
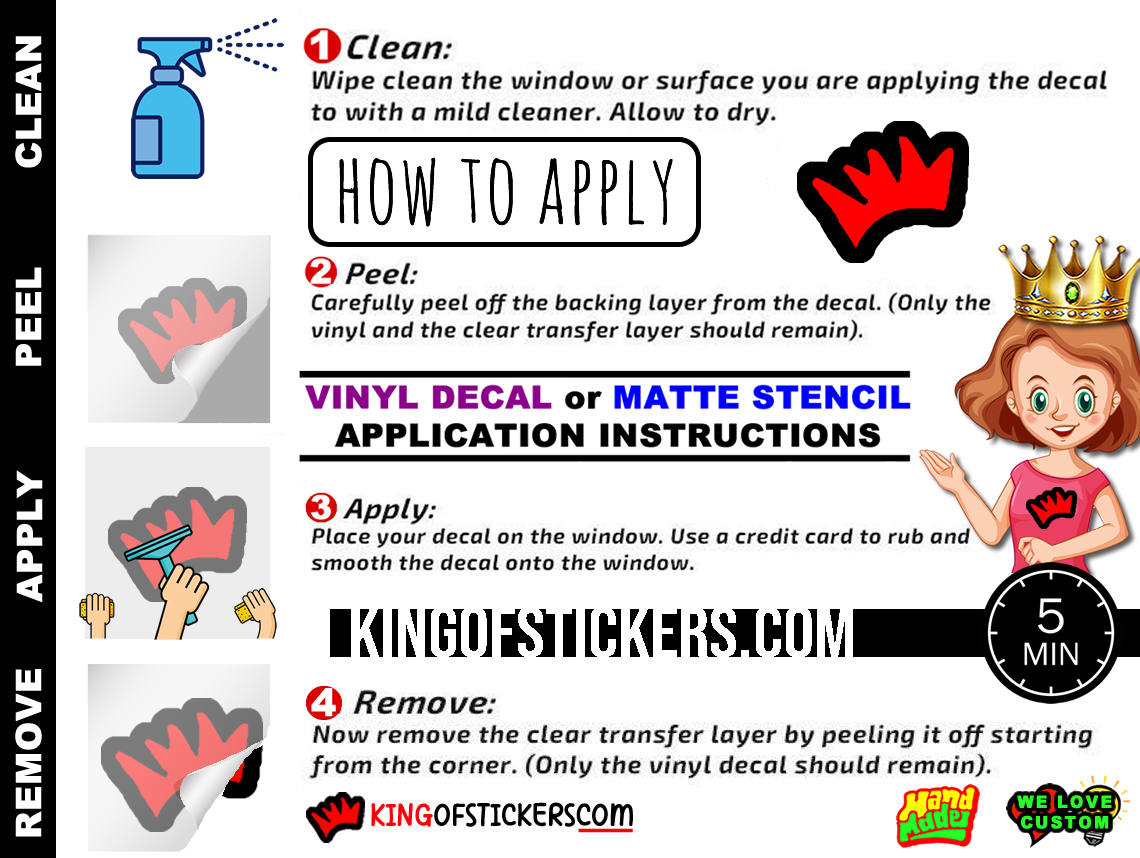
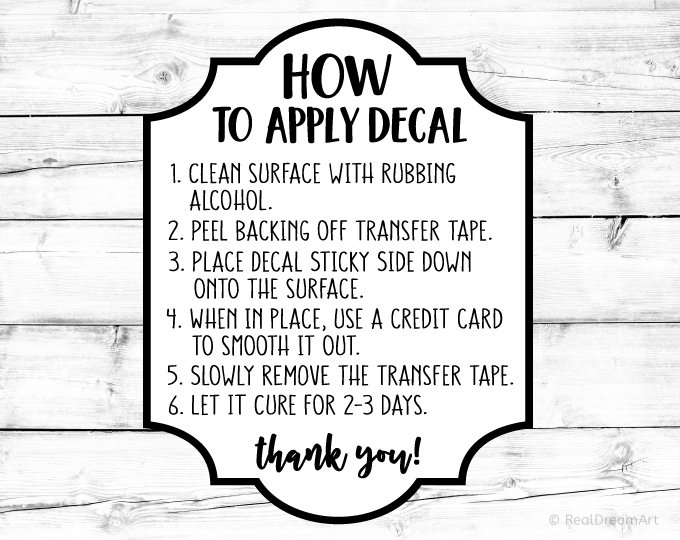
The foundation of a flawless vinyl decal install is thorough surface preparation. Dust, grease, or old stickers will prevent the adhesive from bonding properly and cause lifting over time. Before you even remove the backing, wash the area with mild soap and warm water, then dry it completely. For glossy or painted surfaces, use a little isopropyl alcohol or a dedicated cleaner to remove any remaining residue, and let the surface air dry before moving to the next step.
Gather the tools that will make the job smooth and precise. You will need the vinyl decal itself, a soft microfiber cloth, a squeegee or a plastic credit card, a ruler or measuring tape, and painter's tape for temporary positioning. A spray bottle with a few drops of dish soap and water creates a temporary soapy layer that lets you slide the decal into place before it sticks permanently. Having these items within reach keeps the process efficient and reduces the need for repositioning that can stretch or crease the material.

Measure, Align, and Position the Decal
Start by measuring both the decal and the installation area so you can plan your placement. Use painter's tape to mark the outer boundaries lightly on the surface, which acts as a guide when the decal is floating in soapy water. For larger or intricate designs, consider using a registration mark on the backing paper and a light pencil line on the surface to keep everything aligned. This step is especially helpful for symmetrical patterns, vehicle graphics, or multi-piece installations where even a small shift becomes obvious later.
With the surface prepared and measured, lightly mist the taped area and the back of the vinyl decal with your soapy solution. Lay the decal onto the surface, sticky side down, and use your fingers or a soft cloth to gently smooth out major air bubbles. At this stage, the decal should move easily, allowing you to adjust height, angle, and distance from edges until it looks exactly where you want it. Take your time, because once the decal bonds to the surface, repositioning becomes difficult and may damage the material.
Squeegee Out Water and Secure the Edges
Once the decal is positioned perfectly, begin the squeegee process from the center moving outward. Use firm, even pressure to push the soapy water toward the edges, which helps the adhesive make full contact with the surface. Overlap each stroke rather than lifting and repositioning the squeegee, which can introduce new bubbles or wrinkles. If you see stubborn bubbles, carefully lift the edge of the decal, smooth the area with your hand or squeegee, and continue pushing the water out toward the opening.
As you progress, pay special attention to corners and detailed elements, which tend to trap water. You can use a small, soft brush or a microfiber cloth wrapped around your finger to reach tight spots without scratching the material. When most of the liquid is gone and the decal lies flat, use a clean part of the squeegee to press down along the edges firmly. Securing the edges early prevents them from peeling up later and gives you a stable starting point for the next phase.
Remove the Backing Paper Completely
With the decal mostly secured, it is time to remove the backing paper without disturbing the vinyl. Start at one corner and slowly peel the paper away at a sharp angle, keeping the decal close to the surface to reduce stress on the adhesive. If sections resist, lay the backing back down, apply a bit more soapy water, and use the squeegee to press the decal down further before trying again. Working in a well-lit area helps you spot any small bits of liner that might have stayed stuck to the adhesive.
If your design includes small pieces or intricate cutouts, remove the backing in manageable sections rather than all at once. Use tweezers or the edge of your squeegee to coax delicate parts into place while the soap film still provides some sliding room. Remember that patience here prevents tears and keeps the overall lines crisp. Once all the backing is gone, inspect the surface visually and run the squeegee lightly over the entire decal to ensure every part is bonded.
Dry, Cure, and Final Inspection
After the vinyl decal is fully applied, let it dry and cure before doing anything that might stress the adhesive. For outdoor applications, waiting through an overcast period or even overnight allows the adhesive to settle into the surface properly. Avoid washing the area or applying any protective coatings until the decal has set according to the manufacturer's recommendations, which can range from a few hours to several days depending on the product and climate.
Do a final walk-around check, looking for lifted corners, trapped dust, or areas that need a little extra pressure with the squeegee. If you are applying the decal to a vehicle, park away from direct sunlight during installation to keep the vinyl pliable and easier to smooth. With consistent pressure, careful alignment, and attention to detail, your vinyl decal will stay vibrant, securely bonded, and ready to showcase your design for years to come.
Vinyl Lettering General Installation Instructions
This is a general installation video for vinyl lettering and vinyl decals. Most decals can be installed using this method.
