How To Put A Vinyl Decal On A Car
Applying a vinyl decal to your car is a simple way to personalize your ride without the permanence of paint, and with the right preparation and technique you can achieve a smooth, professional finish.
Choose the Right Vinyl Decal and Prepare Your Car
The first step in how to put a vinyl decal on a car is selecting a high quality decal made for outdoor use, with strong adhesive and UV resistance so it lasts through weather and driving. You should also gather tools like a soft squeegee, microfiber cloths, rubbing alcohol, painter's tape, and a spray bottle with a bit of soapy water, because these items help you position and smooth the vinyl cleanly.
Before placing the decal, thoroughly wash and dry your car, then clean the chosen area with rubbing alcohol to remove oils, dust, and road grime that could prevent proper adhesion. Choosing a shaded, cool spot to work will keep the vinyl and adhesive from becoming too soft or sticky, making alignment and smoothing much easier during the application process.

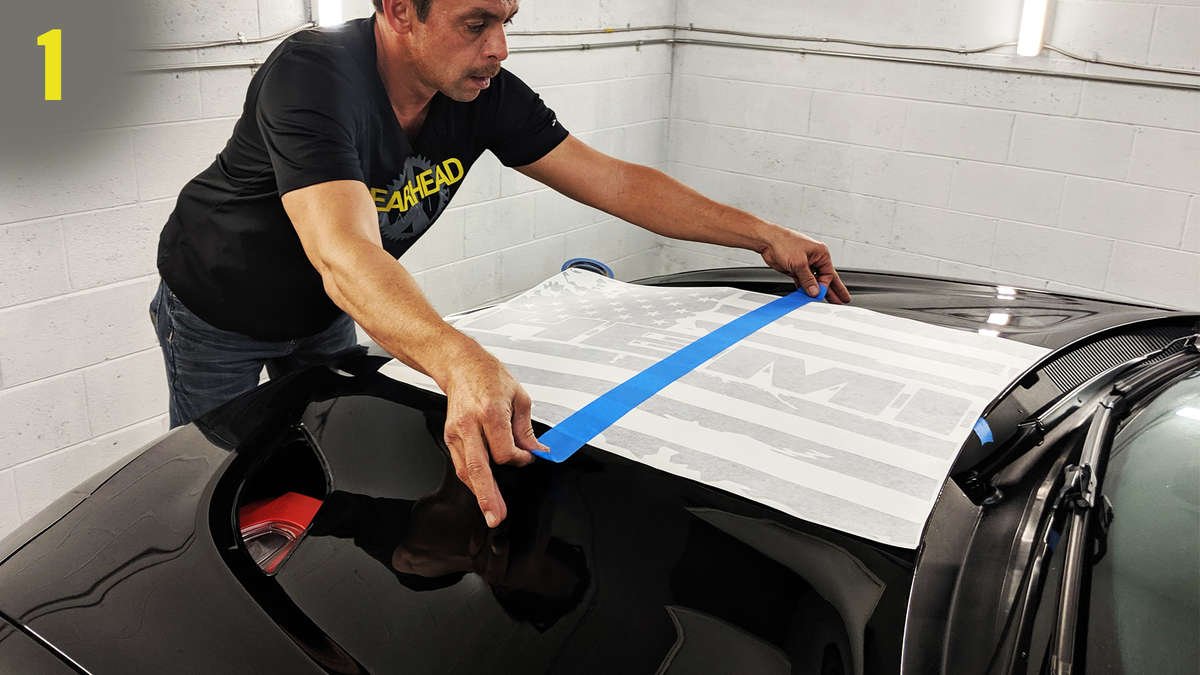
Measure, Mask, and Test Your Layout
Use a measuring tape and level to mark the intended spot, and apply low tack painter's tape to hold the decal in place without damaging the surface. This test positioning lets you step back and confirm that the decal is centered, level, and at the right height before committing to the final placement.
For larger designs, you can gently lift one edge of the decal to check alignment, adjusting the tape until everything looks straight relative to doors, windows, or other body lines. Taking a few extra minutes to fine tune the layout now saves time and reduces the need to reposition later, which can introduce bubbles and wrinkles in the vinyl.
Wet Application for Smooth Placement
The wet application method is a core part of how to put a vinyl decal on a car, because the soapy water reduces friction and lets you slide the decal into exact position before squeezing out the liquid. Spray the car surface and the back of the decal with the soapy solution, then carefully place the decal, allowing the liquid to evenly distribute underneath and prevent dry spots that cause early lifting.
Use a soft squeegee or credit card to push the decal outward from the center, moving from the middle toward the edges to release water and air, while gently lifting and repositioning the edges if needed. Keep the surface wet until you are confident the decal is aligned, because this window of adjustability is what makes it possible to achieve a near flawless finish on curved panels.
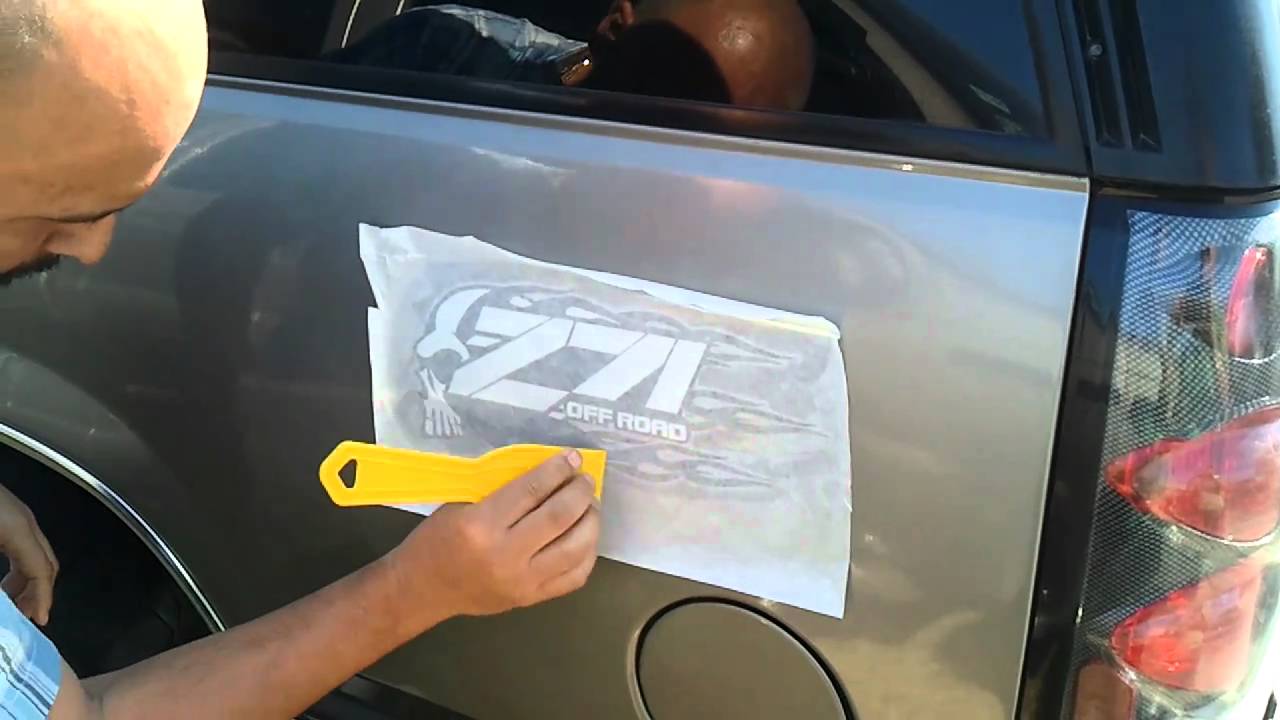
Squeegee Out Bubbles and Excess Water
Once the decal is positioned, firmly squeegee the entire surface using overlapping strokes, pressing out water and ensuring the vinyl makes full contact with the paint. Consistent pressure helps the adhesive bond evenly, reducing the risk of edge lifting and creating a uniform appearance across the panel.
After most of the liquid is removed, use a microfiber cloth to pat down any remaining edges and check for hidden bubbles. If you find small pockets, carefully lift the vinyl, reapply a few drops of soapy water, and smooth again, because trapped moisture left under the surface can cause peeling over time.

Dry, Cure, and Finish the Edges
Allow the decal to air dry for a few minutes while still keeping the surface slightly damp at the edges, which helps you press the borders completely flat without folding the material. After the surface feels dry to the touch, gently run the squeegee along the edges once more to secure them, especially around corners and curves where lifting often begins.
For best results in how to put a vinyl decal on a car, wait several hours or ideally overnight before driving in heavy rain or intense sun, giving the adhesive time to cure and bond securely. Avoid aggressive washing techniques during the first week, and use gentle hand washing to protect the edges and extend the life of the decal.
Troubleshoot Common Issues and Maintain Your Look
If you notice small bubbles after the vinyl has dried, you can sometimes pierce them with a clean needle, then smooth the area with the squeegee to push out air and reactivate the adhesive for better contact. However, if the decal shows signs of peeling at the corners, it may indicate insufficient adhesion, and carefully reapplying soapy water, pressing, and drying again can rescue the installation.

Regular maintenance, such as wiping down the decal with a mild soap and soft cloth, helps preserve the colors and clarity, while avoiding harsh chemicals or abrasive tools that can degrade the vinyl surface. By following these steps and treating your newly decorated panels with care, your car decal will remain vibrant and well bonded, showcasing your style mile after mile.
Mastering how to put a vinyl decal on a car gives you the confidence to refresh your vehicle's appearance quickly, and with practice you can tackle complex shapes and sizes while maintaining a clean, professional look that stands out on the road.
Como aplicar um adesivo de vinil
A especialista em tecnologia Caree Sisson demonstra como aplicar um adesivo de vinil no vidro de um carro. Este adesivo foi ...
