How To Put A Sticker On A Car
Applying a sticker to your car can transform the look of your vehicle, and learning how to put a sticker on a car the right way ensures a clean, bubble-free finish that lasts for years. Whether you are adding a brand logo, a custom design, or a simple decal to express your style, the process requires patience, the right tools, and a dust-free environment to achieve professional results.
Preparing the Surface for a Perfect Adhesive Bond
The first step in how to put a sticker on a car is thorough preparation, because a clean and smooth surface is essential for strong adhesion and long-term durability. You need to wash the area where the sticker will go with a dedicated car shampoo and a microfiber mitt to remove dirt, road grime, and industrial fallout that could prevent the adhesive from bonding evenly.
After washing, rinse the panel thoroughly and dry it completely with a soft drying towel or a clean microfiber cloth, then wipe the surface with isopropyl alcohol or a dedicated panel wipe to eliminate any remaining oils, wax residues, or silicone that could compromise the stickiness. Taking the time to prepare the surface carefully is a crucial part of how to put a sticker on a car that avoids peeling, lifting, and early failure.

Measuring, Aligning, and Using Temporary Guides for Accurate Placement
Precise positioning is one of the most important aspects of how to put a sticker on a car, especially for larger graphics or when the design must sit in a specific spot for brand consistency or aesthetic balance. Before removing the backing, you should measure the panel, mark reference points with removable tape, and use a level or a straight edge to ensure the sticker will be perfectly aligned with the car's lines.
For complex installations, you can employ the water transfer method by spraying a mix of water and a few drops of dish soap onto the panel, placing the sticker on the surface, and then sliding it into the correct position before squeezing out the liquid. This approach is a key technique in how to put a sticker on a car when exact centering and alignment matter, because it gives you the ability to adjust the sticker gently until it looks exactly right before it permanently bonds to the paint.
Removing the Backing and Applying Even Pressure for a Bubble-Free Finish
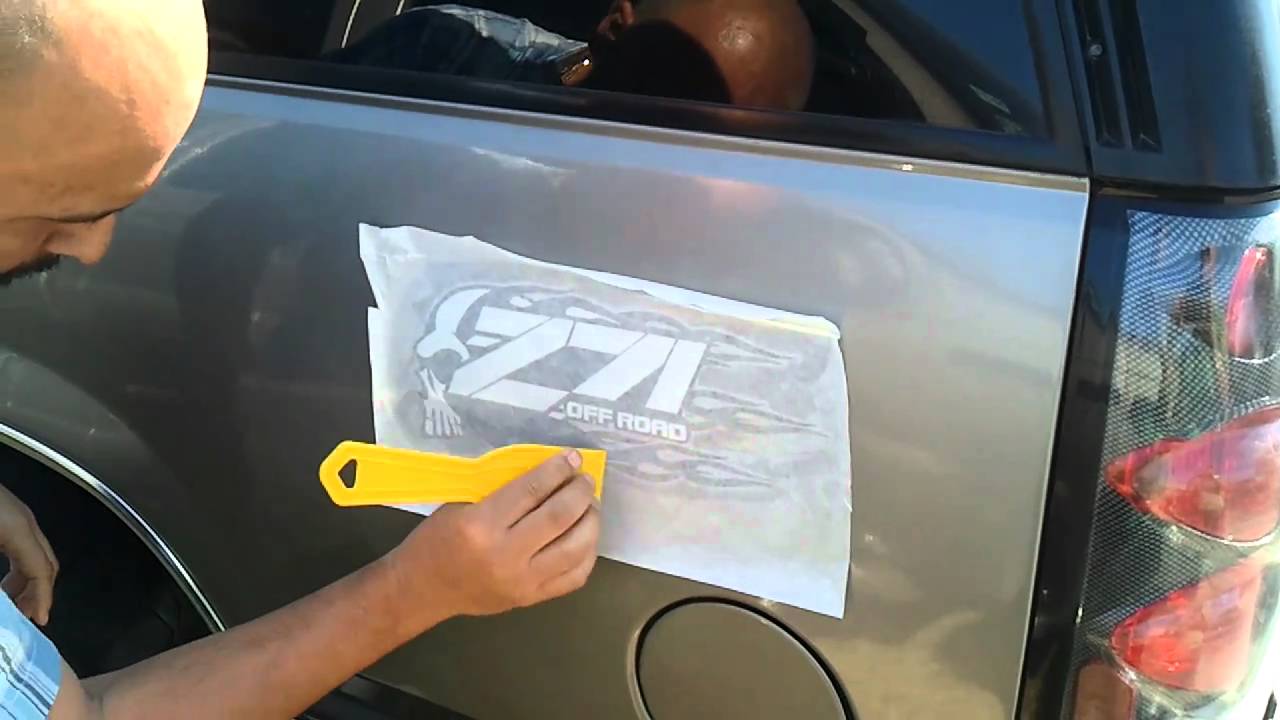
Once the sticker is correctly aligned, you can move on to the stage of how to put a sticker on a car that most people recognize as the actual application, where you remove the backing and lay the graphic onto the prepared surface. Start from one edge and peel the liner away slowly while pressing the exposed adhesive down with a soft squeegee or a credit card, working from the center toward the edges to push out any trapped air and avoid forming bubbles.

Apply firm and even pressure along the entire surface, making sure the sticker conforms to the curves and contours of the panel without stretching or distorting the material, which is essential for understanding how to put a sticker on a car that looks professional. If bubbles appear, carefully lift the edge of the sticker, reapply a small amount of the soapy water if you are using the wet method, and then press the area again with the squeegee until the bubble disappears and the adhesive bonds smoothly.
Trimming Excess Material and Using Sharp Tools for Clean Edges
After the sticker is fully applied and free of major bubbles, the next phase of how to put a sticker on a car involves trimming the excess material so that the graphics sit neatly against panels, moldings, or mounting holes. You should use a sharp hobby knife or a precision cutting tool, holding the blade at a shallow angle against the edge of the sticker to slice away the overhang without cutting into the paint.
Run the knife gently along the contour of the panel, using a light touch and multiple shallow cuts instead of forcing the blade, which reduces the risk of scratching the surface and gives you clean, professional edges. This careful trimming is an important finishing step in how to put a sticker on a car, because it eliminates unsistent flaps, prevents the edges from lifting, and ensures that the graphic integrates seamlessly with the vehicle's design lines.
Curing Time and Long-Term Care to Maintain the Sticker's Appearance
Many people overlook the curing phase when learning how to put a sticker on a car, but allowing the adhesive to set properly is vital for the sticker to withstand wind, vibration, and weather without warping or peeling. It is generally recommended to wait at least forty-eight hours before driving the vehicle in heavy rain or exposing it to extreme temperatures, so that the adhesive can bond securely to the paint.
For long-term maintenance, you should wash the car with gentle soap and avoid aggressive automatic brushes at commercial carwashes, especially near the edges of the sticker, because harsh scrubbing can prematurely wear the material and compromise the adhesion. By following these aftercare tips as part of your overall approach to how to put a sticker on a car, you can enjoy a vibrant, well-fitted graphic that keeps looking great through countless seasons and miles on the road.
Como aplicar um adesivo de vinil
A especialista em tecnologia Caree Sisson demonstra como aplicar um adesivo de vinil no vidro de um carro. Este adesivo foi ...
