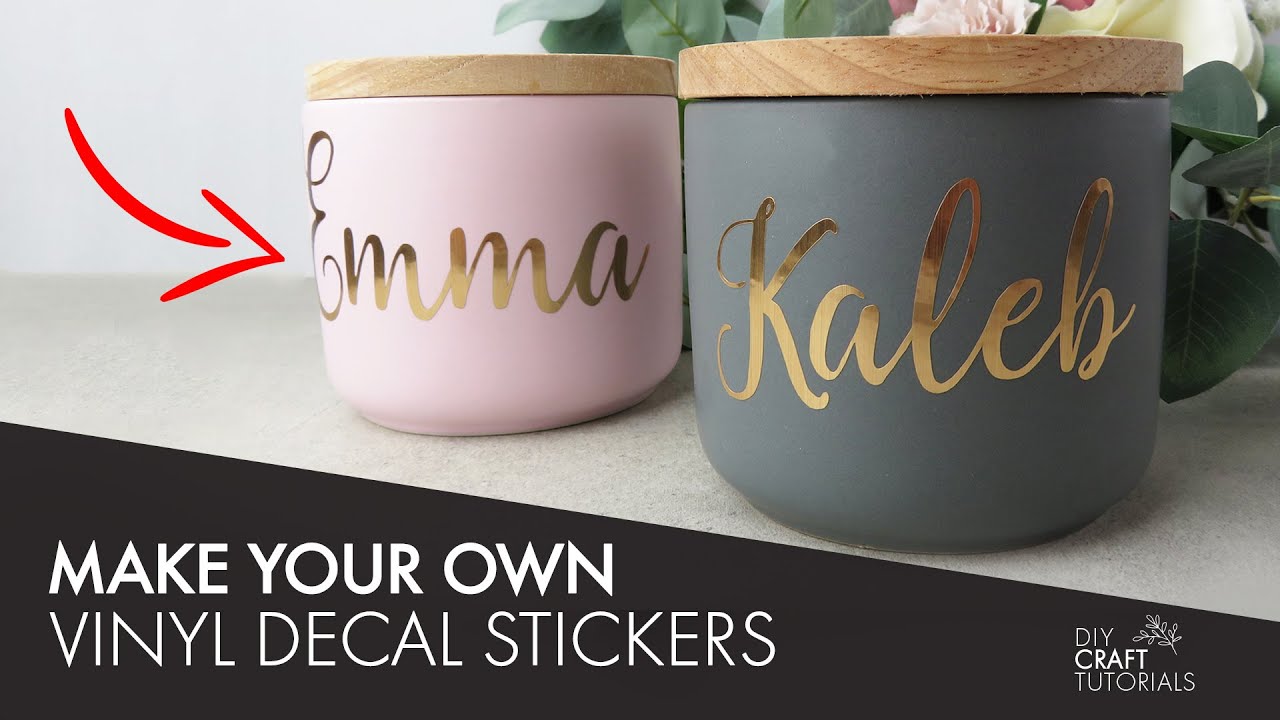
How To Make Decal Stickers

Making your own decal stickers is a rewarding way to personalize your gear, promote your brand, or experiment with creative designs without paying high print-on-demand prices. In this guide, you will learn how to make decal stickers from concept to finished, weather resistant piece using reliable methods and tools that work for beginners and small makers.
Plan Your Design and Prepare the File
Every successful sticker starts with a clear design idea, so take a moment to sketch or define the image, text, and overall style you want. Think about how the colors will layer, whether you need a simple outline or a detailed illustration, and how the sticker will look once it is cut and applied to a surface.
When you move to your computer, create or import your artwork in a vector editor so you can keep clean lines and resize without losing quality. Save the file in a format compatible with your cutting software, usually as SVG or DXF, and simplify small details that might break during cutting or peeling. If you prefer to buy designs, look for commercial use assets that match the style you want, then adjust colors and size so the future decal stickers fit your project.

Choose Your Materials and Cutting Method
Choosing the right materials is one of the most important parts of how to make decal stickers that last outdoors and look professional. For durable results, use a cast vinyl that stretches and conforms to curves, and pick a matching transfer tape that holds all the pieces together during application. If you are just testing the process, you can start with a cheaper calendered vinyl and a low tack transfer tape to practice alignment and weeding.
You have two main cutting options, a precision cutter or a manual approach with a hobby knife. A cutting machine gives clean, repeatable cuts and is ideal for text, logos, and intricate shapes, while hand cutting works for very simple silhouettes or one off designs. Whichever method you choose, make sure the blade is sharp, the speed and pressure settings match your vinyl, and you test cut on a small piece before committing to the final sheet.
Weed the Excess Vinyl and Build Layers
Weeding means removing the extra vinyl around your shapes so that only the parts you want as stickers remain, and it requires patience and a little practice. Use a weeding tool or a needle to lift small pieces, and cut complex shapes into simpler sections so you can weed more easily without pulling up parts of your design. As you progress, you will develop a rhythm that helps you avoid tearing thin elements and keeps the lines of your decal stickers crisp.

If your design has multiple colors or layers, cut and weed each color separately, then align them carefully on a flat surface before applying the transfer tape. Pay attention to registration marks or overlapping edges, because even a small shift at this stage will be visible once the sticker is on a surface. Taking your time during weeding and layer alignment is a big part of learning how to make decal stickers that look professional and ready to sell or gift.
Apply Transfer Tape and Cut to Final Size
Once your vinyl layers are ready, smooth a sheet of transfer tape over them and use a scraper to remove air bubbles, ensuring strong adhesion across every detail. After the transfer tape is firmly pressed, trim the excess vinyl with a little extra border around the edges so you can handle the piece without losing parts. This step is essential in how to make decal stickers that stay together during installation, especially for detailed graphics or small text.
Before you remove the original backing, temporarily test the adhesion by peeling back a corner of the transfer tape to confirm that the vinyl sticks to it more than to the carrier sheet. If parts of your design lift off, press the transfer tape down more firmly or adjust the weeding so that every element is securely attached. When the test is successful, you are ready to position the sticker on its final surface.
Position, Apply, and Seal the Sticker
Good positioning is the difference between a crooked sticker and a polished finish, so use a ruler, a level, or a light grid on your work surface to align the decal before committing. Hold the transfer tape and sticker close to the surface, lower it down at a slight angle, and press from the center outward to push out air traps that can cause peeling later. After the sticker is in place, slowly remove the transfer tape at a low angle, and if small pieces stay behind, use the tip of the tape or a soft tool to encourage them to release.
For extra durability, especially on items that will be washed or exposed to sunlight, consider applying a clear overcoat or using a laminator designed for adhesive projects. Press firmly along edges once more, wipe away any dust, and let any applied coating dry according to the manufacturer instructions. Following these final steps will show how to make decal stickers that stay bright, colorful, and intact through regular use.
Troubleshoot Common Issues and Improve Your Process
Even with careful preparation, you might encounter lifting edges, wrinkles, or tiny gaps, so it helps to know the most common causes and fixes. If the vinyl does not feed smoothly into your cutter, check the mat, blade depth, and speed settings, and if the design curls after application, ensure you have removed the transfer tape completely and pressed the edges down while they were still warm.

As you repeat the process, keep notes on which materials, cut settings, and weeding techniques work best for your specific machine and designs. Gradually you will master how to make decal stickers that look store bought, and you can experiment with bolder colors, more detailed artwork, and special finishes. With consistent practice and attention to each step, making high quality stickers becomes faster, more reliable, and a lot more fun.
Conclusion
By planning thoughtful designs, choosing quality materials, and following each cutting, weeding, and application step, you can create durable, eye catching decal stickers that stand up to daily use. Keep experimenting with colors, techniques, and finishes, and soon you will have a reliable workflow for producing professional looking stickers on demand. Whether you are customizing your belongings or building a small brand, the skills you practice here will help your decals look great and last longer.
How to make Decal Sticker at home DIY
How to make U.S. Air Force Insignia decals out of colored packing tape at home easy. Handmade World War II Roundel Sticker ...
