How To Make Car Decals

Making car decals is a fun and practical way to personalize your vehicle, and with the right tools and techniques you can create professional looking designs at home. Whether you want to add a subtle emblem, a bold racing stripe, or a custom graphic that reflects your personality, understanding how to make car decals opens up endless creative possibilities for your ride.
Design Your Decal Concept
The first step in how to make car decals is turning your idea into a clear, workable design. Start by considering the purpose and placement of the decal, because a small door logo will need different proportions than a full side graphic. Sketch your concept on paper or use vector software so you can refine shapes, text, and details before committing to the final print.
Keep in mind that car surfaces are curved, so designs with clean lines and simplified shapes will wrap more naturally than intricate illustrations. When you learn how to make car decals, aim for strong contrast between the graphic and the background color so the decal remains visible from a distance. Use bold typography, simple icons, and limited colors to create a design that looks great both up close and while driving past.

Tips for a Strong Design
- Limit your color palette to match or complement your car’s paint.
- Test the design at actual size by printing a draft on regular paper.
- Check sightlines so the decal does not cover important labels or safety features.
Choose Materials and Tools
Once your design is ready, choosing the right materials is a crucial part of how to make car decals that last. You can go with removable vinyl for easy changes, or durable cast vinyl for a long term, weather resistant finish. Each type of vinyl has different adhesive properties, so pick one that suits how long you want the decal to stay and how much exposure to sun, rain, and heat it will endure.
Beyond vinyl, you will need a cutting machine or precision craft knife, transfer tape, a squeegee, cleaning supplies, and measuring tools. If you are experimenting for the first time, a basic starter kit with a small vinyl roll and a handheld cutter can teach you the process without a big investment. As you refine your technique, you can upgrade to larger printers, professional grade vinyl, and contour cutting tools that make trimming around curves much easier.
Essential Tools Checklist
- Vinyl sheet in your chosen colors
- Cutting machine or Xacto knife
- Transfer tape or low tack masking tape
- Squeegee or credit card for smoothing
- Ruler, measuring tape, and masking tape
Prepare and Print the Decal
Preparing the file for print is a key stage in how to make car decals, especially if you are using a digital printer at a shop or a wide format printer at home. Export your design in a vector format whenever possible, because lines stay sharp at any size and the file is easier for cutting software to interpret. If you are printing with a raster printer, make sure the resolution is at least 300 dpi at the final size to avoid pixelation.

When you send the file to the printer, choose a weather resistant vinyl and confirm the print settings for that material. Many professional shops can print and cut in one step, which reduces the chance of misalignment. If you are cutting by hand, print the design at full size, align it with the vinyl, and use it as a template to guide your cuts. Taking time to double check colors, scale, and alignment here will save you frustration later during installation.
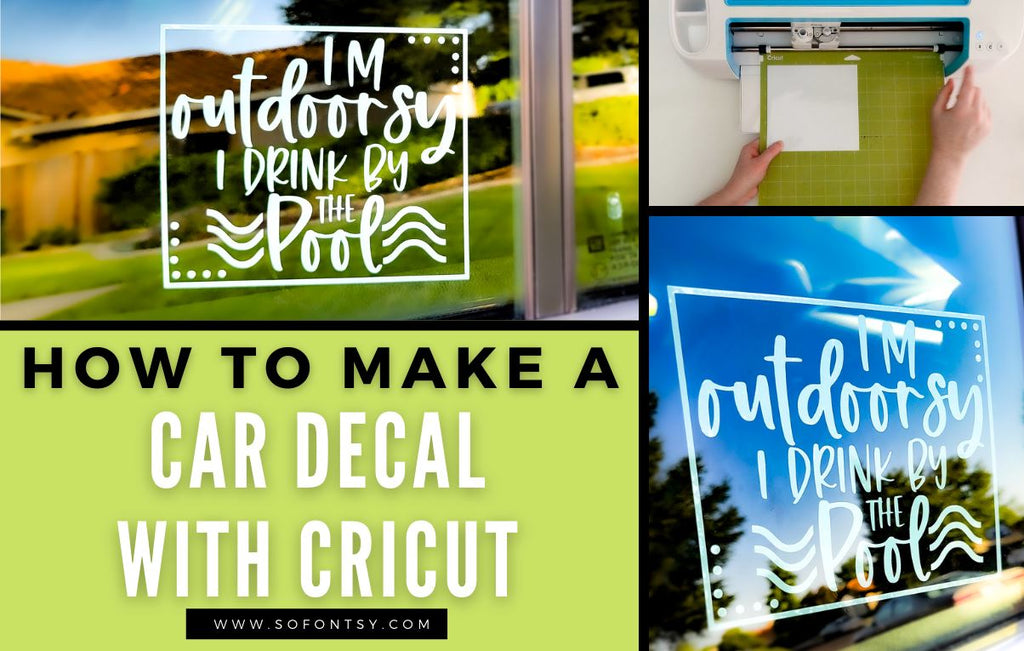
Cut Out the Decal Precisely
Cutting is where your design transitions from a print to a real car decal, so accuracy matters in how to make car decals. If you use a cutting machine, load the vinyl according to the manufacturer’s guide, set the correct blade depth, and let the software do the tracing. For detailed sections or tight corners, pause the machine occasionally to check that the vinyl feeds smoothly and that the cut goes through the vinyl but not the backing.
For hand cutting, place the printed template on top of the vinyl and secure it with a few pieces of low tack tape. Follow the lines with a sharp craft knife, using a metal ruler for straight edges and a steady hand for curves. Cut slowly, and make multiple light passes instead of forcing the blade, because clean edges reduce fraying and make the final decal look polished.
Common Cutting Issues and Fixes
- Jagged edges: replace the blade or lower the cutting speed.
- Pulling vinyl: check that the mat or table surface is clean and not static charged.
- Misaligned cuts: ensure the design is properly mirrored if required by your material.
Apply the Decal to Your Car
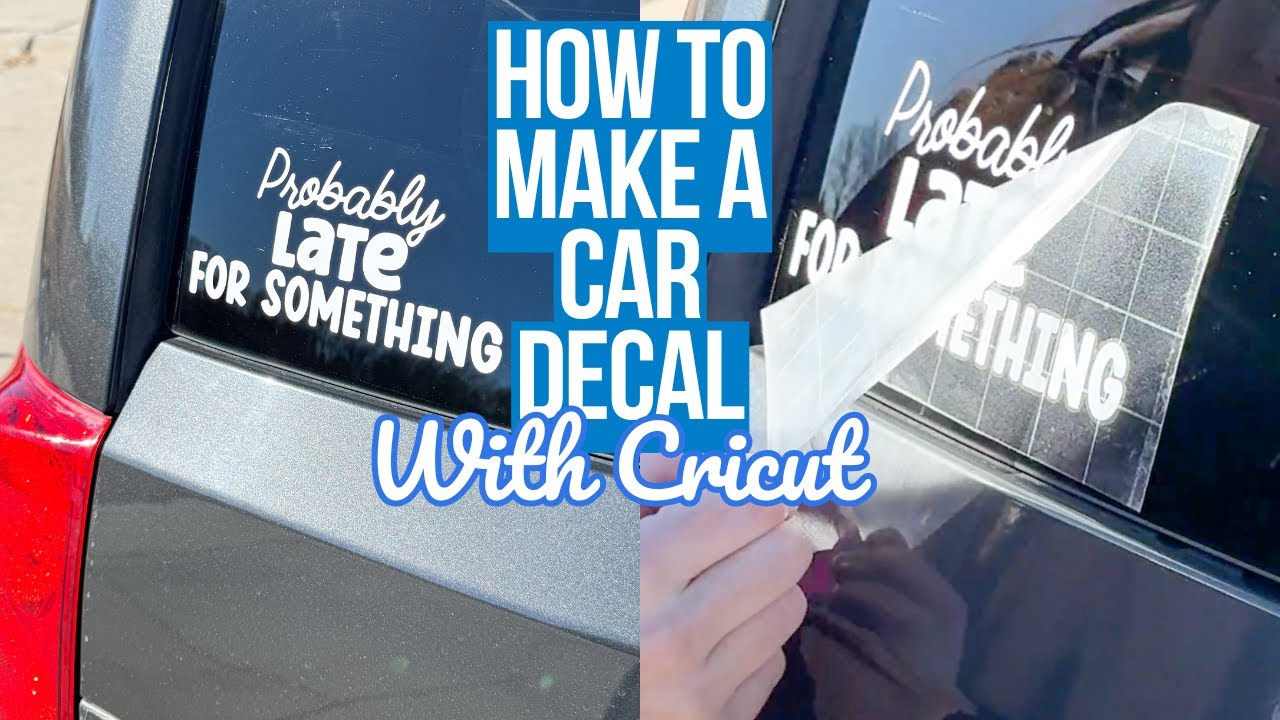
Installing the decal carefully is the final and most decisive step in how to make car decals that look professional. Start by cleaning the area with soap and water, then use rubbing alcohol to remove any wax or residue that could prevent good adhesion. With the decal still on its backing, measure and mark the center point so you can position it accurately without having to peel and re stick.
Peel a small section of the backing, align the exposed edge with your mark, and press it down firmly while continuing to peel the backing slowly. Use a squeegee or a soft cloth to push out air bubbles from the center outward, working toward the edges. On curved panels, make small relief cuts at the ends if needed, but keep them hidden near edges or seams so they are not noticeable from a distance.
Installation Best Practices
- Work in a shaded, calm area to prevent the vinyl from stretching in the sun.
- Use low tack tape as temporary guides before committing to the final position.
- Avoid washing the car for at least 48 hours to let the adhesive cure.
Maintain and Remove Your Decal
After you master how to make car decals, caring for them properly will keep them looking sharp between washes. Rinse your car regularly to prevent dirt buildup around the edges, and use a soft sponge rather than abrasive brushes on the decal area. If you notice small lifting edges, gently press them back down and consider using a compatible automotive vinyl sealant to improve adhesion without damaging the finish.
When the time comes to remove the decal, do it slowly and use heat sparingly to avoid damaging the paint. A hairdryer on low or moderate heat, applied from a distance, can soften the adhesive and make peeling easier. If residue remains, use a mild adhesive remover or isopropyl alcohol, followed by a thorough wash and wax to restore the surface. By following these steps, your custom car decal project can be both creative and car friendly.
Creating your own car decals combines design, cutting, and installation skills, and each successful project helps you refine your technique. With practice, you will gain confidence in choosing colors, solving tricky curves, and applying graphics that look great in any light. Ultimately, how to make car decals is about turning your ideas into durable, eye catching art that turns heads every time you hit the road.
Create and Sell Car Decals with Your Cricut | DIY Business Ideas
Want to make money from home with your Cricut machine? In this step-by-step Cricut tutorial, I'll show you how to make and sell ...
