How To Install Vinyl Decals On A Car
Installing vinyl decals on a car is a rewarding way to customize your ride, and with a little patience and the right tools, you can achieve a professional finish at home.
Gather Your Tools and Prepare the Surface
Before you begin applying any design, it is essential to have the right toolkit and a meticulously cleaned surface. High-quality vinyl decals stick best when the paint is free from dust, dirt, and old wax. You will need a soft microfiber towel, a spray solution of warm water and a few drops of dish soap, a plastic scraper or credit card, a squeegee, and a craft knife for trimming. Clean the area where the decal will go by washing the car and then wiping the spot with isopropyl alcohol to remove any remaining residue. This preparation step is crucial because even tiny particles can prevent the adhesive from bonding evenly and cause bubbling or lifting over time.
While the vinyl itself is generally forgiving, the surface of the car must be completely dry before you start. Moisture trapped beneath the decal will compromise adhesion and lead to premature peeling. Take a moment to inspect the panel for any rough patches or chipped paint, as these irregularities will be visible through the material. If the surface is uneven, gently smooth it with light pressure using the plastic scraper wrapped in a soft cloth. By investing time in this stage, you ensure that the decal adheres smoothly and stays vibrant for years without frequent touch-ups or replacements.

Measure and Position the Decal Carefully
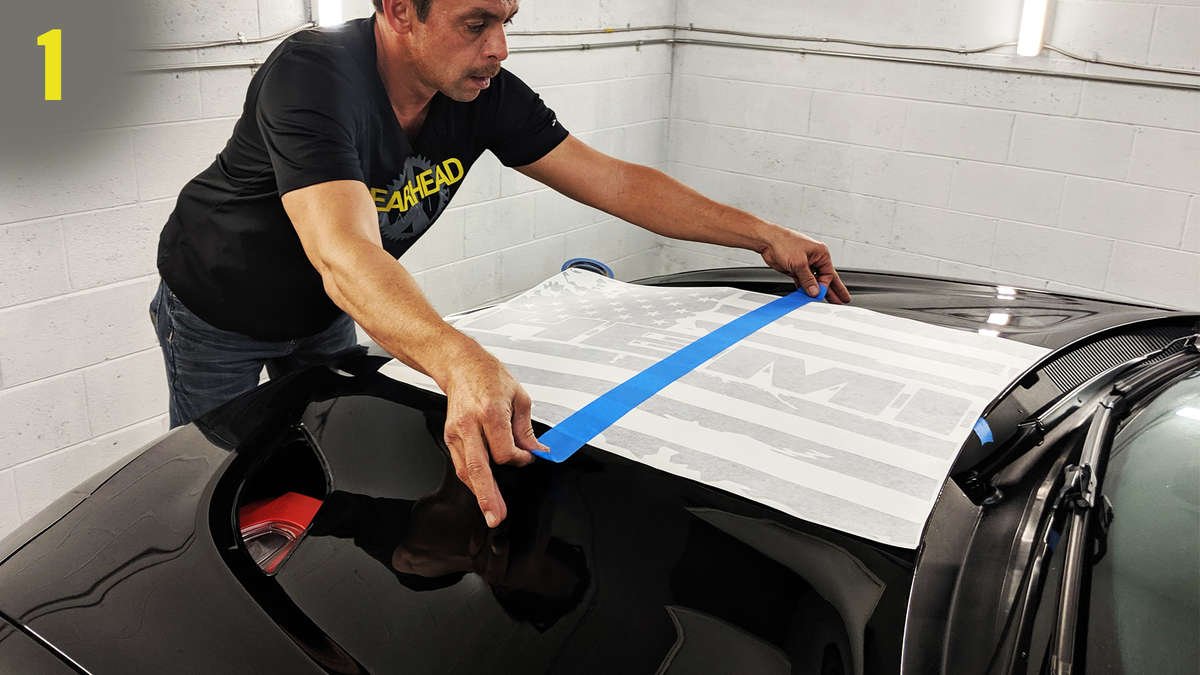
Accurate placement is just as important as surface preparation when you install vinyl decals on a car. Use measuring tape or a ruler to mark the center point of the area and compare it with the dimensions of the decal. Many installers find it helpful to use temporary masking tape to outline the borders lightly, creating a visual guide that can be removed later. Step back frequently to view the decal from driving distance, ensuring that the design aligns with the curves and lines of the panel. If the decal has a clear top layer or transfer tape, keep it intact until you are certain the positioning is perfect, because removing and reapplying can stretch the material and affect adhesion.
For larger designs or multiple pieces, consider using a chalk pencil to sketch the outline lightly on the paint before removing the backing. This technique is especially useful for symmetrical patterns or graphics that must align with existing creases on the vehicle. Remember that small adjustments are easier to make before the adhesive touches the surface than after the decal is firmly set. Once you are satisfied with the alignment, gently lift one edge of the decal to confirm that the placement feels right, and only then proceed to the next step of peeling and applying.
Peel and Apply with a Smooth Motion
With the position confirmed, it is time to peel the backing and apply the vinyl to the car. Slowly remove the liner or transfer tape at a sharp angle, keeping the decal as flat as possible to avoid air pockets. If the decal starts to curl, press the exposed adhesive lightly onto the car surface while continuing to peel the backing, rather than letting it roll up freely. As the vinyl makes contact, begin at the center and work outward, using a soft squeegee or your hand wrapped in a microfiber cloth to press the material down evenly. This motion helps the adhesive flow into the contours of the panel and pushes out trapped air before it can form bubbles.
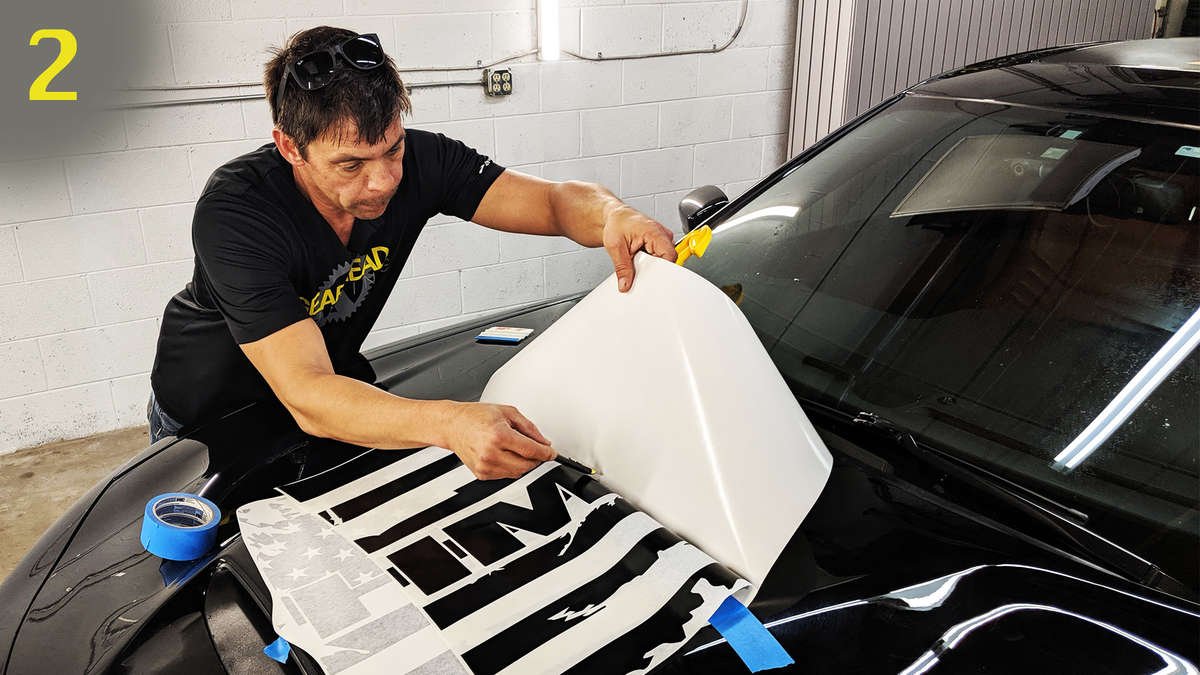
Apply firm but controlled pressure, focusing on the edges and corners where lifting often occurs. If you notice any wrinkles or misalignment, carefully lift the edge and reposition while the adhesive is still pliable. Avoid stretching the vinyl aggressively, because overstretching can distort the design and cause the material to retract later. For best results, work methodically from one side to the other, ensuring that the decal sits flush against the paint without shifting. A calm, steady approach during this phase dramatically reduces the need for rework and contributes to a long-lasting finish.
Use Heat and Detail Tools for Trimming
After the main body of the decal is applied, you will often need to trim excess material around door handles, moldings, or panel edges. A sharp craft knife or razor blade, held at a shallow angle, works well for cutting vinyl without scratching the underlying paint. Run the blade gently along the border, using a straight edge or the vehicle’s panel line as a guide for precision. When cutting near curves, rotate the car slightly or reposition your hand to maintain a steady, controlled stroke. This attention to detail prevents jagged edges and ensures that the decal integrates seamlessly with the car’s factory lines.
For stubborn areas where the vinyl does not want to conform, such as tight corners or textured surfaces, a heat gun or hair dryer on a low setting can be helpful. Brief application of warmth makes the material more flexible, allowing it to relax and adhere to complex shapes without lifting. Be cautious not to overheat the vinyl, as excessive heat can damage the adhesive or distort the graphics. After trimming, run the squeegee once more over the entire decal to reinforce the bond, focusing on the edges and seams. These final touches transform a simple application into a refined, durable installation that looks like it came from a professional shop.

Protect and Maintain Your Custom Look
Once the installation is complete, protecting your work ensures that the decal remains vibrant and intact through varied weather conditions. Wait at least twenty-four hours before washing the vehicle, giving the adhesive time to cure fully. When you do clean the car, use a gentle car shampoo and a soft sponge, avoiding harsh brushes or abrasive cloths that could catch on the edges. Regular rinsing with clear water helps prevent the buildup of contaminants that could gradually lift the vinyl, especially around the borders.
For long-term durability, consider applying a paint-safe ceramic coating or a clear protective film over the decal, particularly if it is exposed to heavy road debris or intense sunlight. Avoid aggressive automated car washes with stiff brushes, as they can peel the edges and compromise the design. Instead, opt for touchless washes or hand rinsing to preserve the finish. By following these maintenance practices, you protect your investment and enjoy a striking, customized appearance that stands out every time you hit the road.
Troubleshoot Common Issues Quickly
Even with careful preparation, minor issues like bubbles or lifting corners can appear after installation. To fix a small bubble, gently lift the edge of the decal, press the air out toward the nearest edge, and smooth the material back down with firm pressure. Larger bubbles may require partially lifting the vinyl, so proceed slowly to avoid tearing or misalignment. If edges begin to peel, a targeted application of heat along the lifted area can reactivate the adhesive, allowing you to re-press it into place securely.

In some cases, the vinyl may lose its initial gloss or develop a cloudy appearance over time, especially on darker paint. A quality automotive polish designed for vinyl or PPF can often restore clarity without harming the graphics. If the decal shows signs of cracking or fading, evaluate your washing routine and exposure to harsh chemicals, as these factors can accelerate wear. Addressing problems early and adjusting your care habits helps maintain a crisp, professional look and extends the life of your vinyl customization.
Conclusion
By methodically preparing the surface, measuring accurately, applying with steady pressure, and protecting the finished result, you can install vinyl decals on a car with confidence and enjoy a bold, personalized look that turns heads wherever you go.
How to install decals like a PRO!
via YouTube Capture.
