How To Apply Vinyl Decals To A Car
Applying vinyl decals to a car is a popular way to customize your vehicle’s look without the permanence of paint, and with a few careful steps you can achieve a professional finish at home.
Preparing the Surface for Decal Application
The foundation of a flawless decal install is a meticulously prepared surface, free of dirt, grease, and old wax. Before you even remove the backing, give your car a thorough wash and dry, paying special attention to the areas where the vinyl will sit, because any embedded particles can cause bubbles or lifting later.
After washing, use an isopropyl alcohol solution to decontaminate the panel, which removes residual oils, silicones, and brake dust that standard soap might miss. It is also wise to choose a shaded area or work indoors to prevent the adhesive from setting too quickly in direct sunlight, and ensure the paint is completely cool to the touch before proceeding.

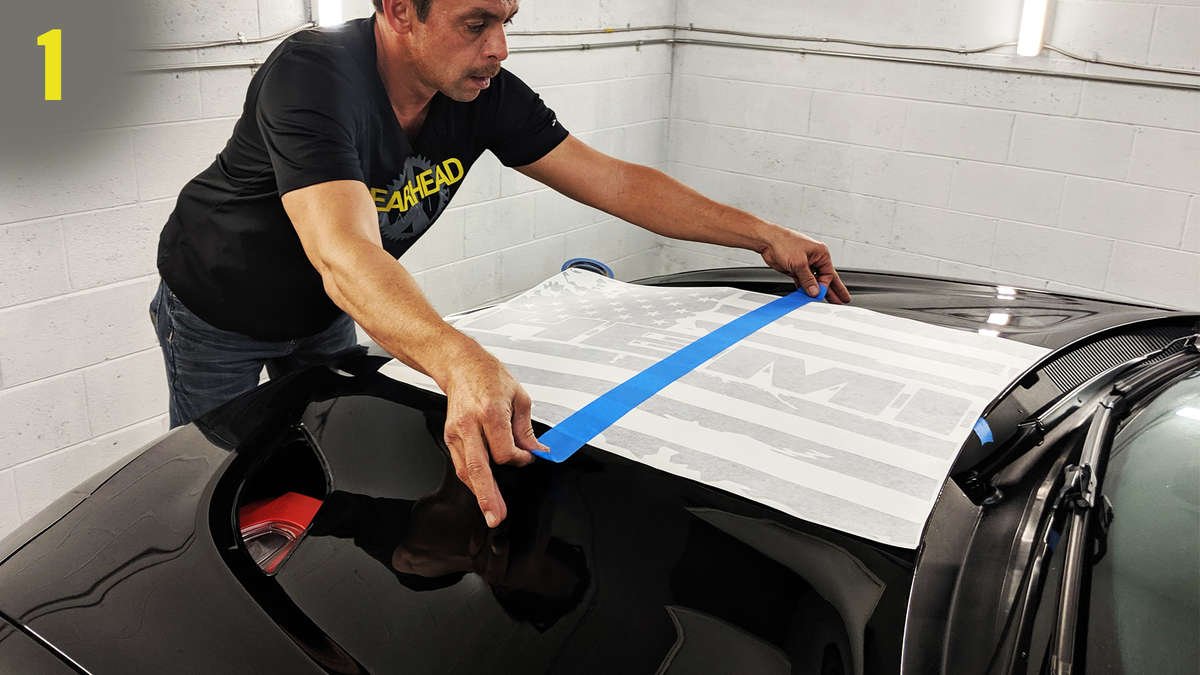
Measuring and Positioning the Decal
Take your time with layout, because precise alignment is one of the most critical parts of how to apply vinyl decals to a car, especially on curves or door edges. Use painter’s tape to temporarily secure the decal in place, stepping back frequently to view it from driving distance and confirm that it looks level and proportional.
For complex shapes, you can mark reference points on the car with chalk or low-tack tape to maintain consistent spacing, and if the decal has multiple components, assemble them on a flat surface first to verify the design before transferring them to the vehicle. When you are satisfied with the positioning, double-check that the surface underneath is clean again, as dust can become trapped once the adhesive makes contact.
Peeling and Applying the Decal
With the position confirmed, carefully peel the vinyl decal from its liner at a sharp angle, exposing only a small section of adhesive edge to prevent the vinyl from curling uncontrollably in the air. If the decal has a transfer tape on top, keep it in place for now, because it will help you slide and align the vinyl without stretching or tearing.

Slowly lay the exposed portion onto the car, pressing gently from the center outward to push out air and avoid wrinkles, then gradually peel the liner away while smoothing the vinyl down with a soft squeegee or a plastic card. Work from the center toward the edges, using light pressure so the adhesive bonds evenly, and if the decal resists laying flat, lift slightly and re-position instead of stretching the material, which can distort the design.
Using a Squeegee for a Smooth Finish
Proper squeegee technique is essential to achieve a bubble-free result when you apply vinyl decals to a car, and it also helps activate the adhesive for a stronger hold. Start at the center and move outward in long, smooth strokes, pressing firmly enough to seat the vinyl but not so hard that you damage the paint or create new ripples.
For edges and corners, lift the squeegee slightly and use the tip to press the vinyl into contours, paying extra attention to areas around door handles, seams, and trim where the decal might not lie completely flat. If small bubbles remain after initial squeegeeing, gently lift the edge of the decal and re-squeeze from the center toward the exit point, repeating until the surface is smooth.

Trimming and Final Inspection
Once the vinyl is fully applied, use a sharp hobby knife or precision trimmer to carefully cut away any excess material along edges, wheel wells, or drip rails, following the natural lines of the car for a seamless look. Before you consider the job complete, inspect the decal from multiple angles and in different lighting to catch tiny air pockets, lifted corners, or misalignment that might need reworking.
If you find minor imperfections, a heated hair dryer on a low setting can make the vinyl more pliable, allowing you to gently smooth it back into place, but avoid overheating the material or the paint. When everything looks crisp and secure, give the decal a final wipe down to remove any dust, and resist washing the vehicle for at least twenty four hours to ensure the adhesive cures properly.
Long-Term Care and Maintenance
To keep your newly applied vinyl decals looking sharp, adopt a gentle washing routine, using a soft mitt and avoiding high-pressure nozzles directly on the edges, which can gradually work the adhesive loose over time. Parking in shaded areas when possible and avoiding harsh automatic car washes will extend the life of the vinyl, preventing premature fading or peeling caused by UV exposure and abrasive brushes.

Over months, you may notice the edges lifting, and a quick application of rubbing alcohol and careful re-squeegeeing can often re-bond the vinyl without needing to replace it entirely. By treating the decal with care and addressing small issues early, you can enjoy a customized, vibrant look that remains intact through seasons of driving.
By following these steps for how to apply vinyl decals to a car, you transform a simple sticker into a polished, custom finish that enhances your vehicle’s personality while protecting the original paint underneath.
Como aplicar um adesivo de vinil
A especialista em tecnologia Caree Sisson demonstra como aplicar um adesivo de vinil no vidro de um carro. Este adesivo foi ...
