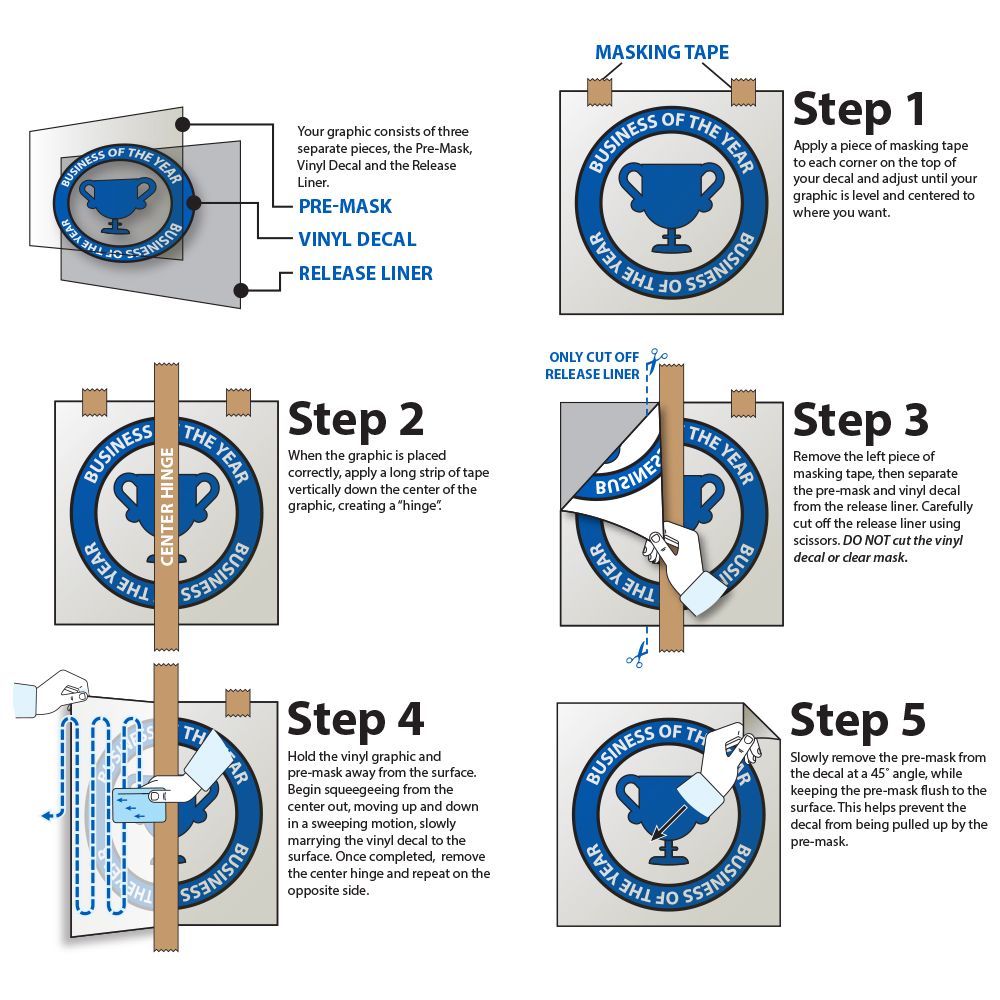
How To Apply A Window Sticker

Applying a window sticker the right way makes your car stand out on the lot and look professionally detailed from the moment you drive off.
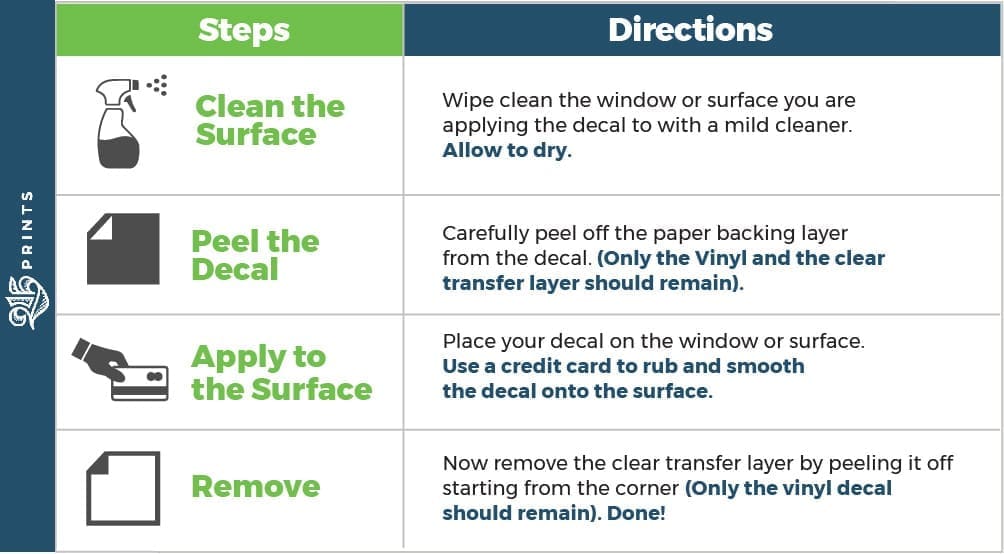
Clean the glass thoroughly before you begin
A flawless window sticker application starts with a perfectly clean surface, because dust, grease, or old residue will create bumps that lead to bubbles and peeling.
Begin by washing the outside of the glass with a dedicated automotive glass cleaner and a microfiber towel, then use a razor blade or plastic scraper to gently remove any stubborn water spots or existing decals from the area where the sticker will sit.
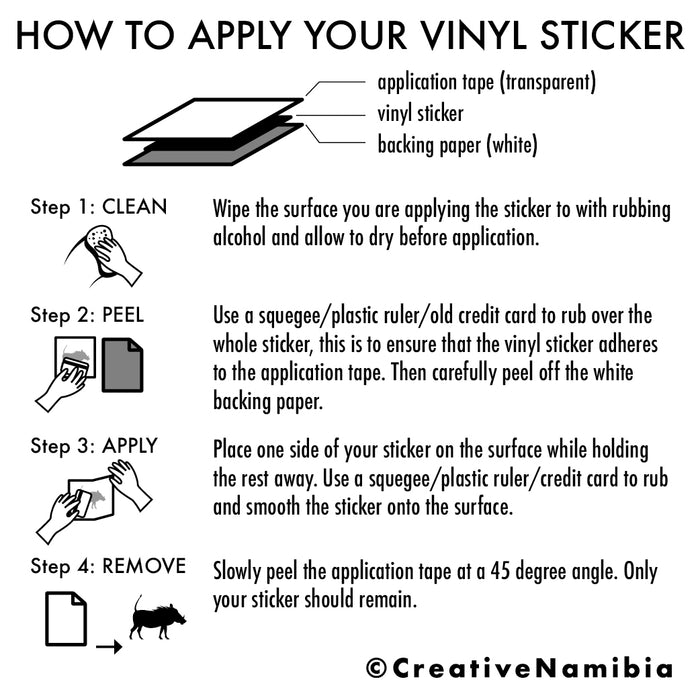
After the glass is streak free, wipe it down once more with isopropyl alcohol or rubbing alcohol to eliminate traces of wax, silicone, or hand oils, which helps the adhesive bond evenly and increases the longevity of your window sticker.
Gather your tools and measure the sticker carefully
Having the right tools on hand turns a potentially frustrating task into a smooth, precise process and reduces the need for rework.
- Soft microfiber towels for cleaning and drying
- Spray bottle with a few drops of dish soap mixed with water as a temporary slip solution
- Squeegee or a credit card for smoothing and pushing out water
- Razor blade or utility knife for trimming excess material
- Measuring tape to confirm the sticker dimensions match your window
Before you remove the backing, hold the sticker up to the glass and double check the size, orientation, and mounting holes if applicable, so you do not end up with a crooked window sticker that forces you to start over.

Position the sticker with a slip solution for easy adjustment
Instead of pressing the sticker down immediately, use a temporary soapy mixture that allows you to slide the sticker into the perfect spot without risking damage to the adhesive.
Spray the cleaned glass lightly with the soapy water, align the top edge of the sticker first, and gently place it onto the glass while maintaining a firm grip on the loose backing to keep the adhesive layers separate at first.
Use your fingers or a soft towel to hold the center in place, then slowly lower the rest of the sticker until it sits evenly across the glass, making sure the edges line up neatly with the window frame and any mounting points.
Squeegee out water and air bubbles methodically
Once the sticker is roughly in position, removing the trapped water and air is the most critical step for a long lasting, professional finish.
Starting from the center and working outward, use a soft squeegee or a plastic card to push water toward the edges, applying firm but gentle pressure so the sticker conforms fully to the glass without stretching.
As you smooth the surface, watch for lingering bubbles, and if you encounter small ones, carefully lift the edge of the sticker, release a little more water, and resume sweeping to eliminate them before the adhesive sets permanently.

Trim excess material and press the edges securely
After the sticker lies flat and bubble free, you need to remove the remaining backing and seal the edges so the decal stays intact through rain, heat, and washing.
Use a razor blade at a very shallow angle to carefully slice off any overhanging pieces, then run your fingernail or a firm tool along the borders to ensure the adhesive is completely bonded to the glass, paying special attention to corners where lifting is common.
If your window sticker includes perforated lines for easy tearing, follow them closely, and avoid cutting into the graphic itself, because clean edges enhance the overall appearance and give the decal a polished, factory installed look.
Protect your work during curing and long term care
Even after the sticker feels dry, the adhesive continues to cure, so gentle handling in the first hours prevents peeling and keeps the graphics vibrant for years.
Avoid high pressure washing directly at the edges, harsh chemicals that attack plastic or rubber trim, and abrasive cleaning pads, and instead use a soft cloth, mild soap, and a steady hand when wiping the window to preserve the crisp appearance of your newly applied window sticker.
By following these detailed steps, you can apply a window sticker that looks professional, stays firmly in place, and enhances your vehicle’s style without the stress of guesswork or reapplication.
How to Apply Artscape Window Film
An instructional video for applying Artscape's Decorative and Privacy Window Films. Featuring, "New Leaf" For more information, ...
