Diy Vinyl Decals
Creating your own diy vinyl decals is a fun and affordable way to personalize your gear, your ride, or your living space with bold graphics and custom text.
What Are DIY Vinyl Decals and Why They Are So Popular
DIY vinyl decals are cut designs made from adhesive vinyl that you can apply to almost any clean, smooth surface. They are popular because they are versatile, removable in many cases, and much more affordable than full custom prints or painted graphics. Whether you want subtle branding for your business or playful art for your laptop, a diy vinyl decal gives you control over color, size, and style. With a little practice, you can produce professional looking results without a big investment in equipment.
The appeal comes from the balance of quality and accessibility; the vinyl material is durable against weather and light indoor use, while the process stays friendly for beginners. You can start with simple shapes and text, then gradually experiment with layered designs, intricate lettering, and detailed illustrations. Because you are making them yourself, each diy vinyl decal can reflect your exact vision, whether that is minimalist, vintage, modern, or playful. This mix of craft and design freedom is why so many makers, small businesses, and hobbyists are exploring diy vinyl decals as a go to customization tool.
Essential Tools and Materials for Your First DIY Vinyl Decal Project
To get started with diy vinyl decals, you do not need a professional cutting machine right away, but having the right tools makes the process much smoother. At minimum, you will need adhesive vinyl sheets in your chosen colors, a precision cutting tool such as a craft knife or a basic vinyl cutter, and a cutting mat to protect surfaces. Transfer tape is also important, because it helps you move the decal from its backing to the target surface without losing alignment or causing wrinkles.
- Adhesive vinyl in matte or glossy finishes
- Craft knife, rotary cutter, or vinyl cutting machine
- Cutting mat with measurement grid
- Transfer tape and a squeegee or credit card
- Scissors, ruler, and masking tape
- Cleaning supplies like soapy water and a microfiber cloth
Optional but helpful tools include a weeding tool for removing small vinyl pieces, a heat gun for smoothing curves, and a printer or digital design software to create your artwork. You can begin by testing a diy vinyl decal on a small, inexpensive sheet to learn how your tools handle corners, curves, and fine text. Over time, you will discover which materials and techniques give you the cleanest edges and the longest lasting results.
Designing Your Decal: From Concept to Vector Ready File
The design phase is where your diy vinyl decal takes shape, so it is worth investing time in planning composition, colors, and legibility. Start with a clear idea, such as a logo, phrase, icon, or pattern, and consider how it will look when scaled to a specific size. Simple shapes and strong contrast between the vinyl and the surface usually work best, especially for text that needs to be readable at a glance. If you plan to sell or gift your decals, think about how your design can reflect your personal brand or the recipient’s style.
- Create outlines or paths instead of detailed shading for easier cutting
- Use bold, clean fonts that remain legible when reduced in size
- Test your design in black and white first to check contrast and balance
- Save your final artwork as a vector file for precise cutting
When preparing the file for a diy vinyl decal, you want to focus on clean lines and minimal overlapping elements, especially if you are cutting by hand or with an entry level machine. If you are using a cutting machine, follow the recommended settings for your vinyl type, and always do a small test cut before committing to the full sheet. A well prepared design reduces waste, speeds up the weeding process, and ensures that your decal looks polished from a distance as well as up close.
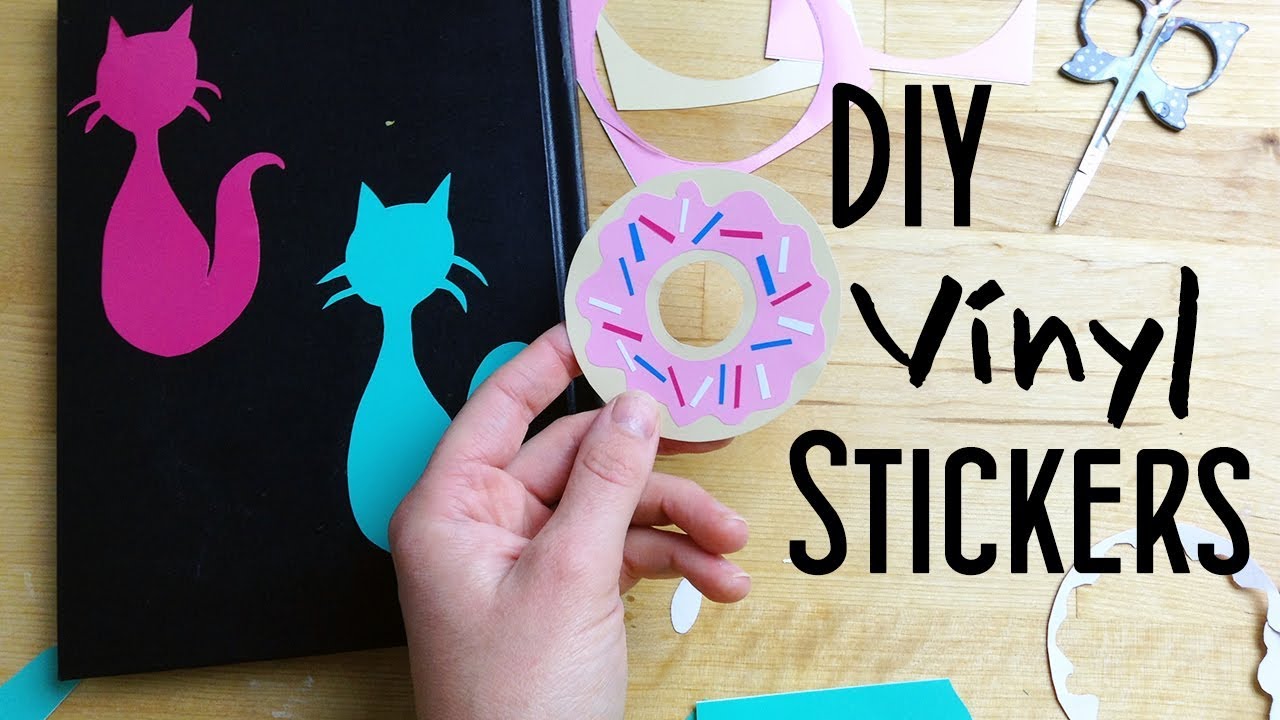
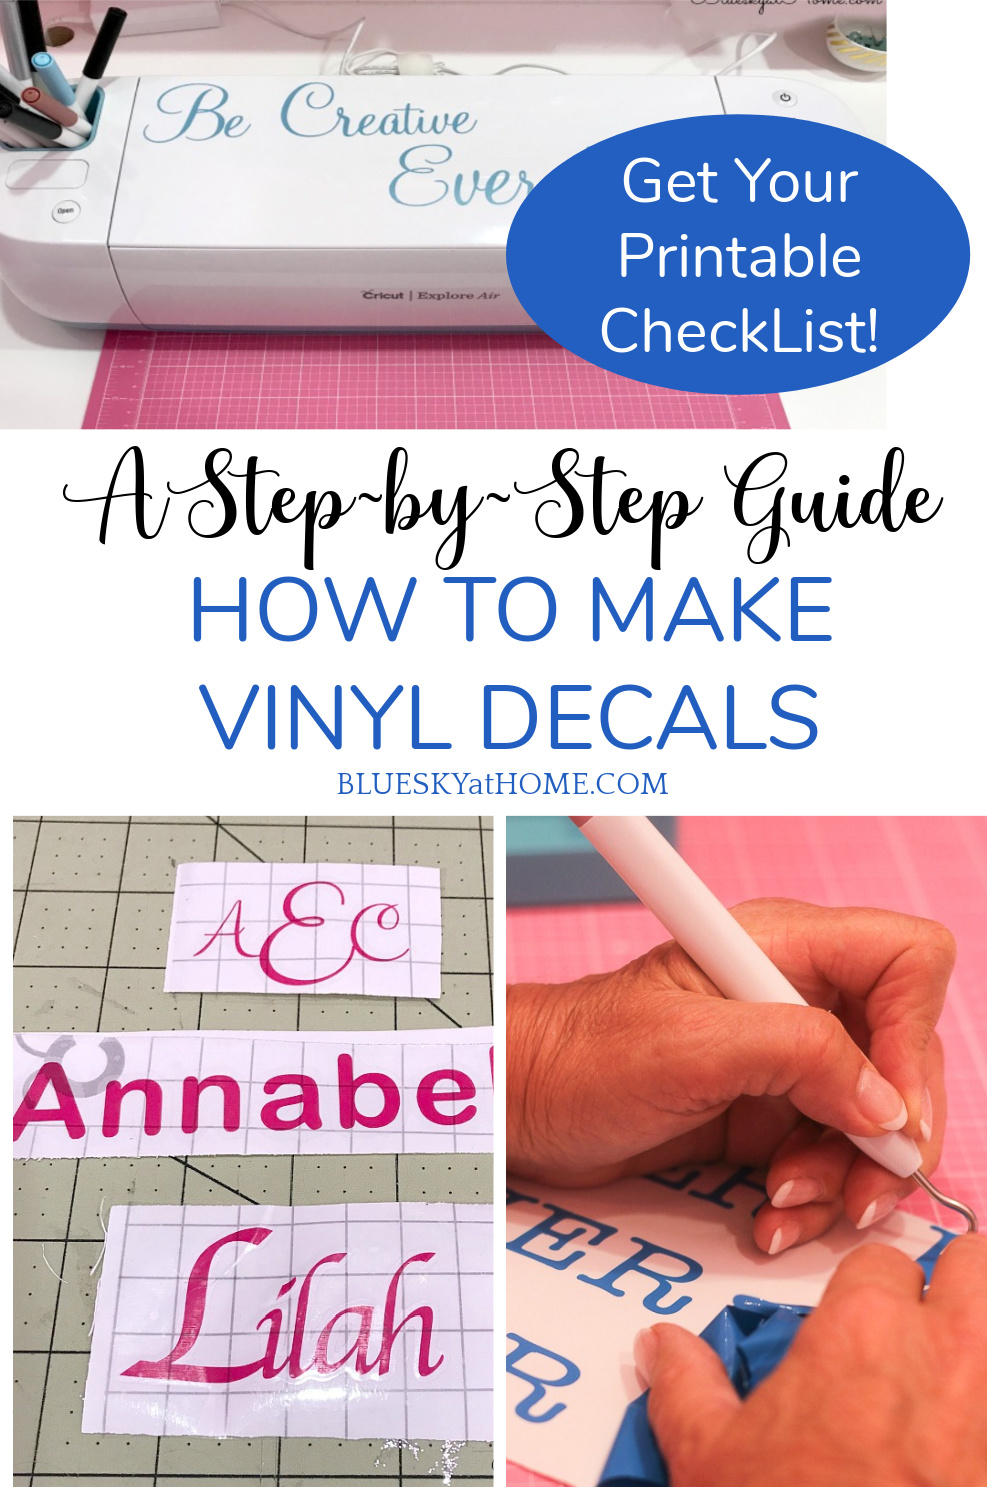
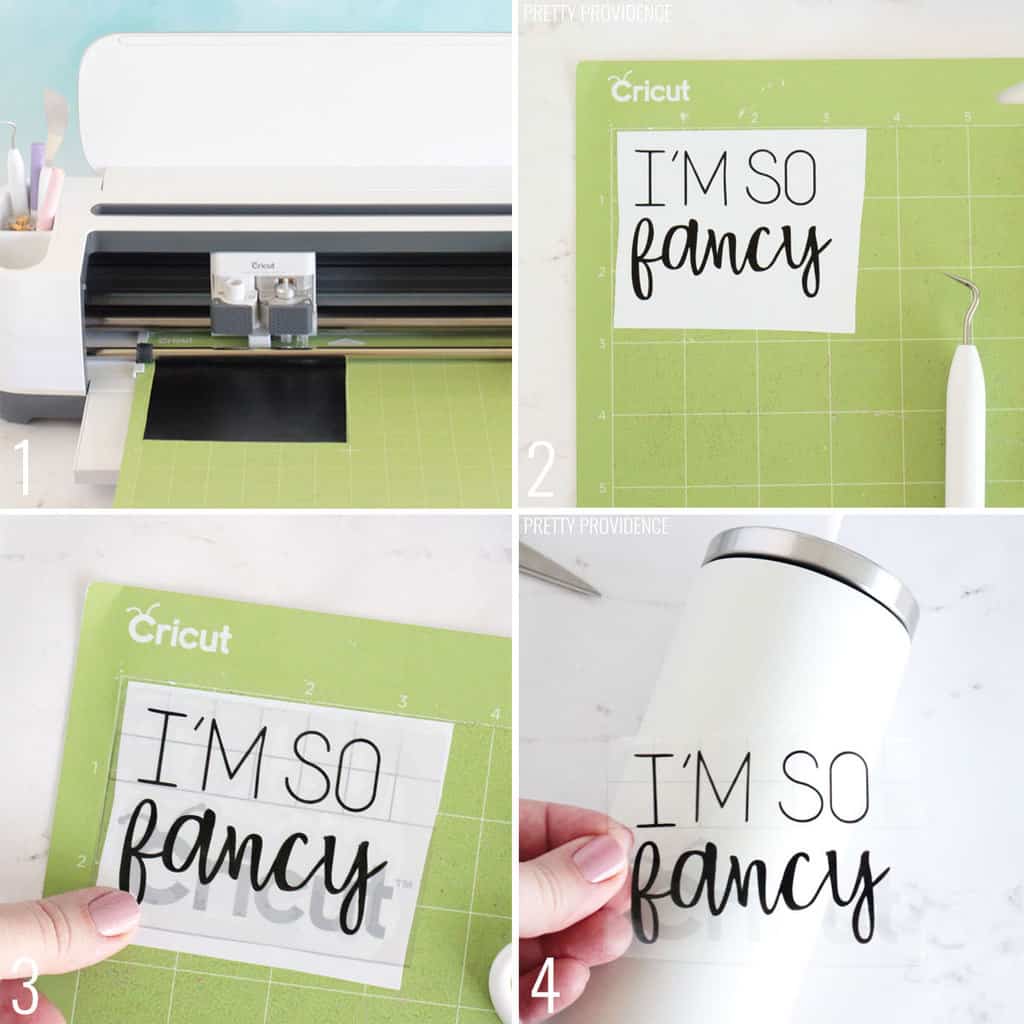
Cutting, Weeding, and Transferring Your DIY Vinyl Decal
Once your design is ready, the physical process begins with cutting the vinyl, where precision makes the difference between a crisp decal and a messy one. If you are using a knife or manual cutter, apply firm, even pressure and use a ruler for straight lines to support your diy vinyl decal’s shape. For machine cutting, double check the blade depth and speed settings to match the thickness of your vinyl. After cutting, the weeding step requires patience; you carefully remove the excess vinyl around your design, leaving only the parts you want to transfer.
Transferring the decal is often the most delicate step, because you need to keep the arrangement perfect while moving it from the backing to the final surface. Start by cleaning the target area, then apply transfer tape smoothly from one side to the other to avoid trapping air bubbles. Use a squeegee or the edge of a credit card to press the tape firmly onto the vinyl, then peel away the backing slowly while holding the transfer tape flat. If the decal resists sticking, a light pass of heat or a bit of repositioning spray can help it adhere without distortion. With practice, you will develop a rhythm that makes each diy vinyl decal feel smooth and controlled.

Applying and Maintaining Your DIY Vinyl Decal for Long Lasting Results
After your diy vinyl decal is in place, proper application techniques can prevent peeling, bubbling, and premature fading. Make sure the surface is completely dry and free from dust, oils, or residues that could interfere with adhesion. For larger or detailed decals, it can help to secure the transfer tape with a few pieces of masking tape until you are fully satisfied with the placement. Once the decal is smooth and attached, gently remove the transfer tape at a sharp angle, pulling steadily so the vinyl stays in place.
- Clean the surface with mild soap and water before applying
- Use a heat gun or hairdryer on low to soften vinyl on curved surfaces
- Avoid harsh chemicals that can degrade the vinyl over time
- Allow cured time before exposing to heavy rain or strong sun
To keep your decal looking fresh, occasional maintenance with a soft cloth and gentle cleaner will remove dust without lifting edges. If you notice small pieces starting to lift, a carefully applied heat or a tiny amount of adhesive can rescue your diy vinyl decal before it gets worse. With thoughtful placement and basic care, your custom designs can stay vibrant for years, turning everyday objects into personal canvases that showcase your creativity.
Expanding Your Skills: Advanced Techniques and Creative DIY Vinyl Decal Ideas
As you gain confidence, you can explore advanced approaches that take your diy vinyl decal projects to the next level. Layering multiple colors and textures, combining cut vinyl with printed overlays, or adding subtle gradients can create depth and visual interest. You might experiment with masking techniques that let you paint over vinyl and then remove it to reveal sharp, masked shapes. These methods open the door to intricate illustrations, realistic textures, and highly detailed signage that still carry the handmade charm of a diy vinyl decal.

- Try gradient vinyl or textured finishes for unique visual effects
- Combine hand drawn sketches with digital tracing for custom art decals
- Use registration marks when layering pieces to keep alignment exact
- Document your process so you can refine or reproduce successful designs
Community inspiration is abundant, with makers sharing templates, color palettes, and troubleshooting tips that can help you solve tricky cuts or tricky surfaces. You might discover new niches for your diy vinyl decal work, such as vehicle graphics, event signage, product labels, or decorative wall art. By continuously experimenting and documenting what works, you build a personal style that sets your projects apart. Ultimately, the combination of accessible materials, creative freedom, and growing skill makes diy vinyl decals an endlessly rewarding pursuit for makers at any level.
Conclusion
DIY vinyl decals offer an approachable yet powerful way to customize objects, express your style, and even grow a small creative venture through hands on, repeatable techniques. By mastering the basics of design, cutting, and application, you can consistently produce decals that look polished and last through everyday use. As you experiment with new tools, materials, and ideas, your projects will become more confident, efficient, and uniquely yours. Start small, stay curious, and let each diy vinyl decal be a step toward a more personalized, creatively marked world around you.
How to Easily Make Professional Vinyl Decals | Cricut Tutorial
Take your vinyl stickers to the next level, and make them look very professional, and it is so easy to do this too! Supplies used in ...
