Die Cut Decals
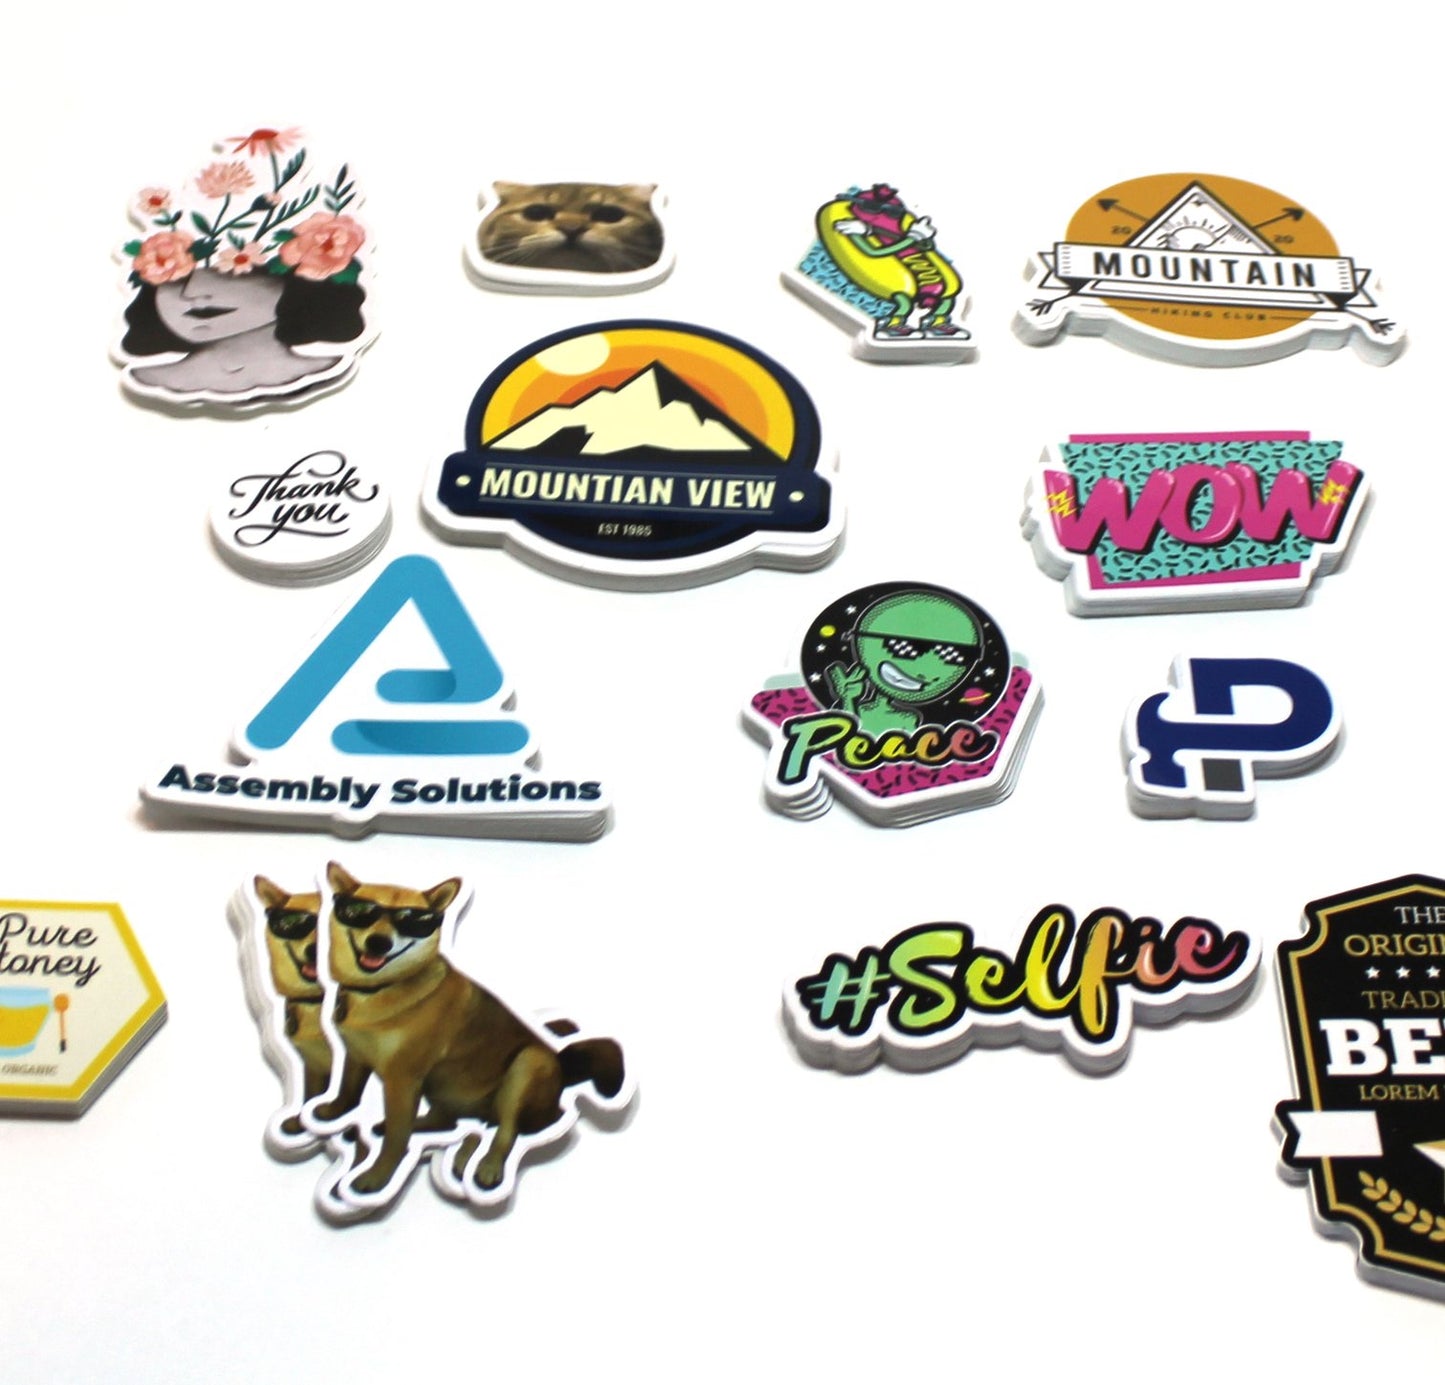
Die cut decals turn a plain surface into a bold statement with clean edges and vibrant graphics that stick like a sticker but look professionally printed.
What Are Die Cut Decals and How Do They Work
Die cut decals are vinyl stickers cut to the exact shape of the design, so only the image, text, or logo shows while the excess material is removed. They use pressure sensitive adhesive that bonds to many surfaces without needing special tools or skills. Because the backing is removed and the design is applied directly, the result looks seamless and integrated with the object or vehicle.
These decals differ from printed stickers with rectangular trim because the cut reveals the design edge to edge, giving a custom, tailored appearance. The process starts with a printed vinyl sheet, then a cutting machine traces the outline and slices through the vinyl and liner but not the adhesive. This allows installers to peel away the waste material, leaving only the desired graphic ready to be transferred onto the target surface.

Materials and Durability of Die Cut Decals
Most die cut decals are made from calendared or cast vinyl, each offering different flexibility, conformability, and lifespan. Calendared vinyl is more affordable and works well for short to medium term applications on flat, clean surfaces. Cast vinyl is thinner, more conformable, and resists fading and cracking, making it ideal for vehicles, outdoor signs, and premium branding.
- Polyvinyl chloride (PVC) and polyester are common materials that resist moisture, UV rays, and mild chemicals.
- Adhesive options include standard removable, high tack permanent, or specialty adhesives designed for automotive or outdoor use.
- Protactic overlaminates can be added for extra resistance against scratches, abrasion, and weathering.
With proper surface preparation and installation, die cut decals can last several years outdoors while maintaining strong adhesion and vivid color. Regular cleaning with mild soap helps preserve the finish and prevents buildup that could lift edges over time.
Design and File Preparation Best Practices
Creating die cut decals starts with vector artwork, which ensures clean edges and scalability without losing quality. Designers should set the cut line slightly inside the visible graphic, known as a contour cut, so the blade follows the exact shape of the design. Adding registration marks or clear spacing instructions helps installers align multiple layers and avoid miscuts.
- Use CMYK color mode for print and include at least 3mm of bleed around the edges if the design reaches the border.
- Simplify fine details that might tear during application, and avoid extremely small text without considering the viewing distance.
- Specify adhesive type and overlaminate in the file notes so the manufacturer matches material and finish to the intended use.
Proofing is essential; a digital mockup and a physical proof allow clients to confirm colors, placement, and overall impact before full production. Clear communication about where the decal will be applied, lighting conditions, and viewing distance guides design decisions for optimal results.
Common Applications and Creative Uses
Die cut decals appear on vehicles, storefront windows, equipment, electronics, helmets, and promotional items, turning everyday objects into mobile advertisements. Vehicle graphics use layered die cuts with contour shapes to create fleet branding that looks cohesive from a distance and detailed up close. Retail and point of sale displays benefit from shaped logos and aisle markers that guide customers without feeling cluttered.
- Event signage and wayfinding rely on clear shapes and strong contrast for quick recognition.
- Personalized items such as laptop decals, skateboards, and water bottles express identity while protecting surfaces.
- Industrial and safety labels combine die-cut shapes with standardized symbols to communicate rules and warnings efficiently.
The ability to combine die cutting with screen printing, digital printing, or embroidery opens many possibilities for texture, depth, and special effects. Brands can experiment with holographic films, reflective finishes, and tactile elements while still benefiting from the precision of die cut edges.

Installation Tips and Surface Preparation
Successful installation begins with a clean, dry surface free of dust, oil, and old adhesive residues that could prevent proper bonding. Use a mild detergent solution, dry thoroughly, and consider using a bonding agent for challenging surfaces like powder coated metal or textured walls. Measuring and marking a center reference line helps position larger decals accurately before the adhesive touches the surface.
- Apply the decal slowly from one edge to the other, using a squeegee to push out air bubbles and ensure full contact.
- Tackle temperature and humidity by installing indoors or in shaded areas when possible, especially for temperature sensitive adhesives.
- If bubbles appear later, gently lift the edge and reapply with the squeegee; small wrinkles often relax with heat from a hairdryer on a low setting.
For complex multi piece designs, using registration marks or temporary alignment tabs reduces the risk of gaps and overlaps. Testing the process on a scrap material helps refine pressure, overlap, and trimming techniques before working on the final project.
Cost, Production Time, and Ordering Guidance
The cost of die cut decals depends on material choice, complexity of the cut, quantity, and finishing options such as lamination or special adhesives. Simple shapes in small volumes are more affordable, while larger runs benefit from setup efficiencies and bulk material discounts. Production time can range from same day for basic stock materials to several days for custom printing, cutting, and quality checks.
When ordering, clearly specify the intended surface, indoor or outdoor use, expected lifespan, and any regulatory or brand guidelines. Providing accurate measurements, artwork files, and photos of the installation site helps vendors recommend the right materials and avoid costly revisions. Comparing quotes from multiple suppliers while reviewing samples ensures a balance between price, quality, and reliability.
Die cut decals offer a flexible, visually striking way to communicate messages, reinforce brand identity, and enhance aesthetics across countless environments. From bold vehicle wraps to subtle product labels, their clean lines and tailored fit make graphics feel intentional and polished. By understanding materials, design requirements, and installation best practices, anyone can use die cut decals to communicate with confidence and style.
Die-cut vs. Kiss-cut Stickers - What's the Difference?
Every decal has a purpose. Making sure your decal is cut the best way for your project will ensure you get the best results.
