Decal Install
Getting a professional decal install starts with choosing the right surface and preparing it carefully so the graphic sticks cleanly and lasts for years.
Why Surface Preparation Matters for Decal Install
Many people underestimate how much a clean surface matters for a durable decal install. Dust, oils, or light rust can create invisible barriers that prevent the adhesive from bonding evenly.
For a long-lasting decal install, start with a smooth wipe down using isopropyl alcohol or a dedicated cleaner, then let the area dry fully before peeling the backing. When you follow these steps, the decal aligns easily, reduces bubbles, and maintains vivid colors over time.
Tools You Need for a Smooth Decal Install
You do not need expensive equipment for a clean decal install, but a few simple tools make a huge difference in how flat the final result looks.
- Squeegee or soft plastic card for pushing out water and air.
- Microfiber cloth to keep surfaces lint free during the decal install.
- Scissors or a utility knife for trimming excess material neatly.
- Soapy water in a spray bottle for repositioning during the early stage of decal install.
With these items ready, you can complete a precise decal install without scratching the surface or trapping tiny particles underneath.
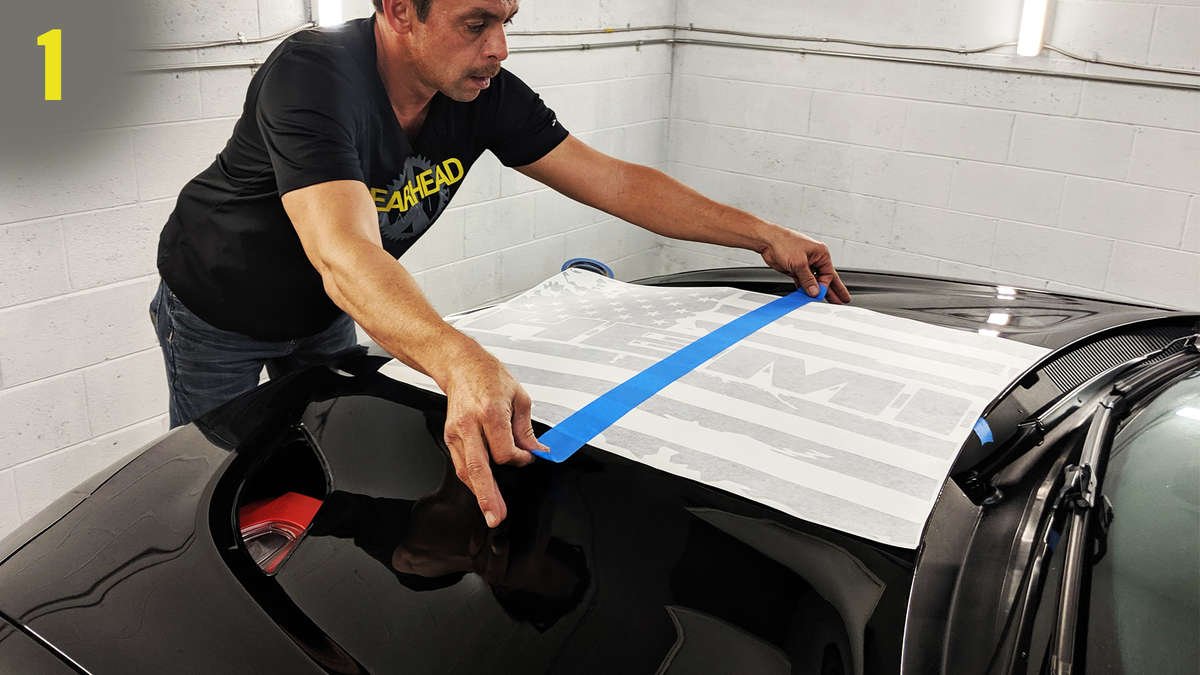
Measuring and Positioning Before the Decal Install
Taking a few extra minutes to plan the layout pays off during the actual decal install, especially on large panels or irregular shapes.

Use painter’s tape to mark the intended placement, check symmetry with a level, and visualize how the decal will look once it is permanently bonded. If you need to adjust, the tape gives you a safe framework to test angles without committing to the final decal install position.
Applying the Decal with Water for Better Control
The wet application method is one of the most reliable ways to achieve a flawless decal install on the first attempt.
Spray a light mist of soapy water on the surface, peel the backing slowly, align the edges, and lay the decal down while sliding it into place. The water layer allows you to nudge the graphic, remove wrinkles, and verify alignment before the adhesive sets.
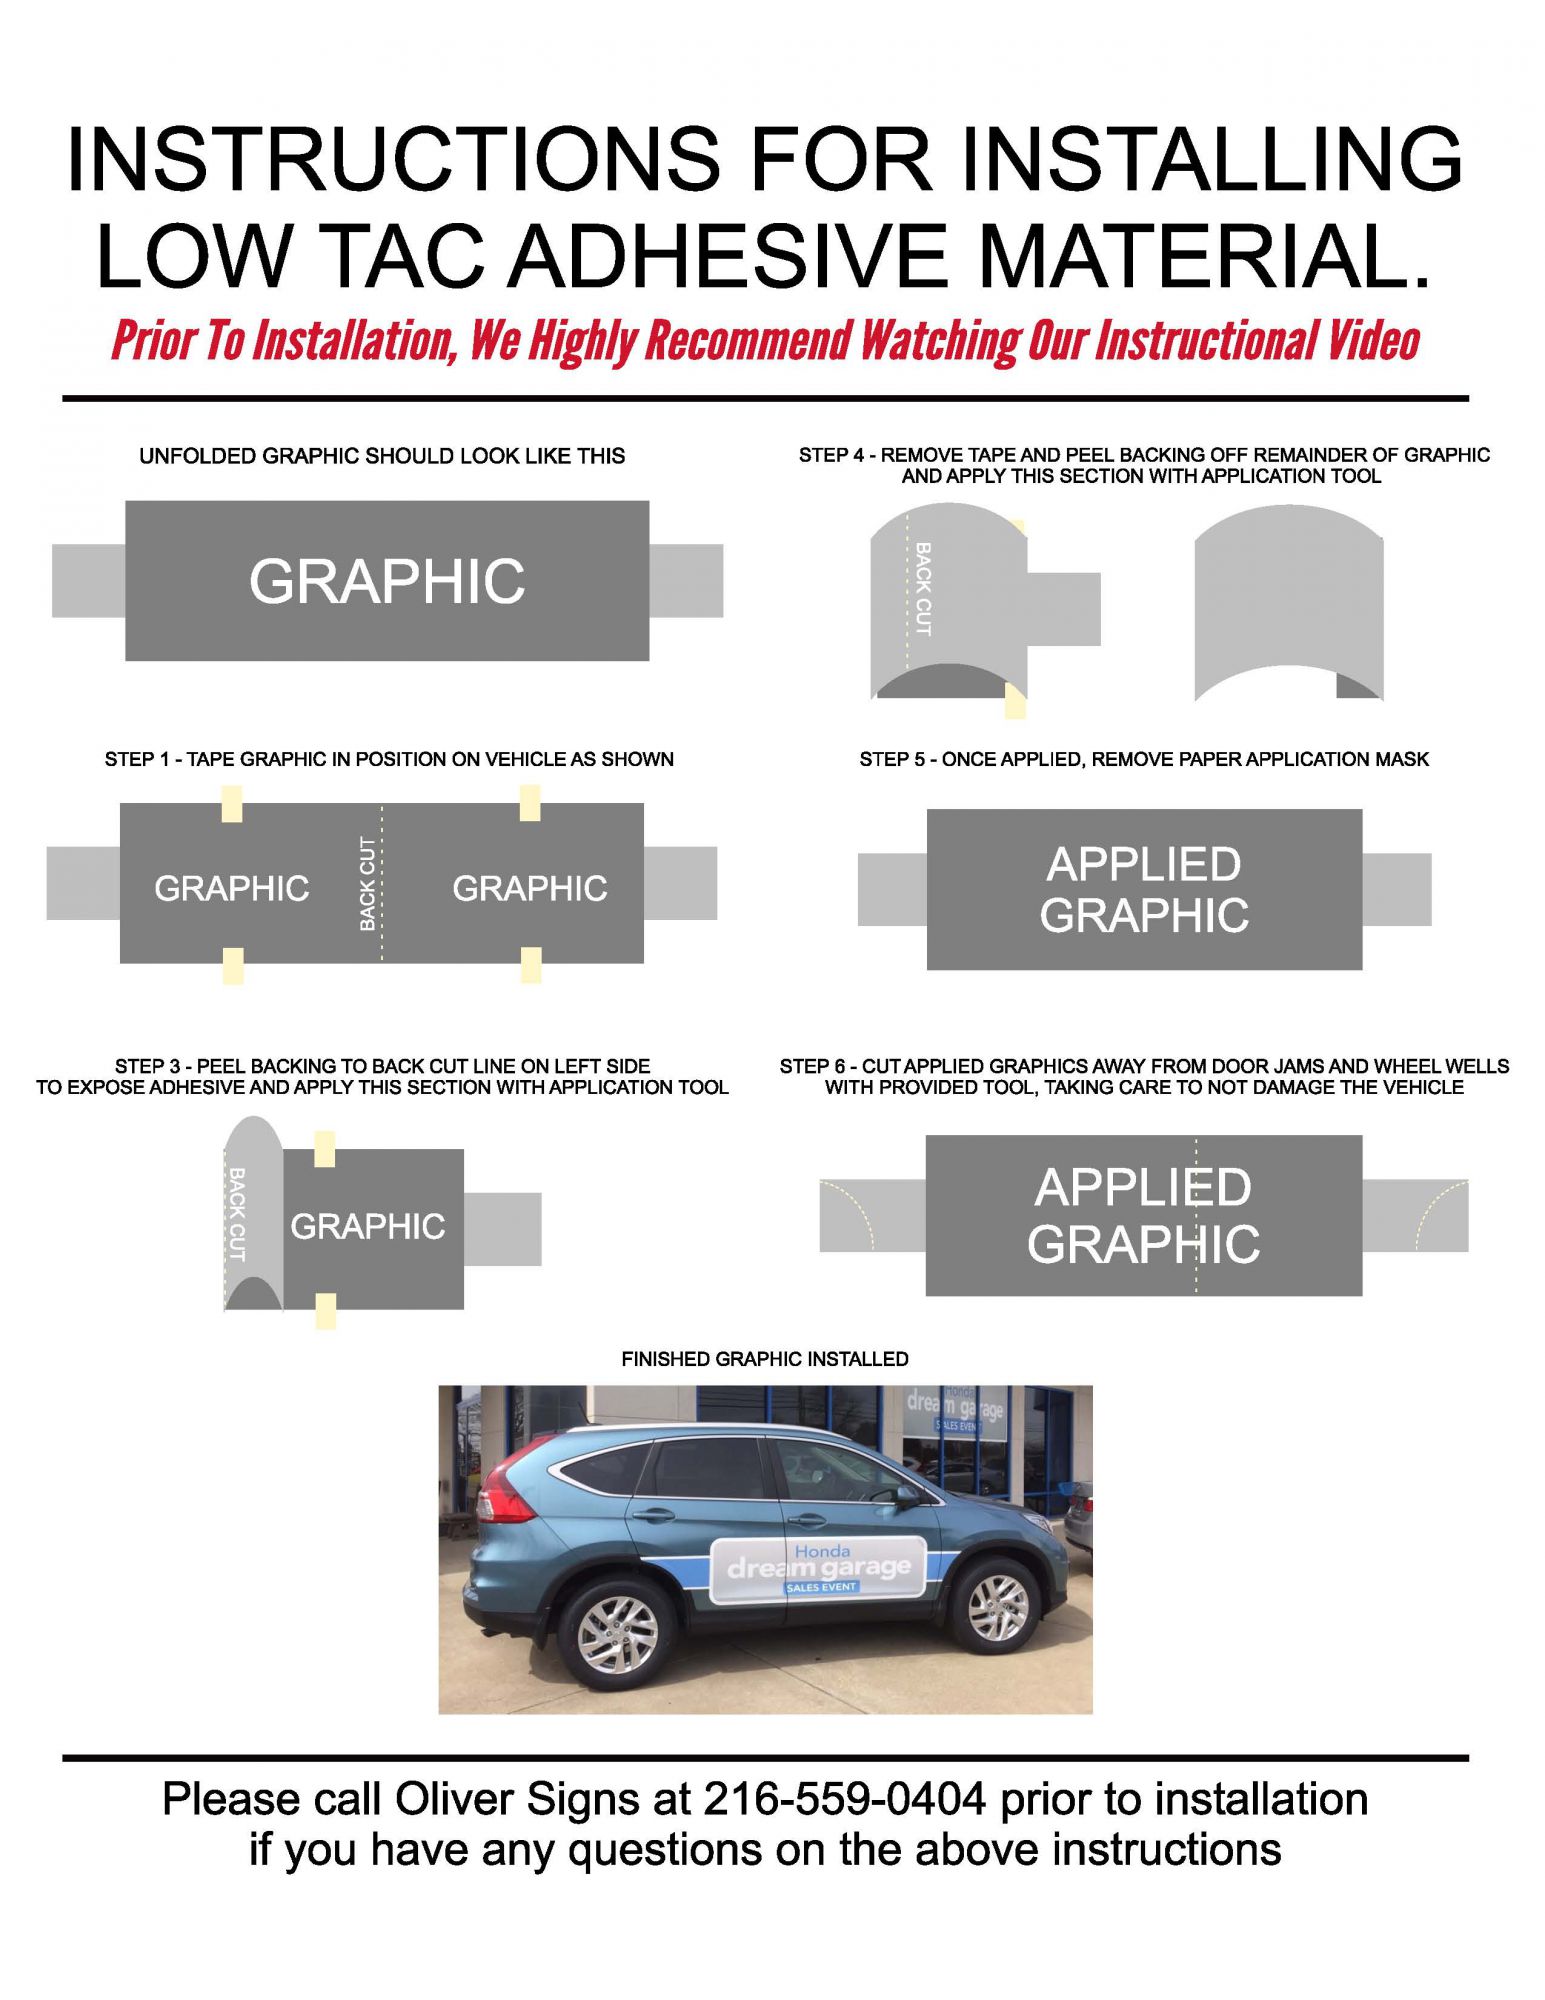
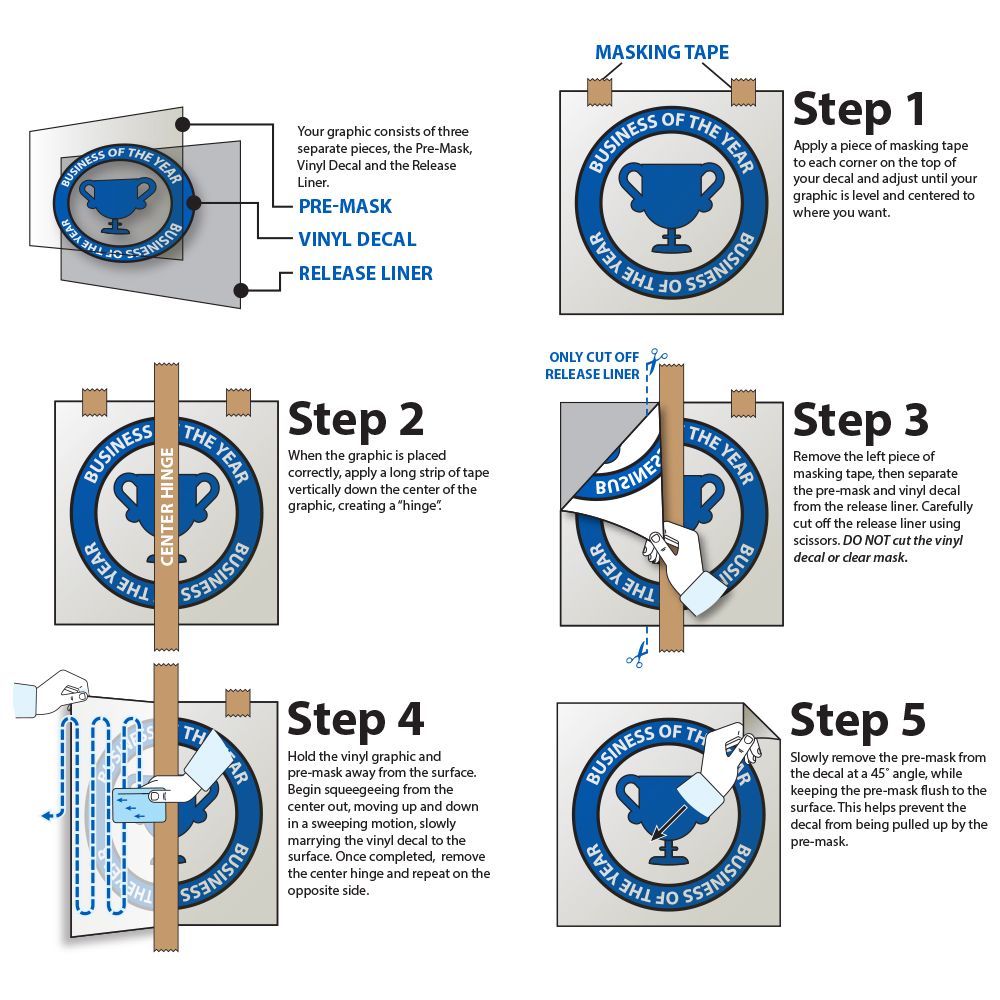
Step by Step Guide
- Clean and dry the area thoroughly.
- Position the decal using low tack tape as a guide.
- Spray water mixed with a drop of soap onto the surface.
- Place the decal, then use a squeegee from the center outward.
- Let it dry, then gently remove the masking layer if used.
Following these steps helps you avoid misalignment and keeps the decal install looking sharp under different lighting conditions.
Avoiding Bubbles and Wrinkles During Install
Small bubbles are common, but they do not have to ruin your decal install if you address them the right way.
Push bubbles toward the nearest edge using a soft squeegee, working slowly so you do not stretch the material unevenly. If a wrinkle appears, gently lift the edge, reapply a little water, and smooth it down again. For a professional decal install, patience is more important than speed, because rushing often creates permanent ripples.

Curing Time and Long Term Care After Decal Install
Even when the decal install looks perfect right away, the adhesive continues to cure over the next forty eight hours, so avoid heavy washing or peeling during this period.
Protect your work by parking vehicles out of harsh sunlight, keeping sharp objects away from edges, and cleaning with gentle, non abrasive products. With proper care, a well executed decal install will stay vibrant, resist fading, and maintain strong adhesion for many seasons.
By combining careful preparation, the right tools, and a steady hand, every decal install can look crisp, professional, and built to last.
Vinyl Lettering General Installation Instructions
This is a general installation video for vinyl lettering and vinyl decals. Most decals can be installed using this method.
