Decal Application Instructions

Following clear decal application instructions is the easiest way to achieve a clean, long lasting finish on any surface.
Preparing the Surface for Decal Application
Before you even touch the adhesive, thorough surface preparation makes all the difference in how your decal looks and how long it lasts. Dust, oil, and tiny imperfections can cause lifting, bubbling, or early peeling, so treat this stage as the most important part of your decal application instructions.
Start by cleaning the area with a mild detergent and water, then rinse thoroughly and dry completely. For painted surfaces or smooth plastics, use a mild solvent such as isopropyl alcohol to remove any remaining residue or wax. Lightly sanding the area with fine grit sandpaper can help on very smooth surfaces, but be sure to wipe away all dust afterward for a truly clean base that grips well.

Measuring and Aligning the Decal
Precise measuring and alignment during application keeps your design looking professional and prevents the frustration of a crooked placement.
Use masking tape to create temporary guide lines on the surface, then hold the decal against those marks to check proportions and centering before any adhesive touches the surface. If your decal includes multiple parts or layers, apply the main piece first and use registration marks so that additional elements line up exactly where they should.
Tips for Perfect Alignment
- Use a level or ruler to confirm horizontal or vertical edges.
- Place the decal on a flat backing temporarily if you need to step back and view it from a distance.
- Mark faint pencil guides that can be wiped off later, ensuring symmetry across the surface.
Cutting and Handling the Decal
How you cut and handle the material affects how easily it lies down and how much waste you deal with during the process.
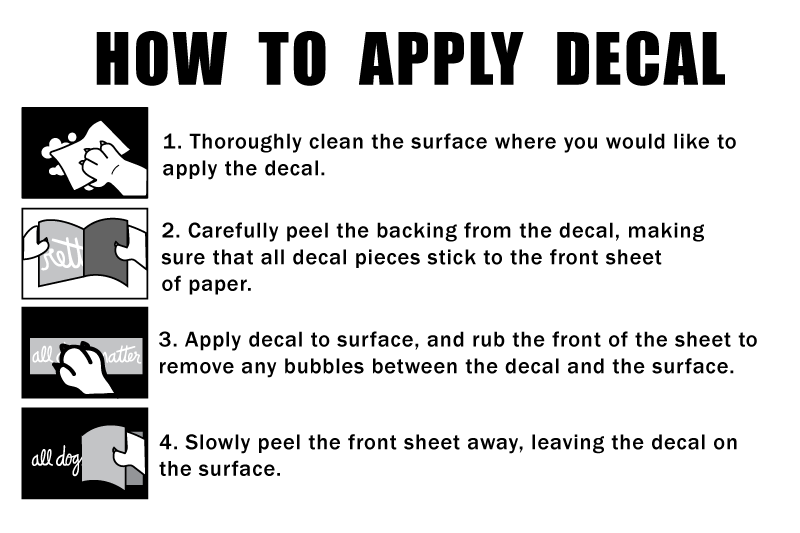
Leave a small border around intricate designs when you cut it from the sheet, giving yourself room to handle the edges without damaging the actual artwork. For detailed sections, use a very sharp hobby knife to trim away excess only after the decal is positioned, which reduces the risk of tearing delicate lines or text.
- Hold the decal by the backing sheet, not the printed area, to avoid smudging.
- Use clean, dry hands or wear cotton gloves to prevent oils from transferring.
- Keep the adhesive side protected until the moment it meets the surface.
Applying the Decal with Water or Setting Solution
Many professional applications rely on a water or setting spray to give you the working time needed to position the decal perfectly.
Spray the surface and the back of the decal with a gentle mist of water or a recommended setting solution, then lift the decal and place it using your guide marks. With a soft squeegee or a clean microfiber cloth, gently press from the center outward to push out trapped water and air. This slow, even pressure helps the adhesive bond smoothly and minimizes wrinkles or lifted corners.
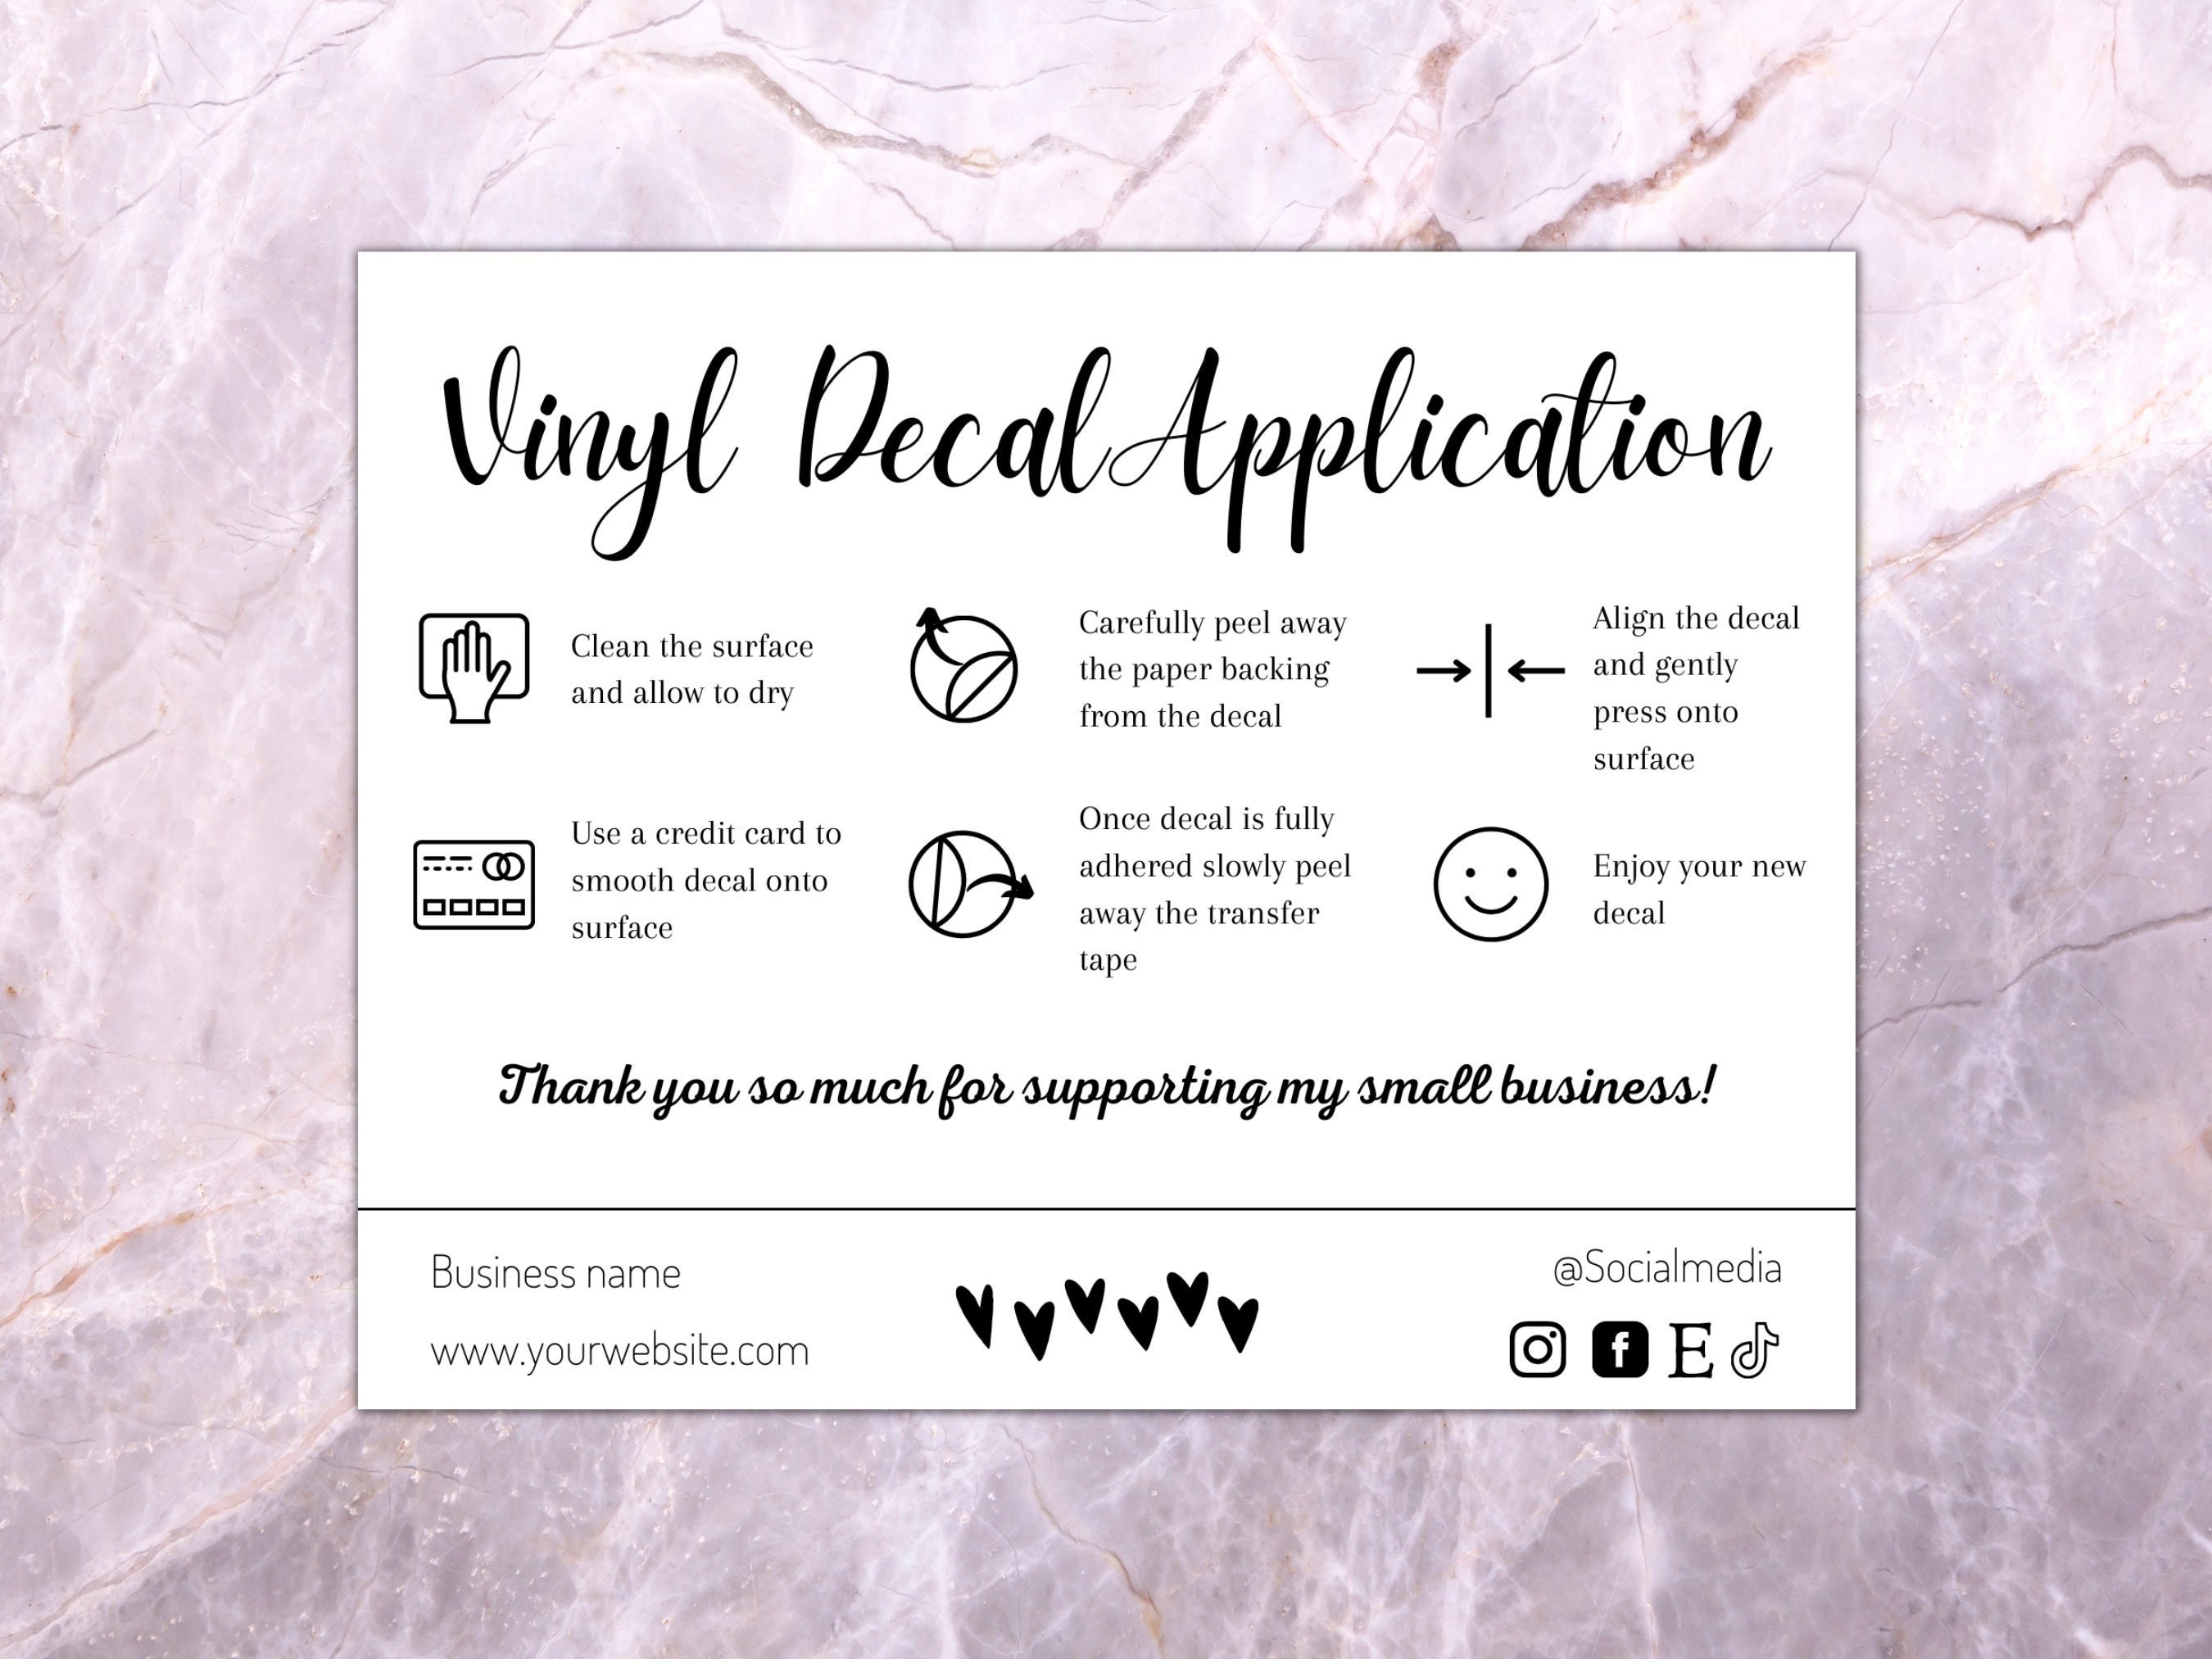
Squeegeeing and Drying for a Bubble Free Finish
The way you squeegee and dry the decal determines whether the surface stays smooth or ends up with trapped air and texture marks.
Use firm, overlapping strokes from the middle toward the edges, pressing out any water and ensuring full contact between the adhesive and the surface. If bubbles appear, carefully lift the edge and work the air out with the squeegee rather than stretching the material. Allow the decal to air dry according to the product guidelines, avoiding heavy handling until it is firmly set and the surface feels dry to the touch.
Sealing and Long Term Care
Depending on the environment and the surface, a protective finish can dramatically extend the life of your decal and keep colors vibrant.

For outdoor items or surfaces that see frequent contact, consider a compatible clear coat that seals the edges and prevents lifting. When you clean around the decal, use gentle soaps and soft cloths, avoiding harsh abrasives that can scratch the printed area. Following these final steps completes your decal application instructions and helps your work look fresh for years.
By moving step by step through surface prep, careful alignment, controlled handling, and proper drying, you turn a simple decal into a flawless finish that looks as good as it did on the first day.
Como aplicar um decalque de carro - Etapas detalhadas - Método seco - Aplicação até a remoção
Este é um vídeo instrucional sobre como aplicar um decalque em qualquer superfície lisa usando o método seco. As superfícies ...
