Custom Motorbike Decals
Custom motorbike decals are a fast, striking way to turn your ride into a personal signature on the road.
What Are Custom Motorbike Decals and How Do They Work
Custom motorbike decals are precision-cut vinyl graphics designed to adhere smoothly to painted, powder-coated, or plastic surfaces on a motorcycle. Unlike hand-painted pinstripes or panels, these decals are produced digitally or by plotter, which allows for sharp lines, complex shapes, and vibrant colors that remain consistent from batch to batch. Because they are removable when applied correctly, they are a favorite choice for riders who want personality now and flexibility later.
Each decal is typically printed on a durable vinyl material with a strong but forgiving adhesive that stretches slightly during installation to conform to curves and contours. A clear top layer, often called a laminate or overlaminate, protects the ink from UV rays, road grit, and abrasion so the graphics stay vivid through seasons of riding. When you combine design precision with quality materials, custom motorbike decals deliver a professional look that rivals factory graphics while reflecting your own taste.

Design Ideas and Themes to Make Your Bike Stand Out
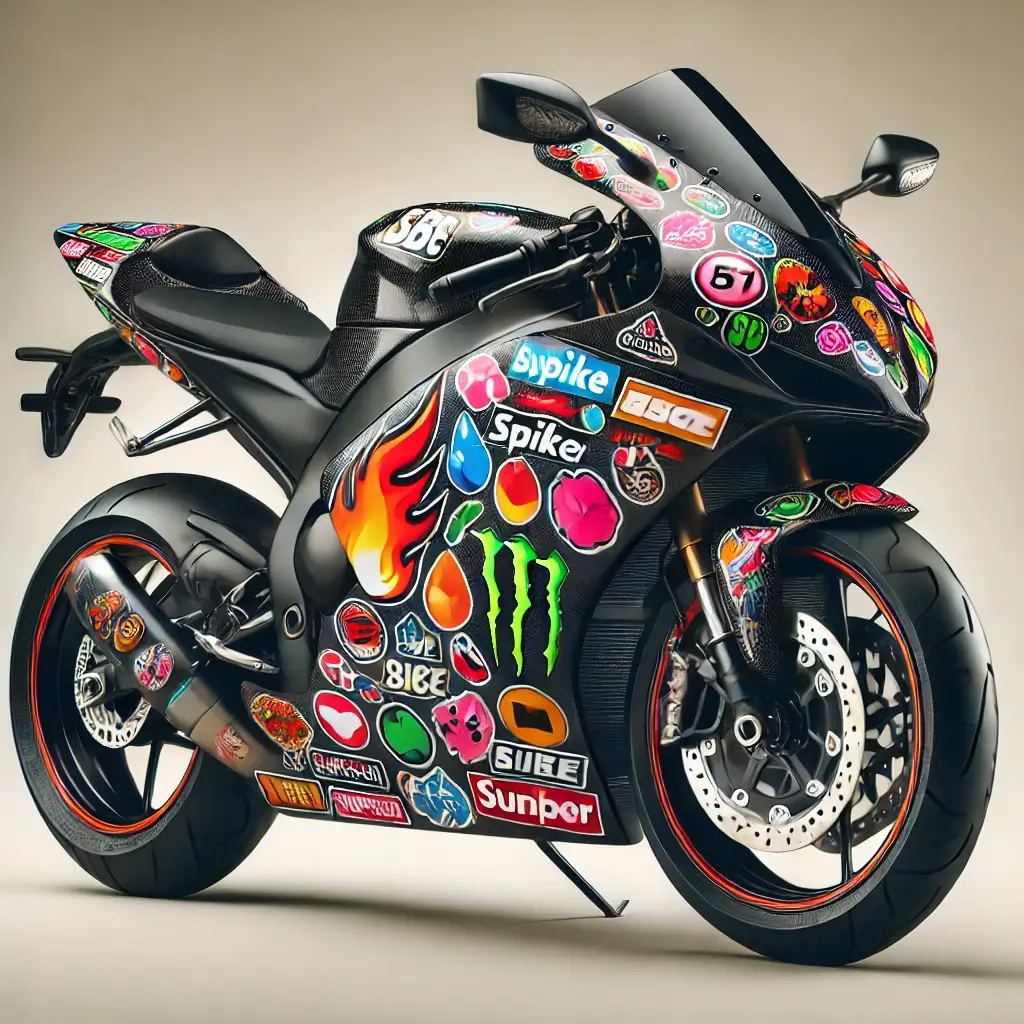
The best custom motorbike decals align with your riding style and aesthetic preferences, whether you lean toward bold aggression, sleek minimalism, or retro nostalgia. Popular themes include tribal flames, geometric patterns, animal silhouettes, cyberpunk-inspired fonts, and brand tributes that respect intellectual property by using original artwork rather than direct logos. You can also draw inspiration from motorsport heritage, local landmarks, or abstract art to create a wrap that feels unmistakably yours.
- Flame and speed motifs that follow the natural lines of the fuel tank and fenders.
- Mandala and symmetrical patterns that wrap around fairings for a meditative, high-detail look.
- Cultural and heritage graphics, such as classic pin-stripes, pinstripe crowns, or art-deco inspired bands.
- Personal symbols like initials, signature doodles, or milestone dates turned into minimalist emblems.
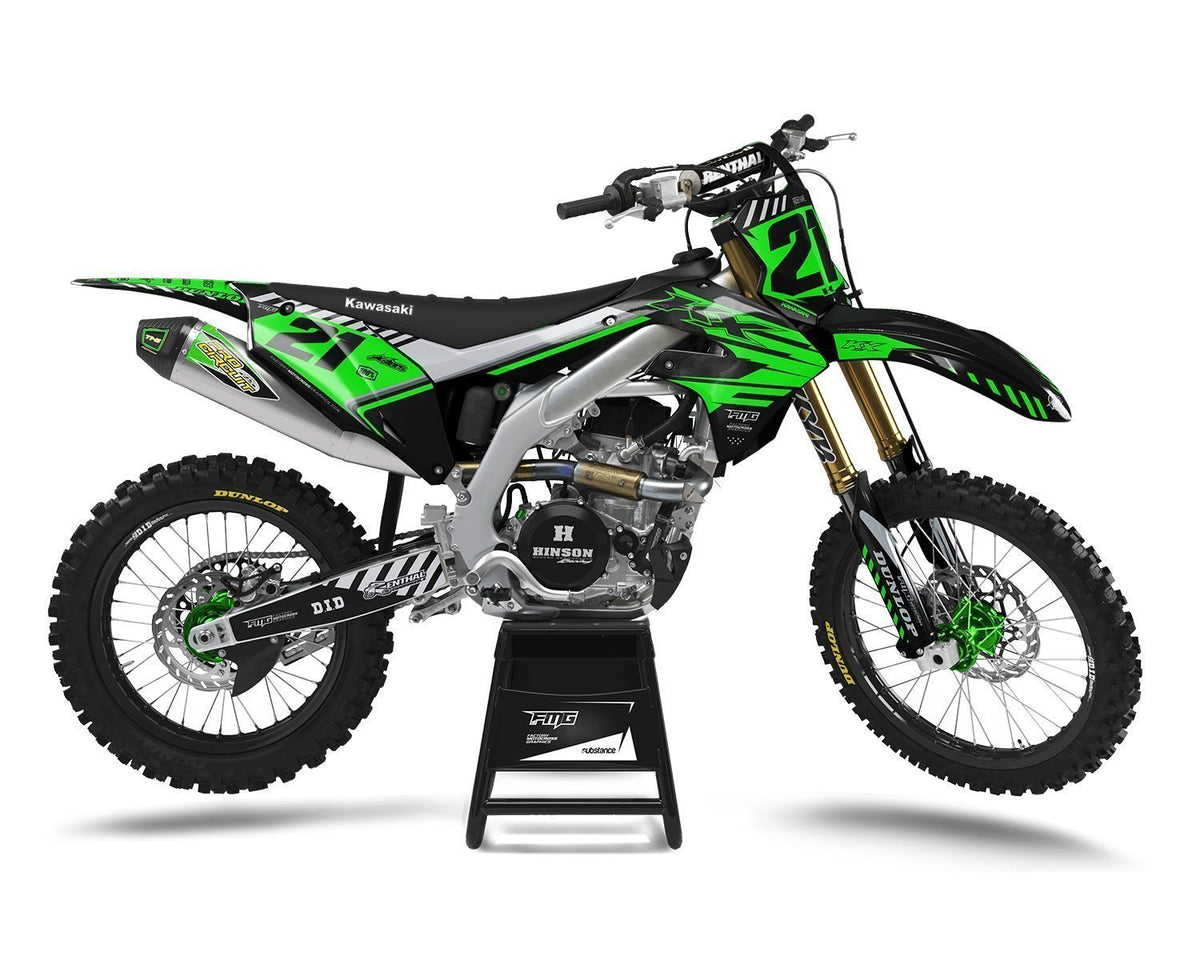
When planning your theme, think about how the decals interact with your bike’s existing color palette. A monochrome bike can be revived with a single bright accent decal, while a colorful sport bike can benefit from restrained line art that adds depth without overwhelming the factory design.
Choosing the Right Materials and Finish for Longevity
Not all vinyl is created equal, and the material you choose has a major impact on how your custom motorbike decals look over time. Cast vinyl offers superior conformability and a premium feel, making it ideal for complex curves and tight corners on sport bikes and adventure bikes. Calendered vinyl is more budget-friendly and works well on flatter panels such as tank sides or rear fenders, provided the surface is carefully prepared.

- Matte finishes hide minor imperfections and deliver a stealth, race-inspired vibe.
- Gloss finishes add depth and shimmer, enhancing metallic or pearl paint colors.
- High-bill finishes create a striking contrast, almost like a painted badge but with the flexibility of vinyl.
- Reflective or 3M Scotchlite detailing can improve visibility at night while still looking stylish.
For riders who push limits on gravel, track days, or long-distance touring, opting for UV-resistant inks and overlaminates is essential to prevent fading and peeling. A well-installed, properly maintained decal set can look nearly as durable as factory graphics, surviving rain, mild cleaning, and road debris without losing adhesion.
Preparing Your Bike Surface for Flawless Application
Successful installation starts long before the first decal touches the paint, with a meticulous surface preparation routine. Begin by cleaning the area with a dedicated panel wipe or isopropyl alcohol to remove factory wax, oils, and any residues that could compromise adhesion. Lightly inspect the surface for rust, old decal edges, or chipped clearcoat, since these issues can telegraph through even the thinnest vinyl.
For best results, work in a dust-free environment with moderate temperature and low wind, which reduces the risk of particles bonding to the adhesive before the decal is smoothed into place. Mask off surrounding panels with painter’s tape to avoid accidental contact with cleaner or trim dye, and consider using a temporary outline template to visualize how the final graphic will wrap around curves and seams. A well-prepared surface not only improves durability but also makes repositioning during installation much easier, minimizing the need for do-overs.

Installation Techniques and Tools for a Professional Finish
Applying custom motorbike decals confidently requires a few simple but effective tools, including a soft squeegee, a microfiber towel, a spray solution of mild soap and water, and a sharp hobby knife for trimming edges. The wet application method, which involves spraying the surface and the back of the decal, allows you to slide and level the graphic before committing, which is especially valuable on complex panels where perfect alignment matters.
- Start from the center and work outward, pushing out bubbles with firm, even pressure.
- Use low-tack tape or registration marks if you are installing multiple pieces that must align perfectly.
- Trim excess vinyl with a fresh blade, holding the knife at a shallow angle to avoid cutting into the paint.
- Let the adhesive cure for at least 24 to 48 hours before aggressive washing or riding in heavy rain.
If you prefer a completely flawless finish with no risk of lifting edges, many riders choose professional installers who use contour templates and industrial-grade applicators. While this adds to the cost, it can be worthwhile for large full-panel wraps or graphics that integrate seamlessly with factory badges and seams.
Maintenance Tips to Keep Graphics Looking Fresh
To preserve the appearance of your custom motorbike decals, adopt a cleaning routine that is effective yet gentle. Use a soft sponge or microfiber mitt with mild car shampoo, and avoid abrasive brushes or scouring pads that can lift edges or scratch the vinyl. Rinse thoroughly and dry with a soft towel, taking care to pat, not scrub, around detailed borders.

- Limit direct exposure to intense sunlight whenever possible, or choose UV-stable decals for long-term color retention.
- Avoid aggressive solvents, petroleum-based cleaners, or tar removers that can weaken the adhesive or cloud the overlaminate.
- Inspect the edges periodically and re-press any lifting corners before dirt and moisture infiltrate beneath the vinyl.
- If you store your bike for the winter, clean the decals and consider storing the motorcycle indoors to reduce thermal and UV stress.
With thoughtful maintenance, high-quality custom motorbike decals can retain their vibrancy and adhesion for several years, giving your bike a consistently polished and intentional appearance season after season.
Expressing Identity, Culture, and Personal Storytelling Through Graphics
Beyond aesthetics, custom motorbike decals often serve as a visual language that communicates your interests, values, and journeys. Whether you showcase a favorite band, a heritage brand crest, or a series of small icons that mark significant rides, these graphics can turn your motorcycle into a moving canvas of personal storytelling. They allow you to subtly nod to subcultures, teams, or causes without altering the mechanical character of your bike, keeping it ride-ready while expressing a distinct identity.
Because decals are removable, they also offer a low-commitment way to experiment with style. You can rotate graphics for different events, match seasonal color schemes, or update your look as your tastes evolve. This flexibility, combined with the ability to collaborate with artists or use digital design tools, means your custom motorbike decals can grow alongside you, becoming more meaningful with every mile.
Conclusion
Custom motorbike decals combine design flexibility, durable materials, and straightforward installation to give your motorcycle a tailored look that stands out in parking lots and on open roads. By choosing themes, colors, and finishes that match your personality, preparing the surface carefully, and maintaining the graphics with simple routines, you can enjoy a striking, professional finish that feels truly your own.
Image Transfer and Custom Paint on a Motorcycle Chopper Tank, water slide decal
LiME LiNE Important Links https://linktr.ee/Timewarpcustompaint Paint Supplies Here https://limelinepaintsupply.com LiME ...
