Custom Die Cut Vinyl Decals
Custom die cut vinyl decals let you turn bold ideas into precise, peel-and-stick graphics that look sharp on almost any surface.
What Are Custom Die Cut Vinyl Decals
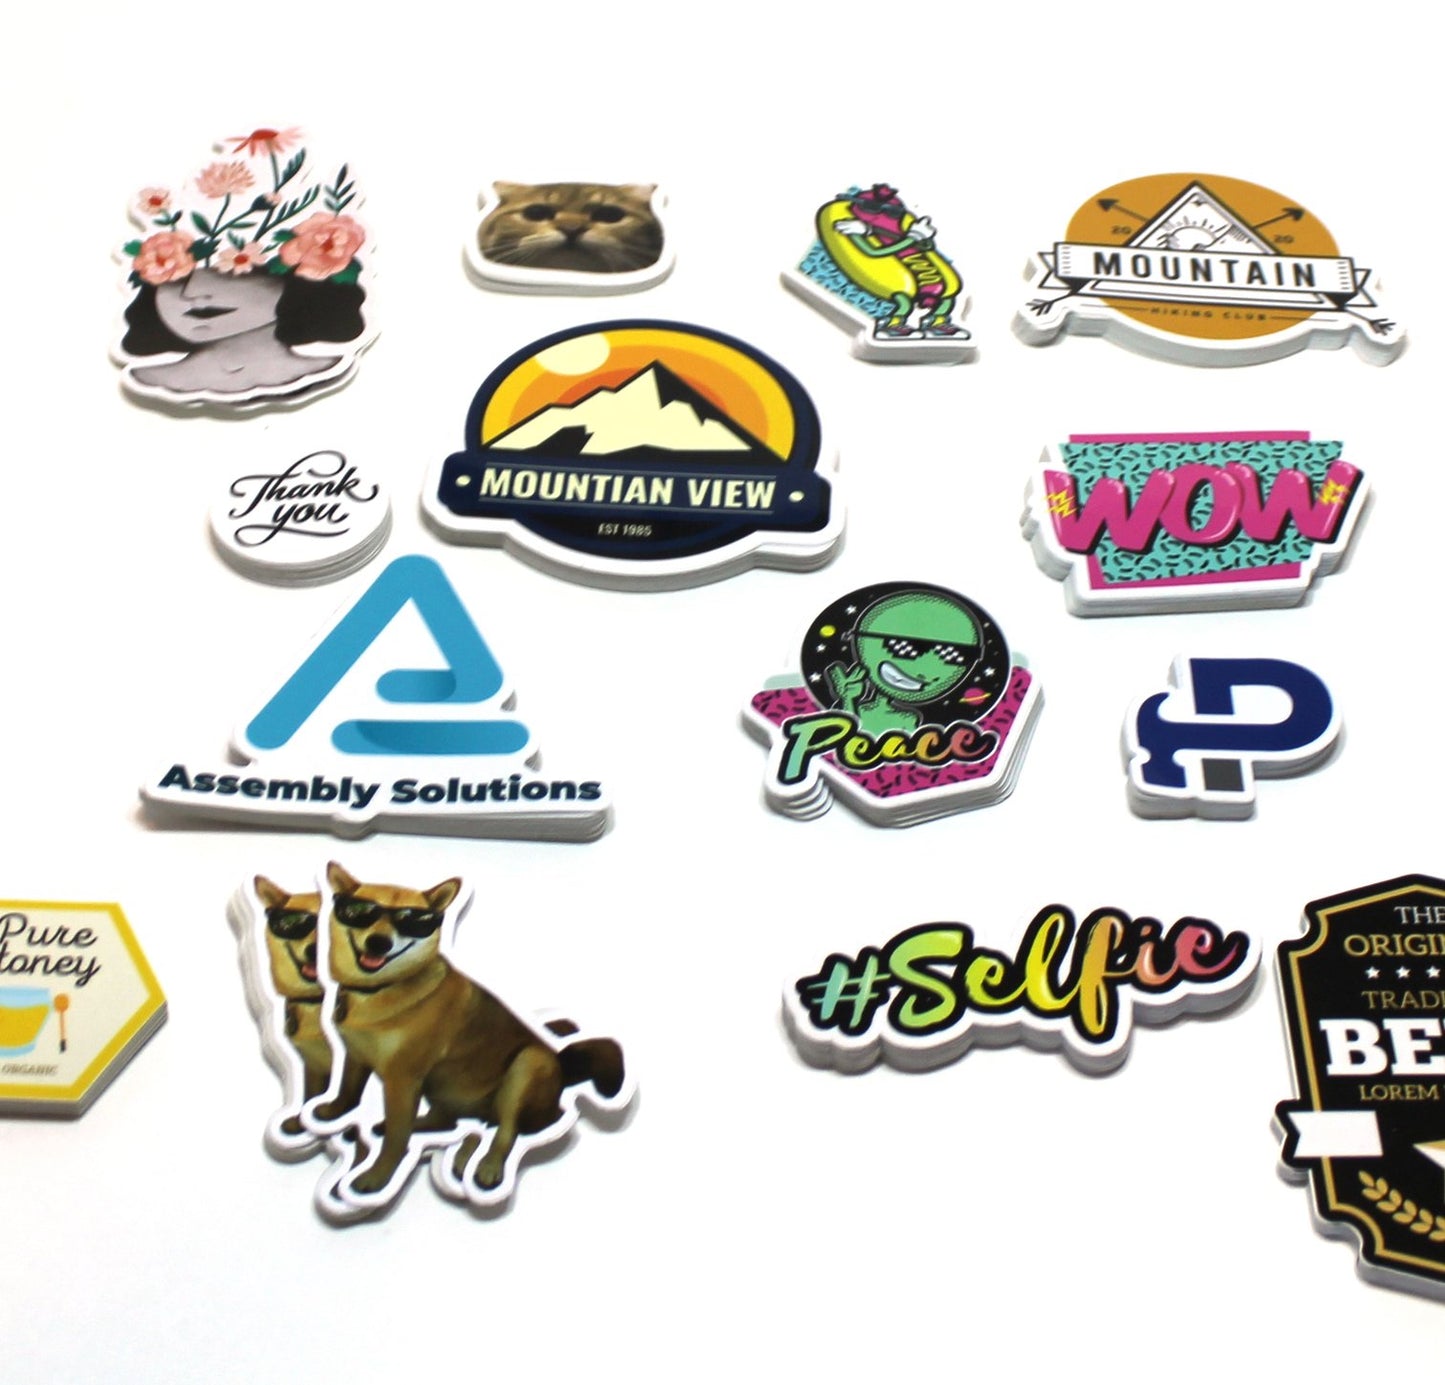
Custom die cut vinyl decals are stickers cut to the exact shape of your design, rather than simple rectangles. This clean edge-to-edge look makes logos, text, and illustrations feel more integrated with the object they are applied to. Because the vinyl material is durable, weather resistant, and available in many finishes, these decals work well indoors and outdoors.
Manufacturers use digital cutting machines to slice through the vinyl layer and the release liner, producing a precise profile that matches your artwork. The result is a professional looking graphic that can highlight products, reinforce branding, or add personality to personal items. Compared with printed labels or overlays, die cut versions give a more sculptured, premium appearance without the cost of more complex fabrication.

How the Die Cutting Process Works
The die cutting process starts with a vector file of your design, which ensures clean lines and accurate curves when the blade moves across the vinyl sheet. The cutter punches through the vinyl and its carrier liner, then the excess material is discarded, leaving only your custom shape attached to the liner. After peeling away the waste, you position the decal and remove the liner so the adhesive bonds to the surface.
Because the cut is exact, edges sit flush against edges of logos, vehicle doors, or product packaging, giving a tighter look than overlays or printed tags. For multilayer designs, some makers align several colored pieces using registration marks, building depth and shading while still benefiting from the flexibility of vinyl. Modern cutters handle intricate details, so even small text and fine patterns remain legible once installed.
Key Steps in Simple Terms
- Create or supply a vector outline of your graphic.
- Choose vinyl thickness, adhesive strength, and finish (matte, gloss, metallic, etc.).
- Let the cutter trace and slice the shape while you focus on design details.
- Peel, position, and smooth the decal for a bubble free finish.
Design Tips for Eye Catching Decals
Strong contrast between the vinyl and the surface underneath makes your decal readable at a glance. Dark vinyl on light backgrounds, or vice versa, helps logos and text stand out, especially from a distance. Keep fine details large enough to cut cleanly, and avoid ultra thin strips that could tear or lift prematurely.
Consider how negative space will read after cutting, because shapes inside letters can fall out or look cluttered if lines are too close. Test your file with a simple print or a rough cut to verify spacing, and use clear layers if you plan to stack colors. When in doubt, a slightly bolder outline or extra border around the decal can protect visibility on uneven surfaces.
Where Custom Die Cut Vinyl Decals Shine
Businesses use these decals on storefront windows, equipment, and company vehicles to build consistent branding without a full paint job. Small brands favor them for packaging, product labels, and promotional giveaways because they add personality at a manageable cost. For events, they work as directional signs, table identifiers, and branded photo backdrops that peel off cleanly when the gathering ends.
On the personal side, hobbyists decorate laptops, skateboards, and notebooks with cutouts that reflect niche interests, fandoms, or personal milestones. The vinyl resists light rain and moderate fading, so outdoor installations can last several seasons. Indoor uses include window accents, cabinet updates, and event décor that transforms a space quickly and reversibly.

Choosing Materials and Finishes
Standard vinyl suits short to medium term projects, while thicker cast vinyl offers more flexibility and longevity for curved surfaces. If the decal will face harsh sun, rain, or constant handling, look for UV resistant and waterproof options to prevent peeling or color shift over time.
- Gloss finish delivers vibrant color and a subtle sheen.
- Matte finish reduces glare and gives a modern, low key look.
- Metallic and textured finishes can mimic brushed metal or other premium materials.
Adhesive strength varies, so choose removable for surfaces you may want to resurface later, and high tack for long term outdoor installations. Confirm that the vinyl is compatible with your surface material, because textured walls, rubber, or low energy plastics sometimes require primers or special application techniques.
Applying and Maintaining Your Decals
Start with a clean, dry surface free of dust and oils to help the adhesive bond evenly. Position the decal loosely, then smooth it down from the center outward to push out air bubbles. A soft squeegee or credit card works well for this step, especially on larger shapes.
Over time, wash the surface gently with mild soap and avoid abrasive cleaners that can wear down the edges. Inspect corners periodically and press down any lifting sections before they catch on clothing or tools. With proper care, a well applied custom die cut vinyl decal can stay vivid and intact for years, making it a versatile choice for branding, wayfinding, and creative expression.
Die-cut vs. Kiss-cut Stickers - What's the Difference?
Every decal has a purpose. Making sure your decal is cut the best way for your project will ensure you get the best results.
