Auto Decal Installation
Applying an auto decal installation correctly transforms any vehicle into a personalized statement on the road, and with the right tools and technique you can achieve a flawless finish.
Preparing the Surface for Auto Decal Installation
Before you begin auto decal installation, meticulous surface preparation is essential for long-lasting adhesion and a bubble-free result. Clean the area where the decal will sit using a mild automotive soap and a microfiber cloth, then rinse thoroughly to remove any dirt, grease, or road film. Use an isopropyl alcohol solution to eliminate residual wax or polish, ensuring the paint is completely dry before proceeding with the auto decal installation.
Choose a shaded, dust-free environment to perform your auto decal installation, as direct sunlight can cause the adhesive to set too quickly and create wrinkles. Inspect the panel for any chips, deep scratches, or rough texture that might interfere with the vinyl’s contact, and lightly polish out imperfections if necessary. A well-prepared surface not only improves the appearance of the auto decal installation but also protects the clear coat and extends the life of the graphic.

Measuring and Positioning the Decal
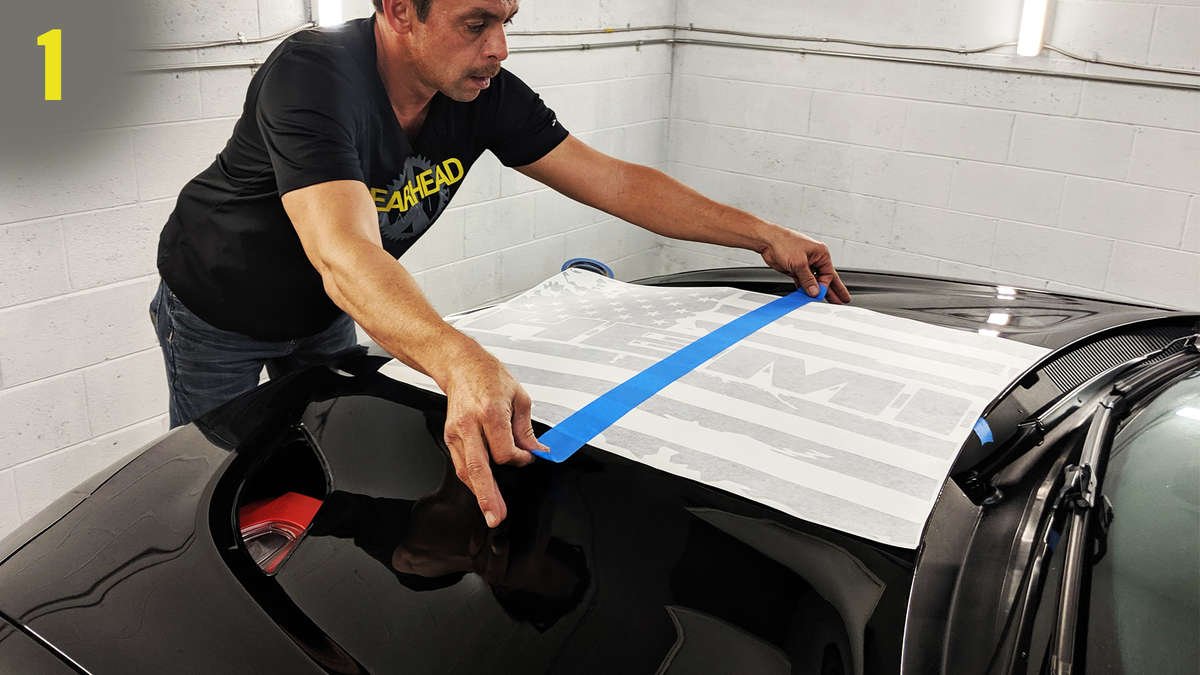
Accurate measuring and positioning are critical steps in auto decal installation, especially for large graphics or designs that must align with existing lines. Use a measuring tape and removable chalk or tape to mark key reference points on the panel, then dry-fit the decal without removing the backing to verify proportions and centering. Make small adjustments until the auto decal installation looks balanced with the vehicle’s stance and design language.
When you are satisfied with placement, lightly mask the outer edges with low-tack painter’s tape to hold the decal in position during the application. This approach allows you to peel away sections gradually and reposition if needed, reducing the risk of a crooked auto decal installation. For complex wraps or multi-piece decals, assemble them on a flat surface using transfer tape before moving them to the vehicle.
Applying the Decal with Proper Technique
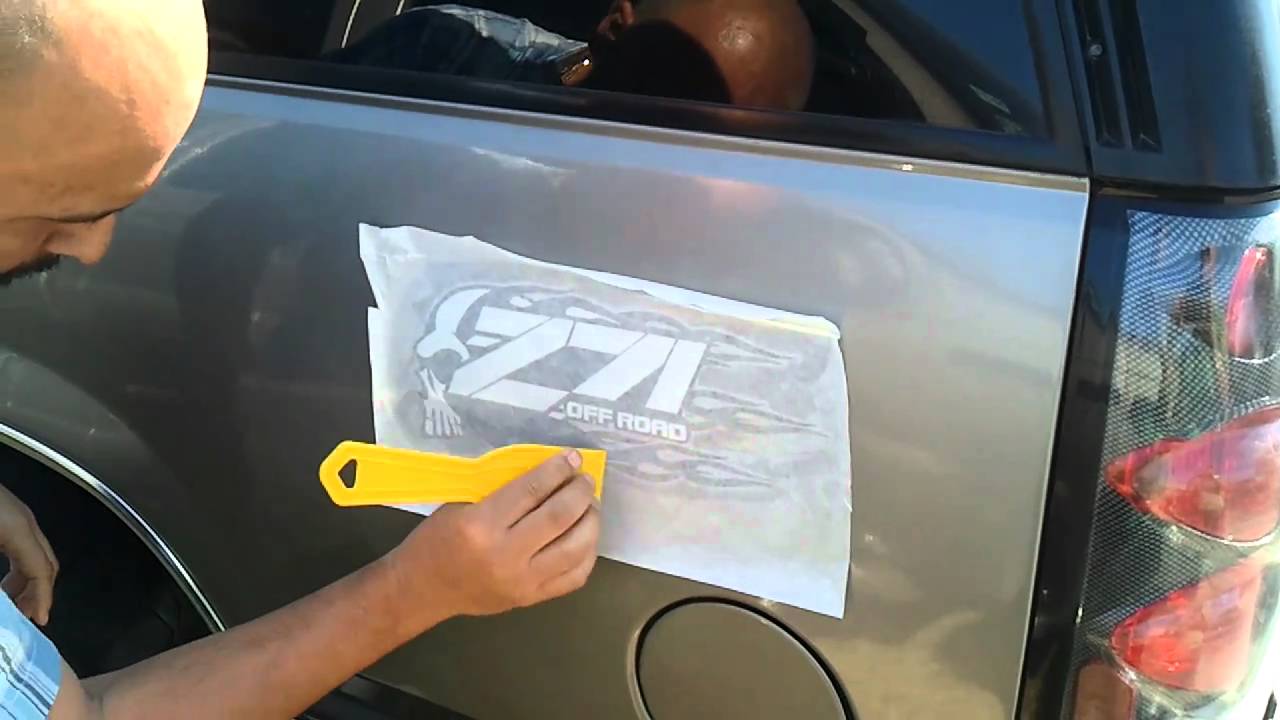
The actual application phase of auto decal installation requires patience and a steady hand to avoid trapped air and wrinkles. Carefully peel the backing paper while gently pressing the adhesive side onto the surface, starting from the center and moving outward toward the edges. Use a soft felt squeegee or a plastic application card to smooth the decal from the middle toward the sides, pushing out any excess water or air as you go.
Maintain a consistent angle and light pressure during this stage of auto decal installation to prevent stretching or distorting the vinyl. If the decal is large, work in manageable sections, overlapping previous strokes to ensure complete contact. Avoid using sharp tools directly on the film, as they can easily scratch or puncture the delicate surface.
Using Heat and Solution for Tricky Areas
For curved panels or detailed contours, employing a heat gun and a mild soap solution dramatically improves the success of auto decal installation. Mix a few drops of car-safe dish soap with water in a spray bottle and mist the surface and the back of the decal to allow controlled repositioning. This slip solution gives you time to adjust alignment before the adhesive bonds permanently.
After aligning the decal, gradually introduce heat from a low-setting heat gun to soften the vinyl and encourage it to conform to the panel’s shape. Use firm, even squeegee strokes to press the decal down while evaporating the liquid underneath, focusing on edges and corners during your auto decal installation. Take your time with this stage, because rushing can lead to wrinkles or poor adhesion in high-stress areas.

Trimming, Sealing, and Final Inspection
Once the decal is fully seated, trim excess material with a sharp hobby knife or razor, cutting along the panel edges with a slight inward angle to protect the paint. After trimming, gently wash the area again to remove any remaining soap residue and inspect the auto decal installation for lifted corners or subtle imperfections. If needed, apply additional heat to problematic zones and re-squeegee until the graphic lies flush.
For extra protection and a polished look, consider applying a light coating of paint sealant or a professional-grade ceramic coating over the decal, which helps preserve the vinyl and enhances color depth. Finish the auto decal installation by cleaning adjacent surfaces, checking for uniform alignment, and admiring the seamless integration of your new graphic with the vehicle’s design.
Common Mistakes and How to Avoid Them
Many enthusiasts encounter problems during auto decal installation due to dust, poor lighting, or overstretching the material, all of which compromise the final result. Always work in a clean, well-lit area, use a stable ladder or workbench, and handle the decal with gloves to prevent fingerprints on the film. Avoid applying in extreme temperatures, as cold makes vinyl brittle while heat can cause it to stretch out of shape.
Skipping the pre-application mock-up and using inadequate adhesion methods are common causes of peeling edges and early failure in auto decal installation. By following a careful process, employing the right tools, and resisting the urge to rush, you can enjoy a professional-looking finish that turns heads every time you hit the road.
When you master auto decal installation, you gain the confidence to refresh your vehicle’s appearance, promote your brand, or showcase your passion with precision and style.
How to install decals like a PRO!
via YouTube Capture.
