Apply Vinyl Decal
Applying a vinyl decal can instantly transform any surface, giving it a professional look or a playful custom design in just a few minutes. Whether you want to brand your vehicle, personalize your electronics, or add character to your walls, the process is straightforward once you understand the key steps. This guide walks you through everything you need to know to apply vinyl decal like a pro, from surface preparation to final finishing touches.
Preparing the Surface for a Clean Apply Vinyl Decal Experience
The foundation of a successful install starts long before the decal touches the surface. A dusty, greasy, or uneven surface will cause bubbles, wrinkles, and early peeling, no matter how high-quality the vinyl decal is. For best results, clean the area thoroughly with isopropyl alcohol or a dedicated surface cleaner, then dry it completely. Avoid using products that leave a residue or a heavy wax layer, because these create a barrier that prevents the adhesive from bonding properly.
Temperature also plays a critical role in how well the vinyl decal applies and sticks. Cold materials cause the adhesive to become less tacky, making it harder to position and smooth the decal, while very hot surfaces can make the material stretch and lead to misalignment. Whenever possible, apply the decal indoors or in a shaded area where the temperature is stable and moderate. This controlled environment gives you time to adjust the placement without the vinyl behaving unpredictably.

Tools and Accessories That Make the Job Easier
You do not need professional equipment to apply vinyl decal successfully, but a few simple tools dramatically improve the process and the final result. A soft squeegee or a plastic credit card helps push out water and air bubbles, while a sharp utility knife or razor blade is useful for trimming excess material cleanly. A measuring tape or ruler ensures accurate placement, especially when you are applying multiple pieces or aligning patterns that must match perfectly.
- Soft microfiber cloth for cleaning and drying
- Squeegee or plastic card for smoothing
- Razor blade or utility knife for trimming
- Measuring tools for precise alignment
- Isopropyl alcohol for surface prep
Measuring and Positioning Before You Apply Vinyl Decal
Taking the time to plan your layout prevents wasted material and frustration mid-install. Before removing the backing, dry-fit the decal by holding it in place against the surface and marking the edges lightly with tape or a soft pencil. This step is especially important for large designs or intricate shapes, where a small misalignment is hard to fix once the adhesive is engaged. Adjust the position until you are satisfied with the centering, spacing, and overall balance of the design.
For surfaces that are not perfectly flat, such as curved bumpers or rounded corners, you may need to stretch or slightly modify the decal during application. Practice the motion gently with the backing still on to see how the material responds to bending and tension. When you are ready to apply vinyl decal for real, start from one edge and work slowly toward the opposite side, using your squeegee to follow the contour and keep the decal flat.
Using Transfer Tape for Complex Designs
Many detailed vinyl decals come with a layer of transfer tape that holds all the pieces together during installation. Before peeling off the backing, smooth the transfer tape across the entire surface and remove any air bubbles, just as you would with the decal itself. This tape acts as a temporary carrier, ensuring that every component stays in its correct position when you apply vinyl decal onto the final surface. If your decal does not include transfer tape, you can apply one separately, choosing a low-tack option that lifts cleanly without damaging delicate edges.
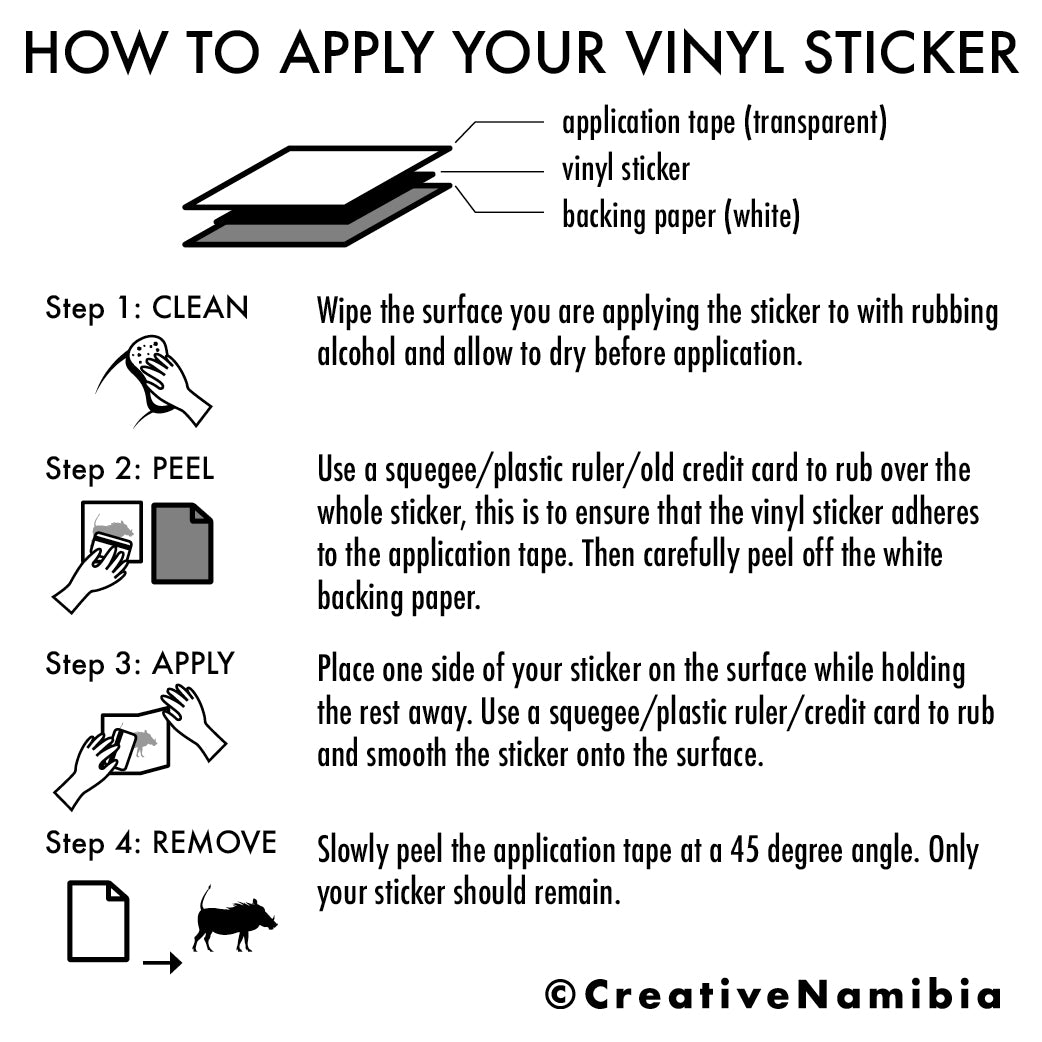
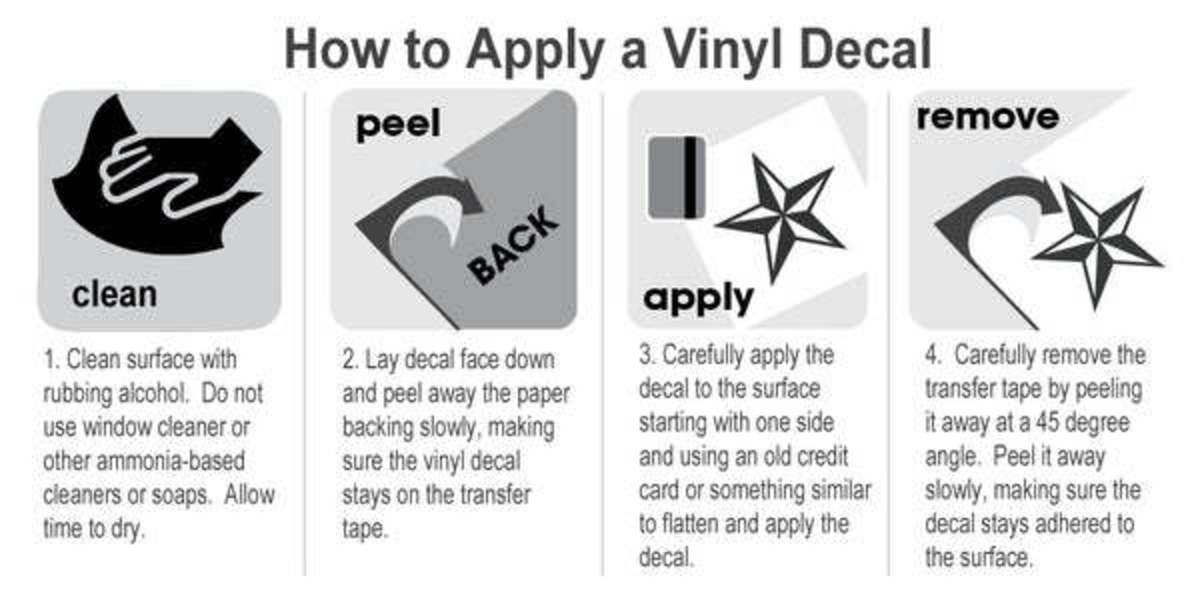
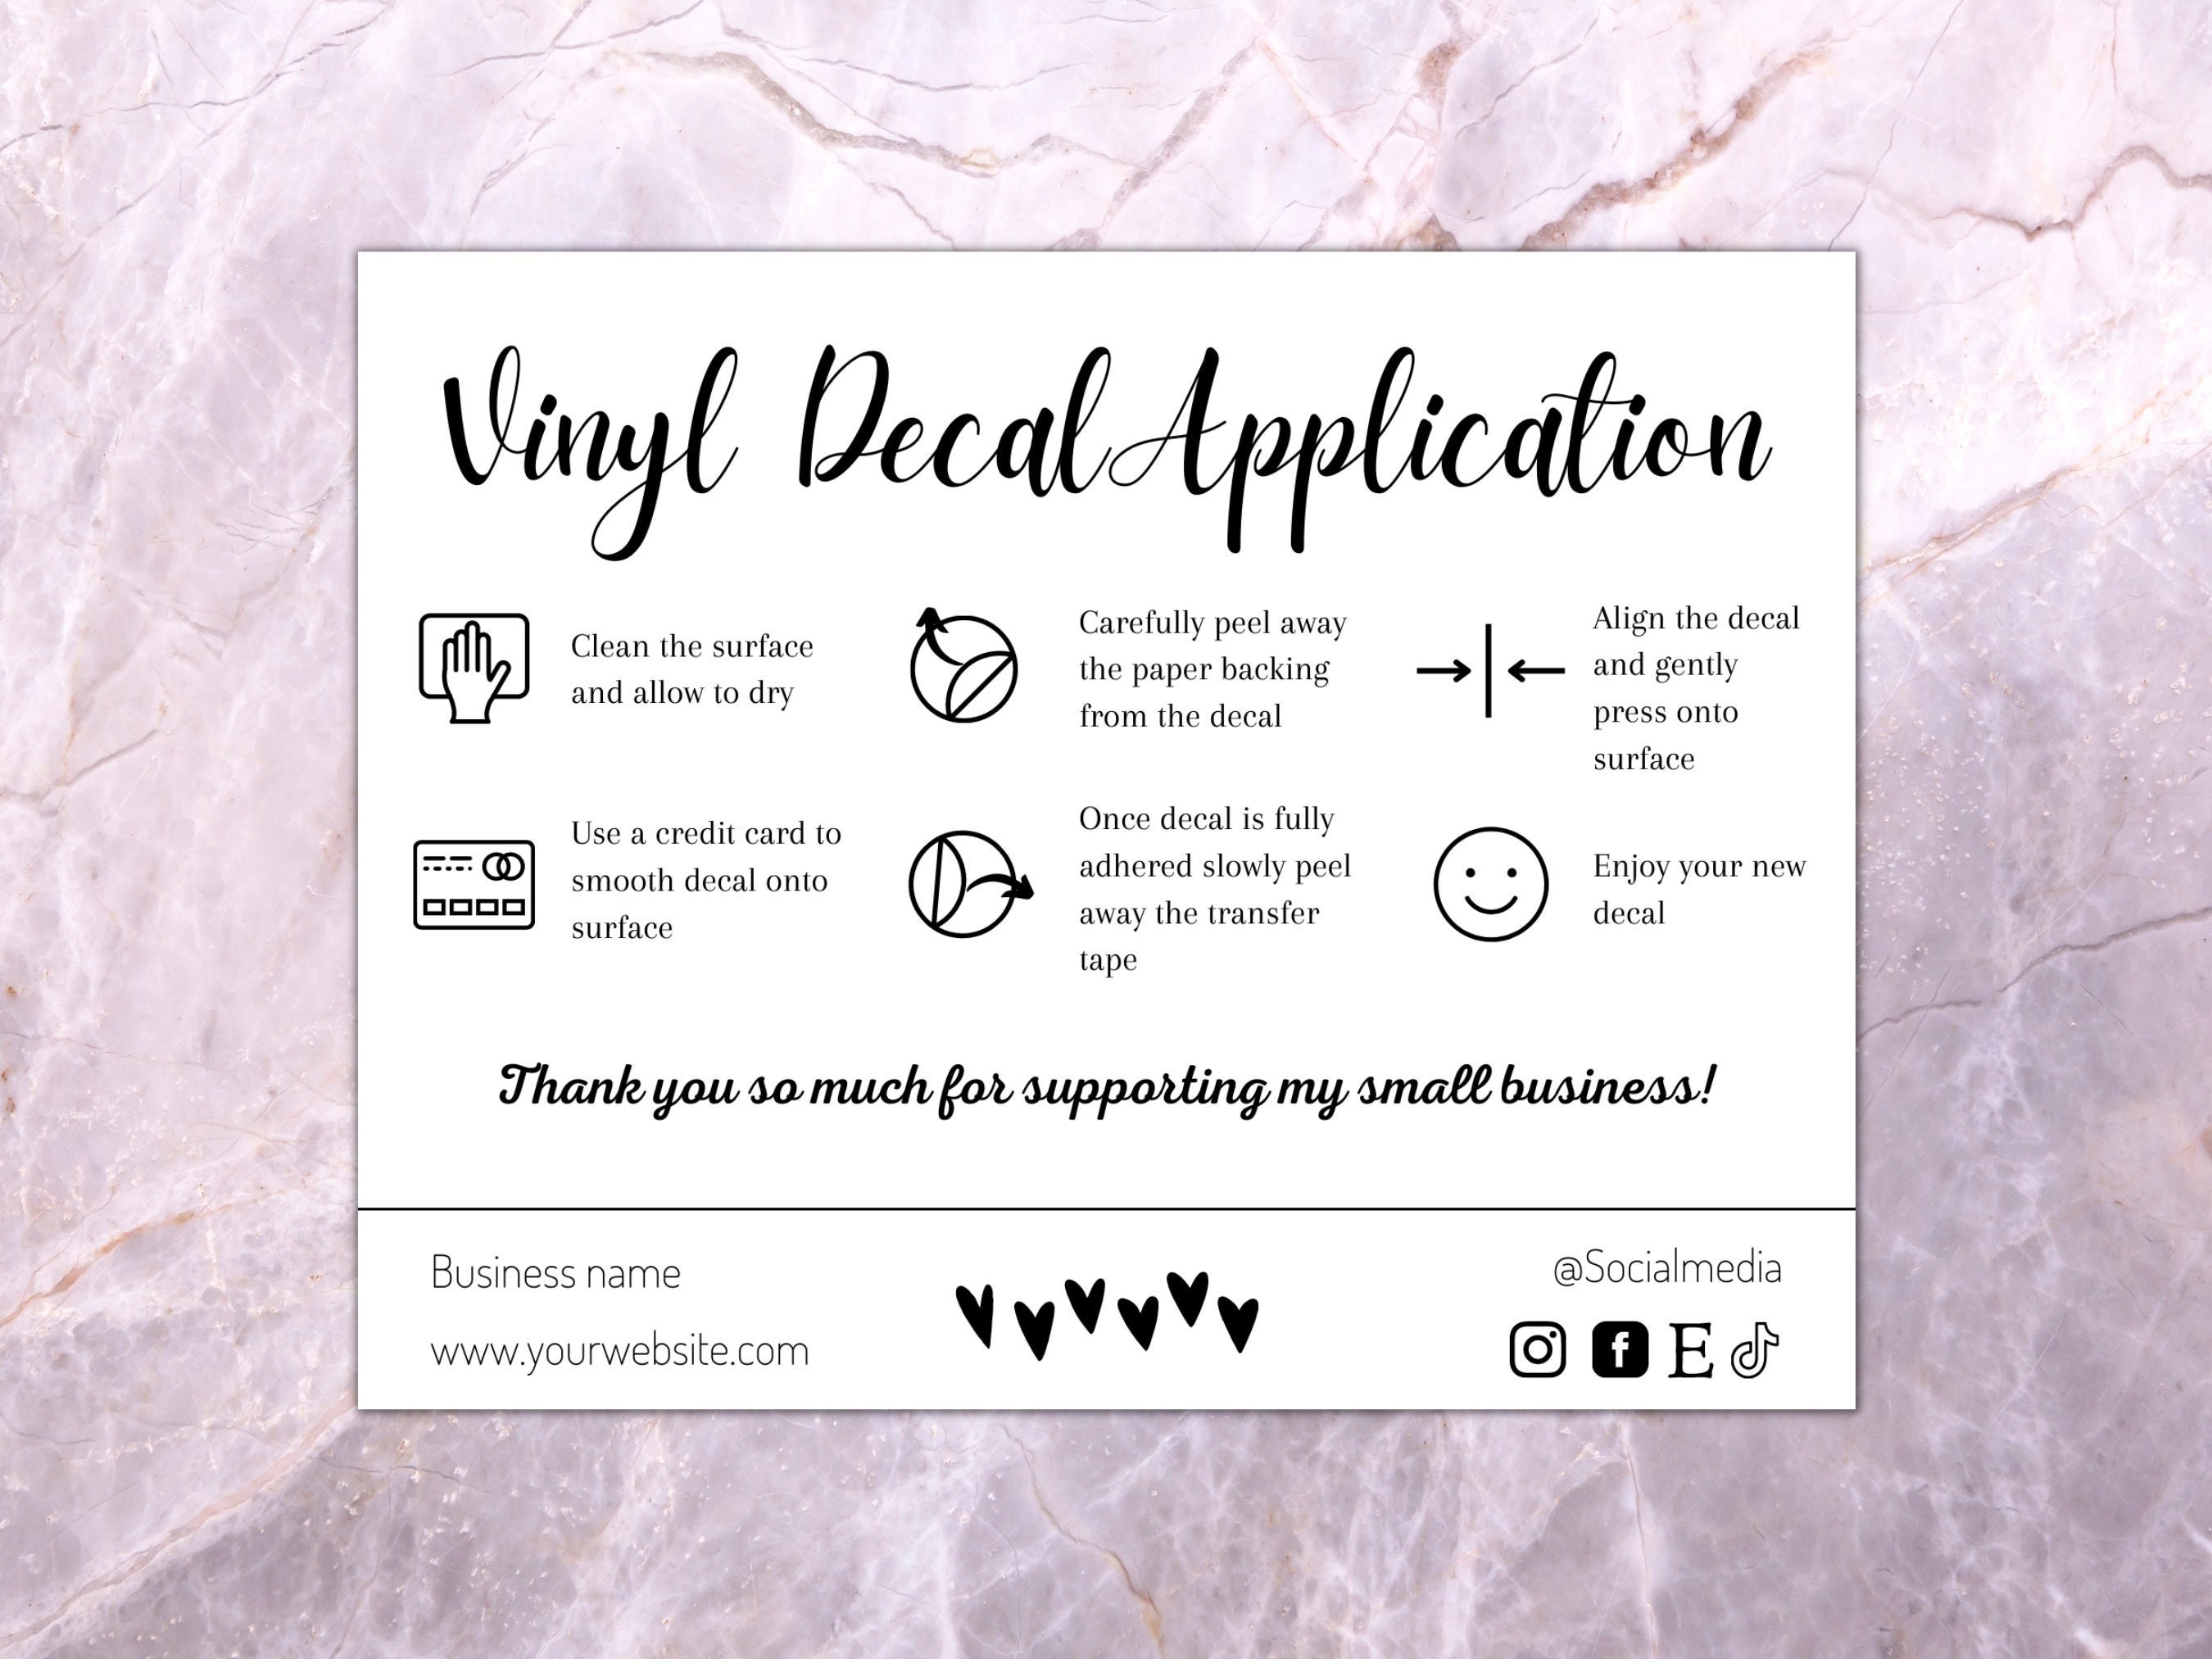
The Actual Apply Vinyl Decal Process Step by Step
With the surface clean, measured, and planned, you are ready to remove the backing and begin the apply vinyl decal process. Start by peeling back a small section of the liner and pressing that exposed adhesive onto the surface, then gradually roll the rest away while smoothing the decal down with your squeegee. Work from the center outward to push out any trapped liquid and to keep the material from wrinkling. If a bubble appears, lift the edge gently, release the air, and press the area back down before continuing.
Trimming is the final step in the physical installation, and it should be done carefully to maintain a professional finish. Use a sharp blade to cut away excess material along edges, windows, or trim pieces, holding the blade at a shallow angle to avoid slicing into the surrounding surface. After trimming, run the squeegee one more time over the entire decal to strengthen the bond between the adhesive and the substrate. When the installation is complete, avoid washing or stressing the area for at least twenty four hours to allow the adhesive to cure fully.

Common Mistakes to Avoid When Apply Vinyl Decal
Even experienced DIY enthusiasts can run into trouble if they rush or skip critical steps. One of the most frequent errors is applying the decal in direct sunlight or on a surface that is still damp from cleaning. Heat causes the vinyl to expand, while moisture trapped underneath leads to peeling later on, so choose a cool, dry moment to work. Another mistake is using too much pressure when smoothing, which can stretch the material out of shape or create new bubbles that are difficult to remove.
Using the wrong type of blade or pulling the vinyl too aggressively can cause tearing, especially on thin or detailed decals. If you encounter resistance while trimming, double check that the blade is sharp and that you are not pressing too hard against the surface. For best results, replace the blade frequently and make multiple light passes instead of forcing the knife through in a single cut. By staying patient and attentive, you avoid rework and enjoy a much cleaner apply vinyl decal outcome.
Maintaining and Removing Your Vinyl Decal
Once the vinyl decal is in place, proper maintenance helps it last for months or even years. Clean the surface gently with mild soap and water, avoiding abrasive sponges or harsh chemicals that can lift the edges. If you ever decide to remove the decal, do it slowly and, if needed, apply a little heat from a hairdryer to soften the adhesive. Peeling slowly at a low angle reduces the risk of leaving residue or damaging the underlying paint or wall finish.
For surfaces that see heavy exposure to sunlight, rain, or constant friction, consider using a UV resistant topcoat or choosing a thicker vinyl material designed for outdoor use. These options extend the life of the decal and keep the colors vibrant for longer. With the right preparation, careful application, and ongoing care, your apply vinyl decal project will look fresh and professional from day one to the very last day.
Conclusion
Applying a vinyl decal is a practical way to customize vehicles, walls, electronics, and countless other surfaces without the commitment of permanent paint or complex fabrication. By focusing on surface preparation, precise positioning, and a steady hand during installation, you can achieve results that look like it came from a professional workshop. Follow the outlined steps, avoid common pitfalls, and give the adhesive time to cure, and your decal will stay sharp and vibrant for a long time.
Vinyl Lettering General Installation Instructions
This is a general installation video for vinyl lettering and vinyl decals. Most decals can be installed using this method.
